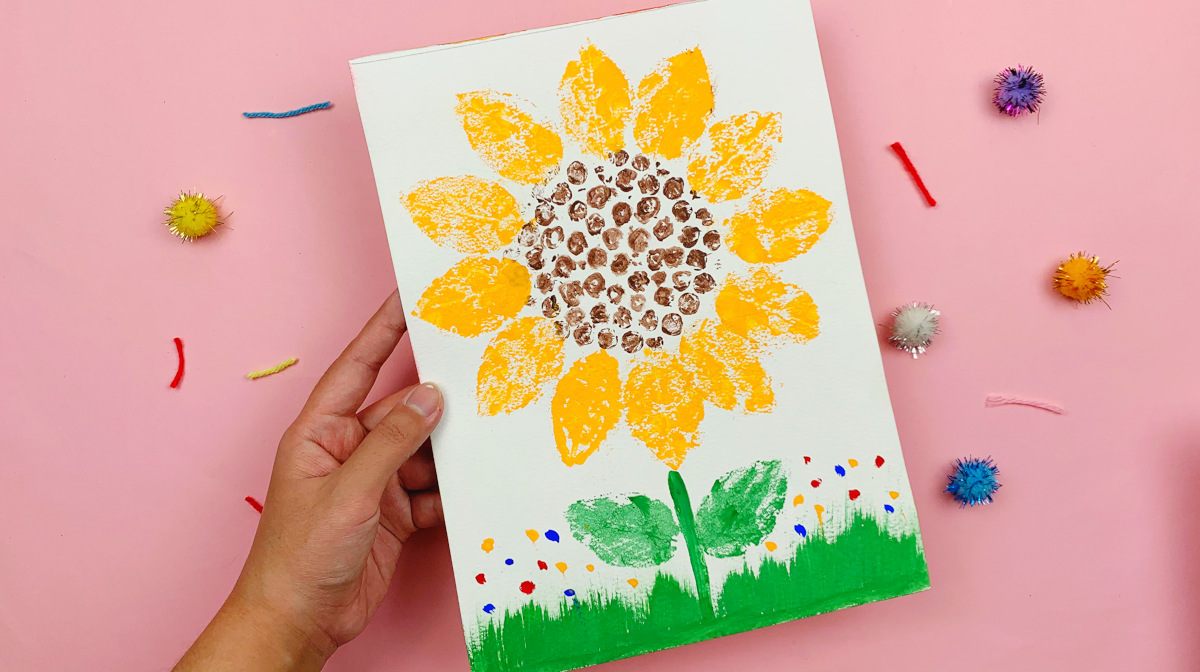
Looking for a fun, colorful craft that’s as satisfying as it is simple? Try bubble wrap painting! In this simple project, kids use bubble wrap to print a bright sunflower that pops right off the page. It’s a great way to keep little hands busy and creative—and a sneaky way to introduce texture and printmaking too!
Pair your art project with a sunflower scavenger hunt outside! Here’s a fun twist—did you know you can turn a common household item into a creative way to collect treasures on your walk? Try this fall leaf craft to display your finds on the wall, or make this clever version that wraps around your wrist! If your kids loved printing with bubble wrap, they’ll definitely enjoy these Easy Leaf Print ideas for more nature-inspired art.
Supplies needed for a Bubble Wrap Sunflower Painting
- Bubble wrap (any size bubble works!)
- Elastic bands
- Washable craft paints – yellow, orange, brown, and green
- White cardstock or heavyweight paper
- A few large leaves from the garden
- Old toothbrush
- Small paintbrush
WATCH | How to Paint a Bubble Wrap Sunflower
How to Paint a Sunflower with Bubble Wrap
As someone with a background in Art Education, I love finding playful ways to introduce artistic concepts. This activity is a favorite because it’s engaging, open-ended, and uses materials you probably already have on hand. Here’s how to paint with bubble wrap.
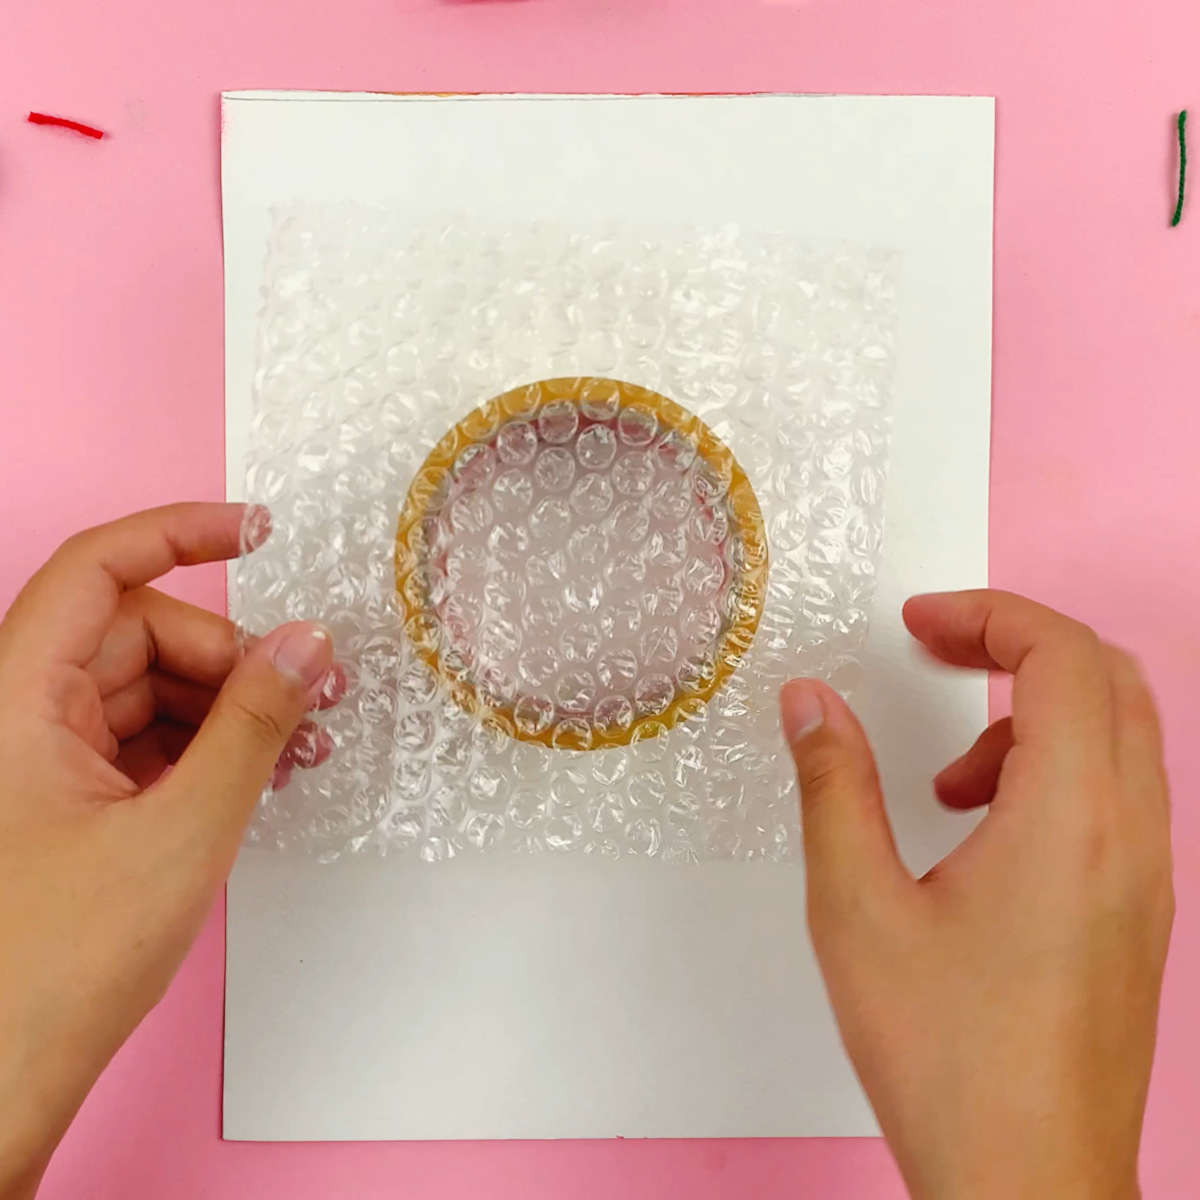
- Prepping the bubble wrap
Tape your bubble wrap and place it over a round raised object. A roll of tape works perfectly. Make sure the raised portion of the bubble wrap is facing upwards.
- Secure the bubble wrap.
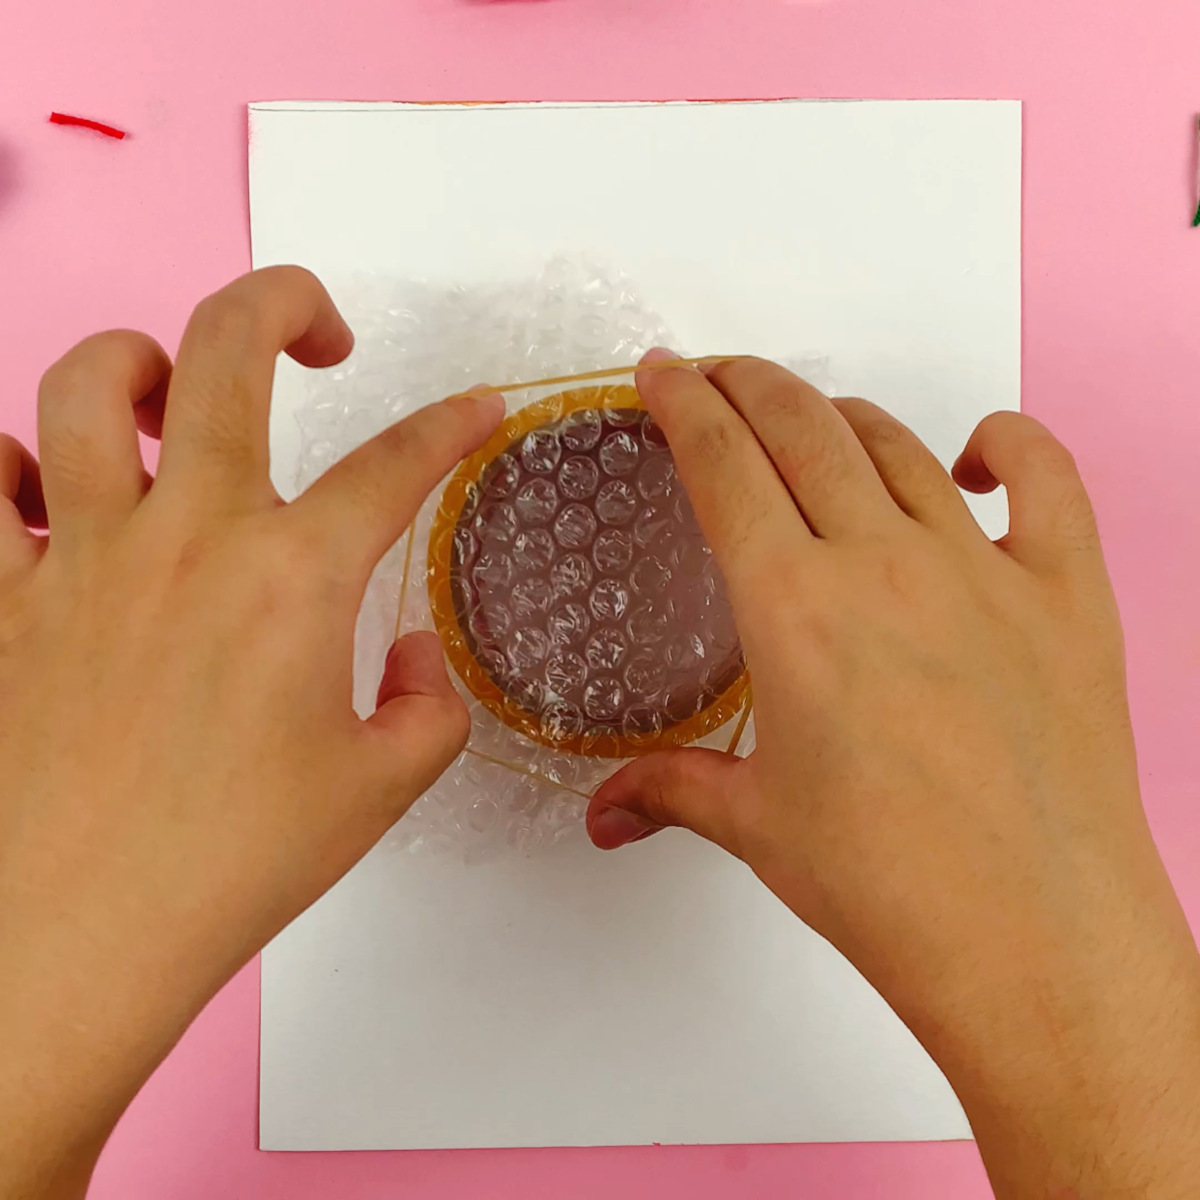
Use an elastic band to secure the sides of the bubble wrap to make sure it doesn’t move. - Add paint to the bubble wrap
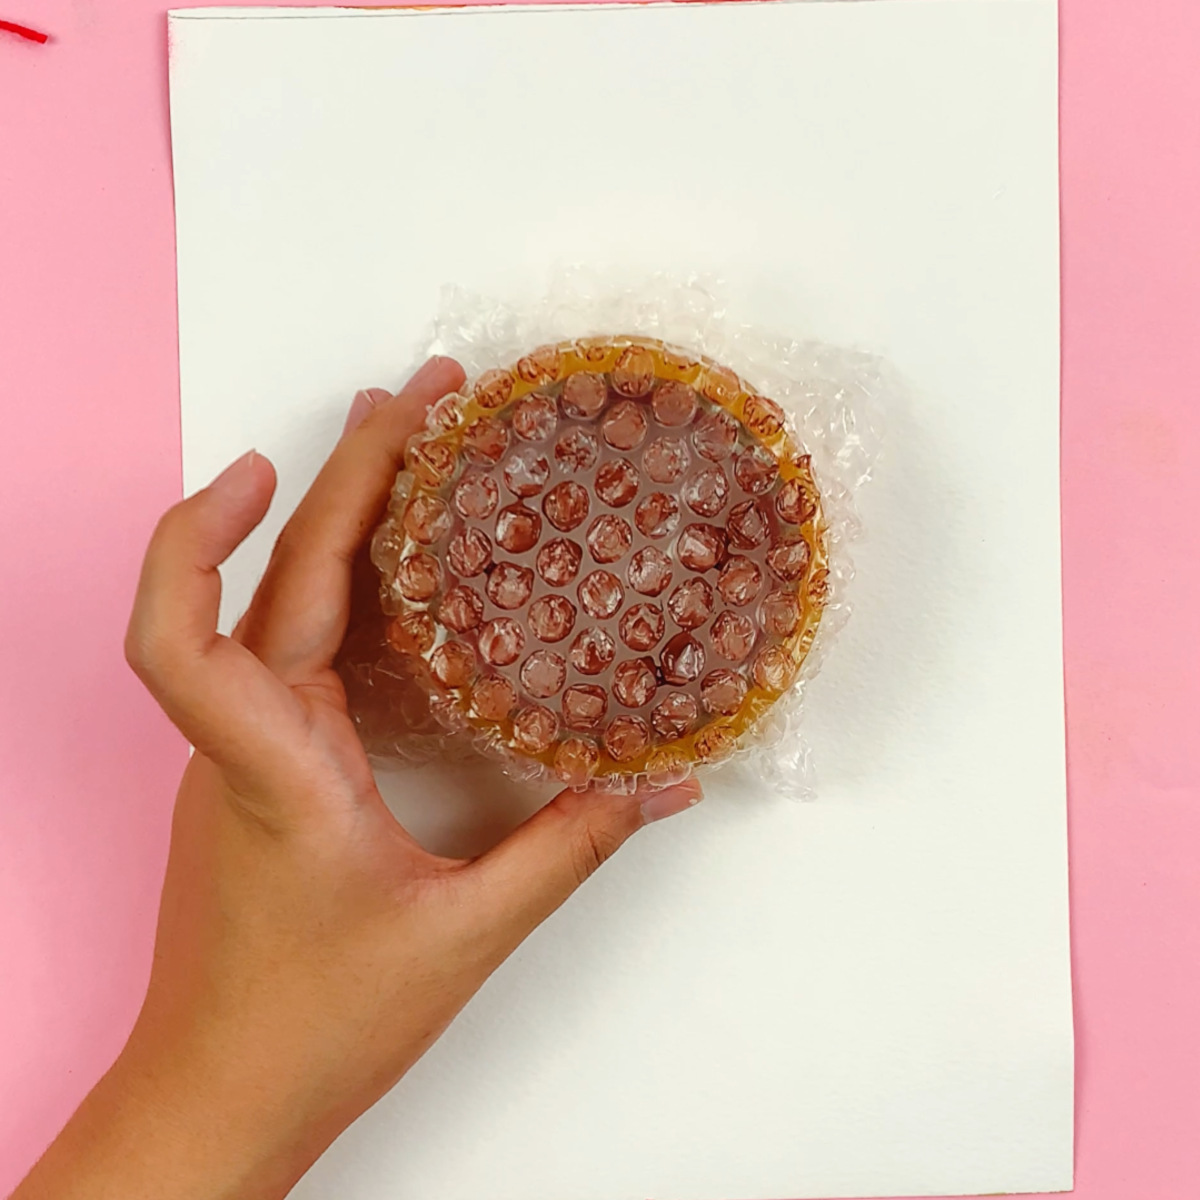
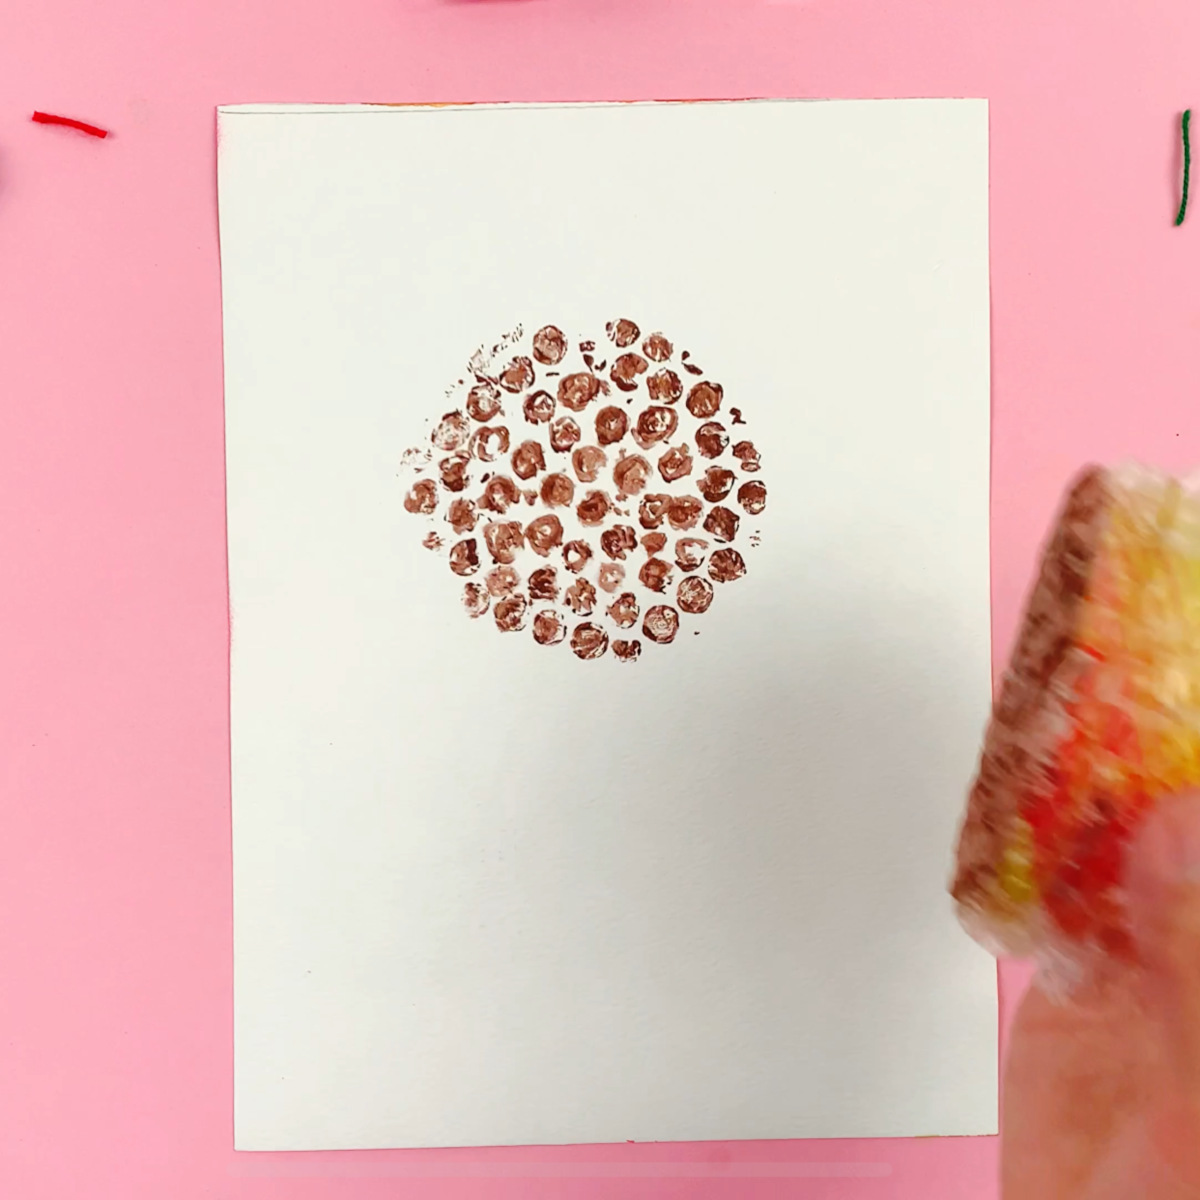
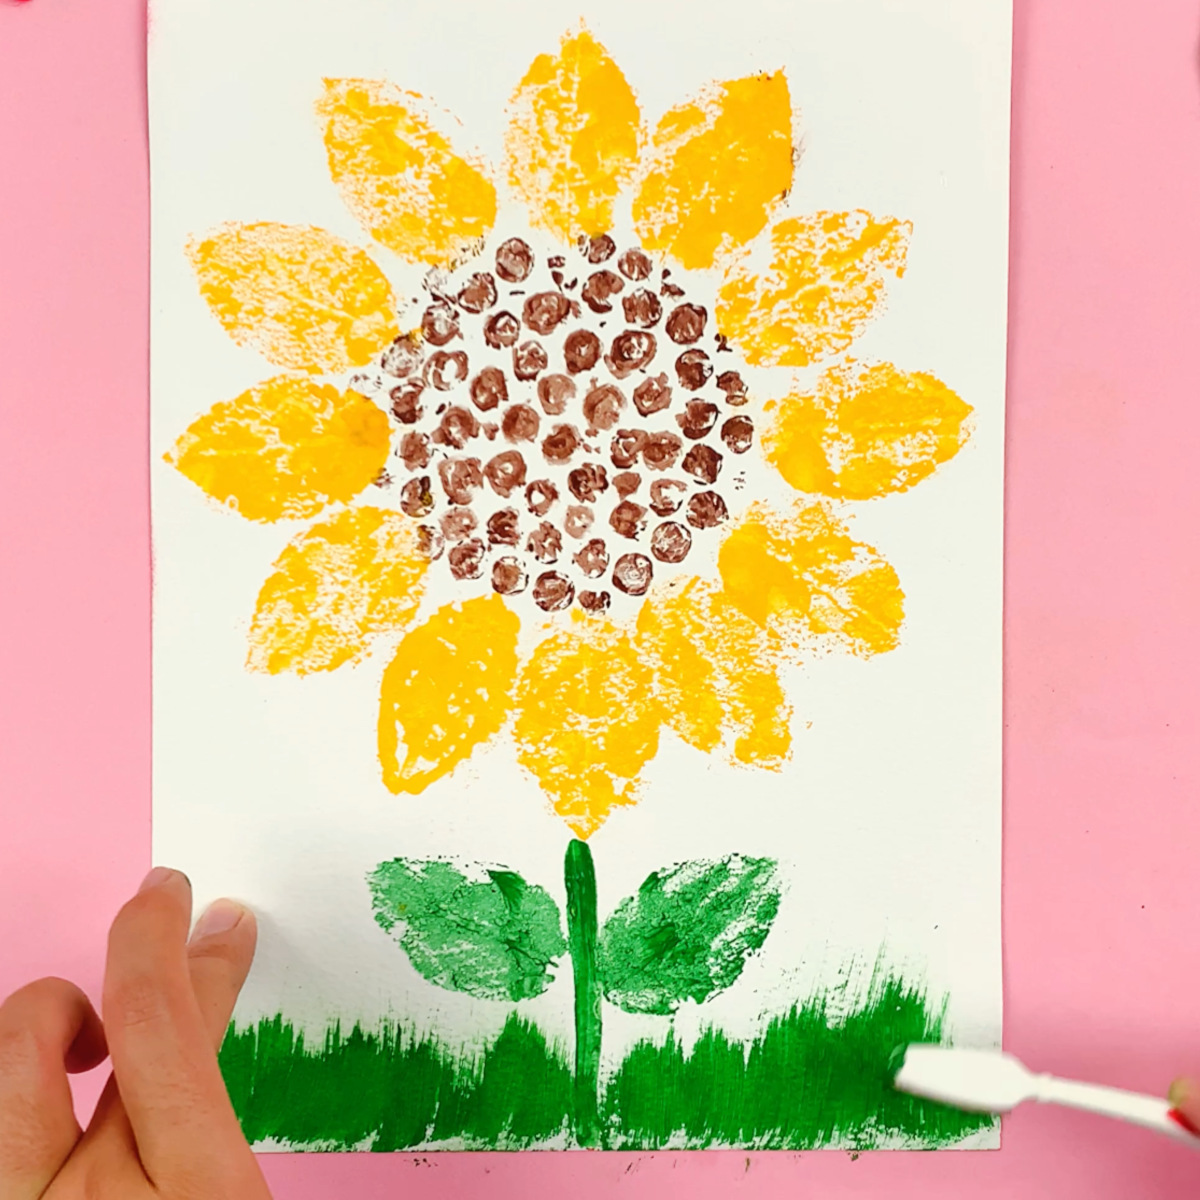
Now add some paint to the bubble wrap, gently coating it everywhere. This can be done with a paint brush, or by dipping into a pool of paint. Remember to just coat the tops of the bubbles. - Make the sunflower center.
Stamp the center of the flower onto some white paper or cardstock. - Add the petals
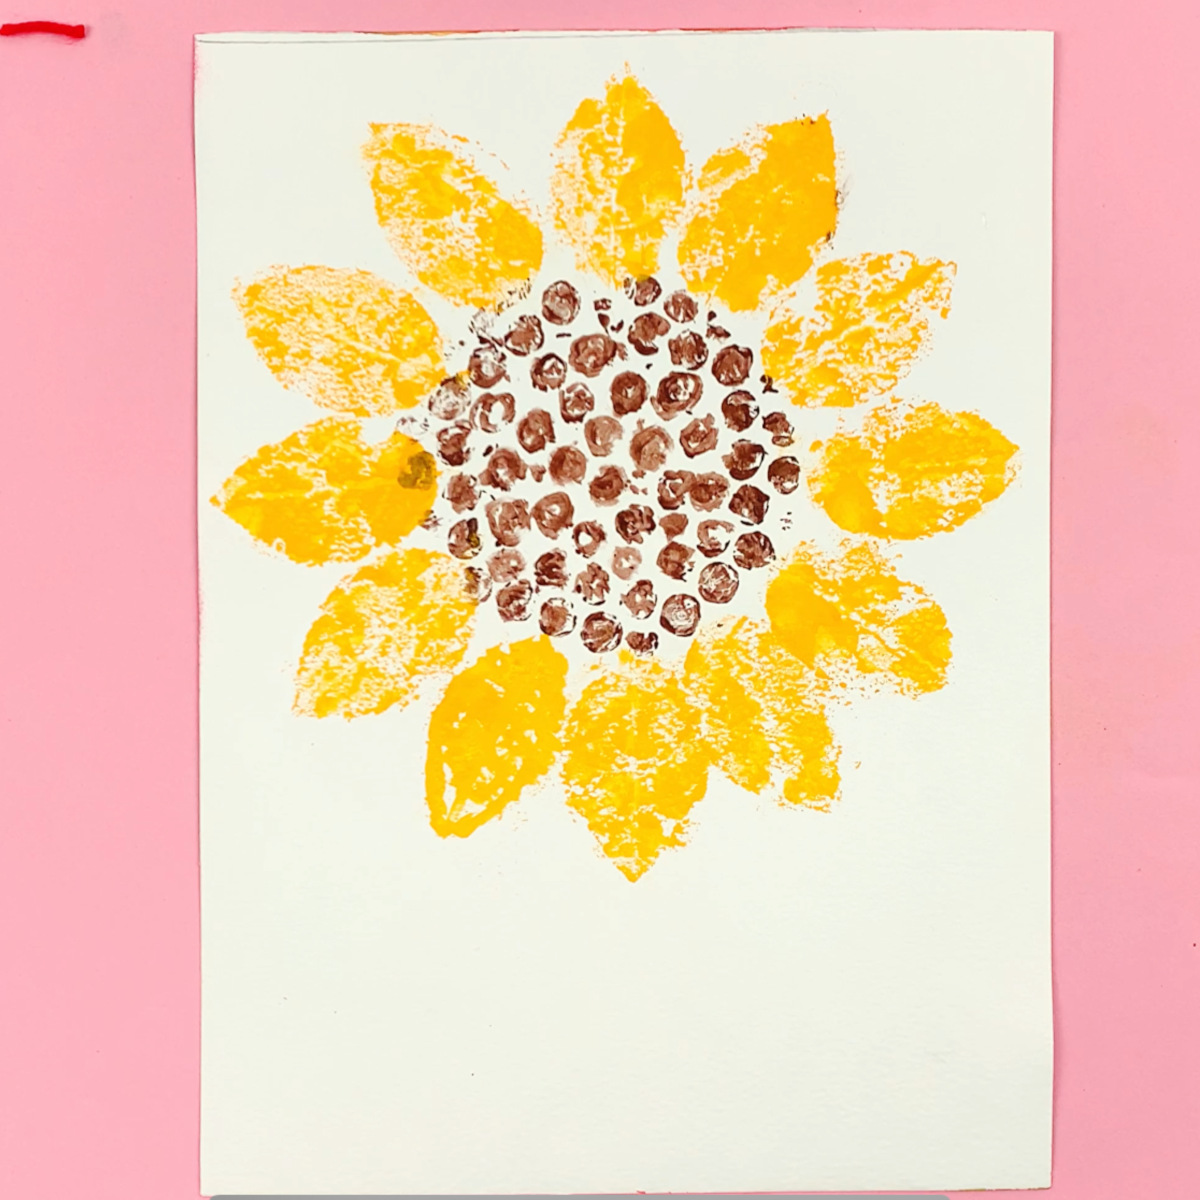
Take a leaf and paint it yellow or orange. Now use the leaf to stamp sunflower petals all around the center section. - Paint the stem
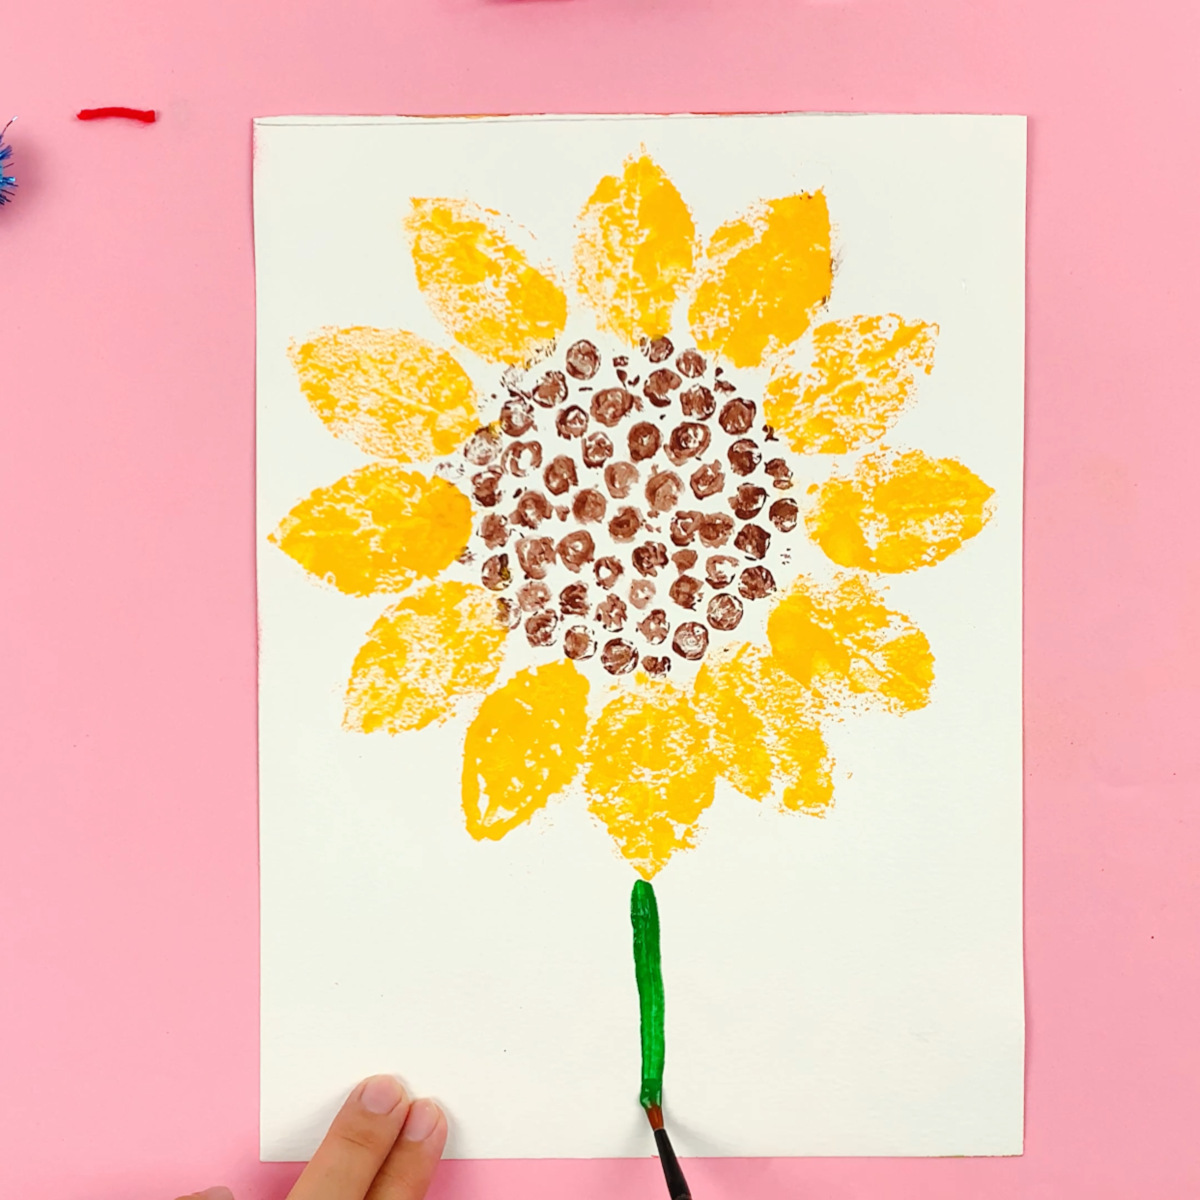
Using a small paint brush and green paint, paint a stem. - Add leaves
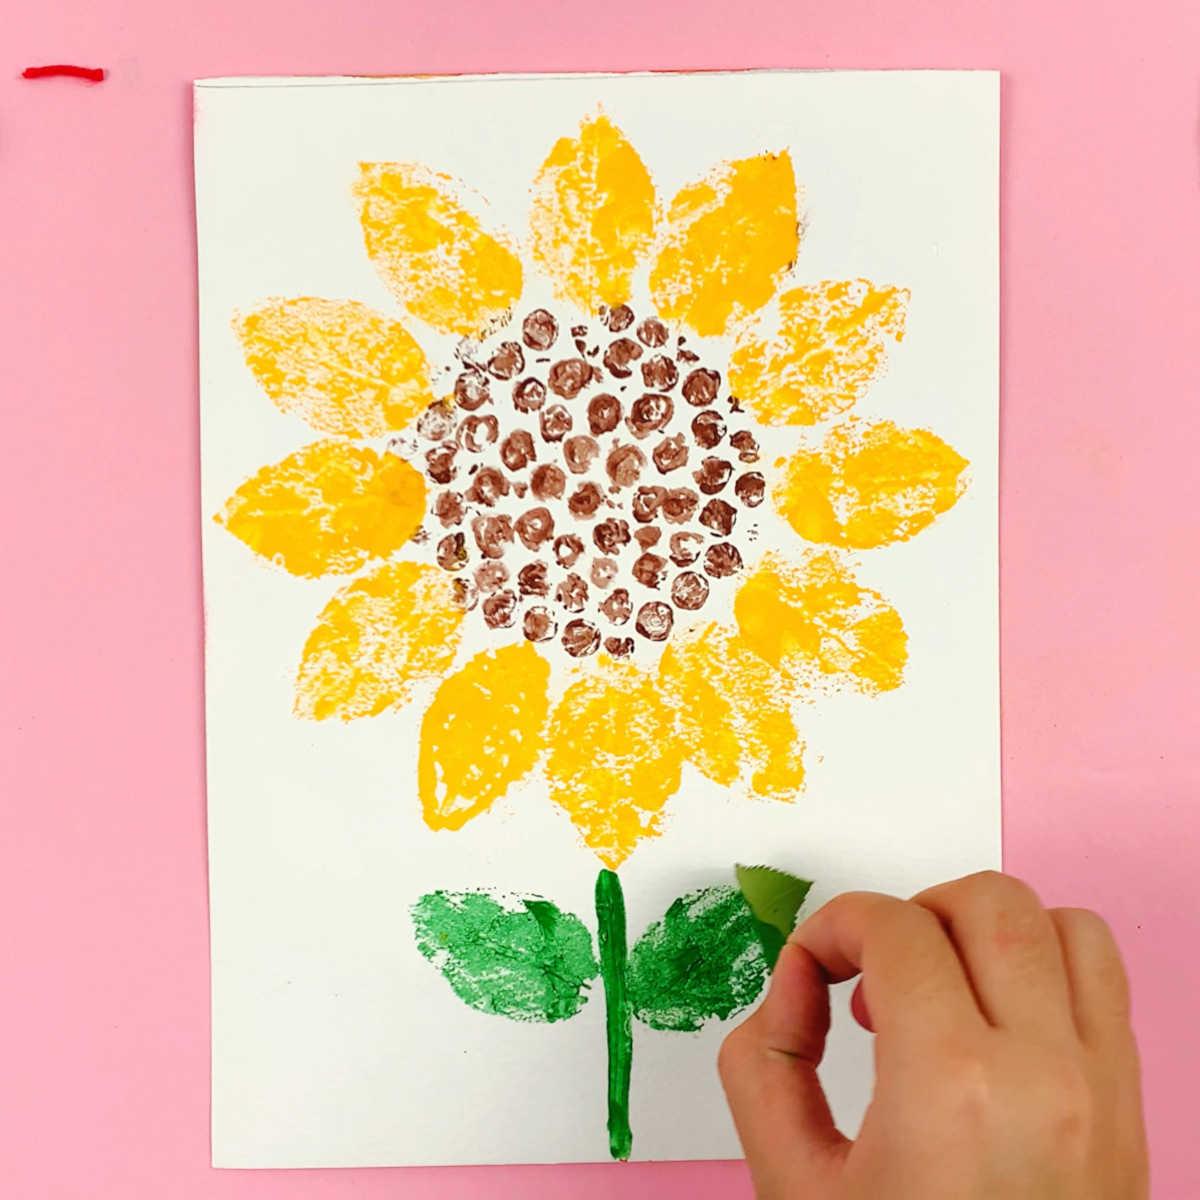
Paint another garden leaf and use it to stamp leaf shapes on the stem. - Add grass
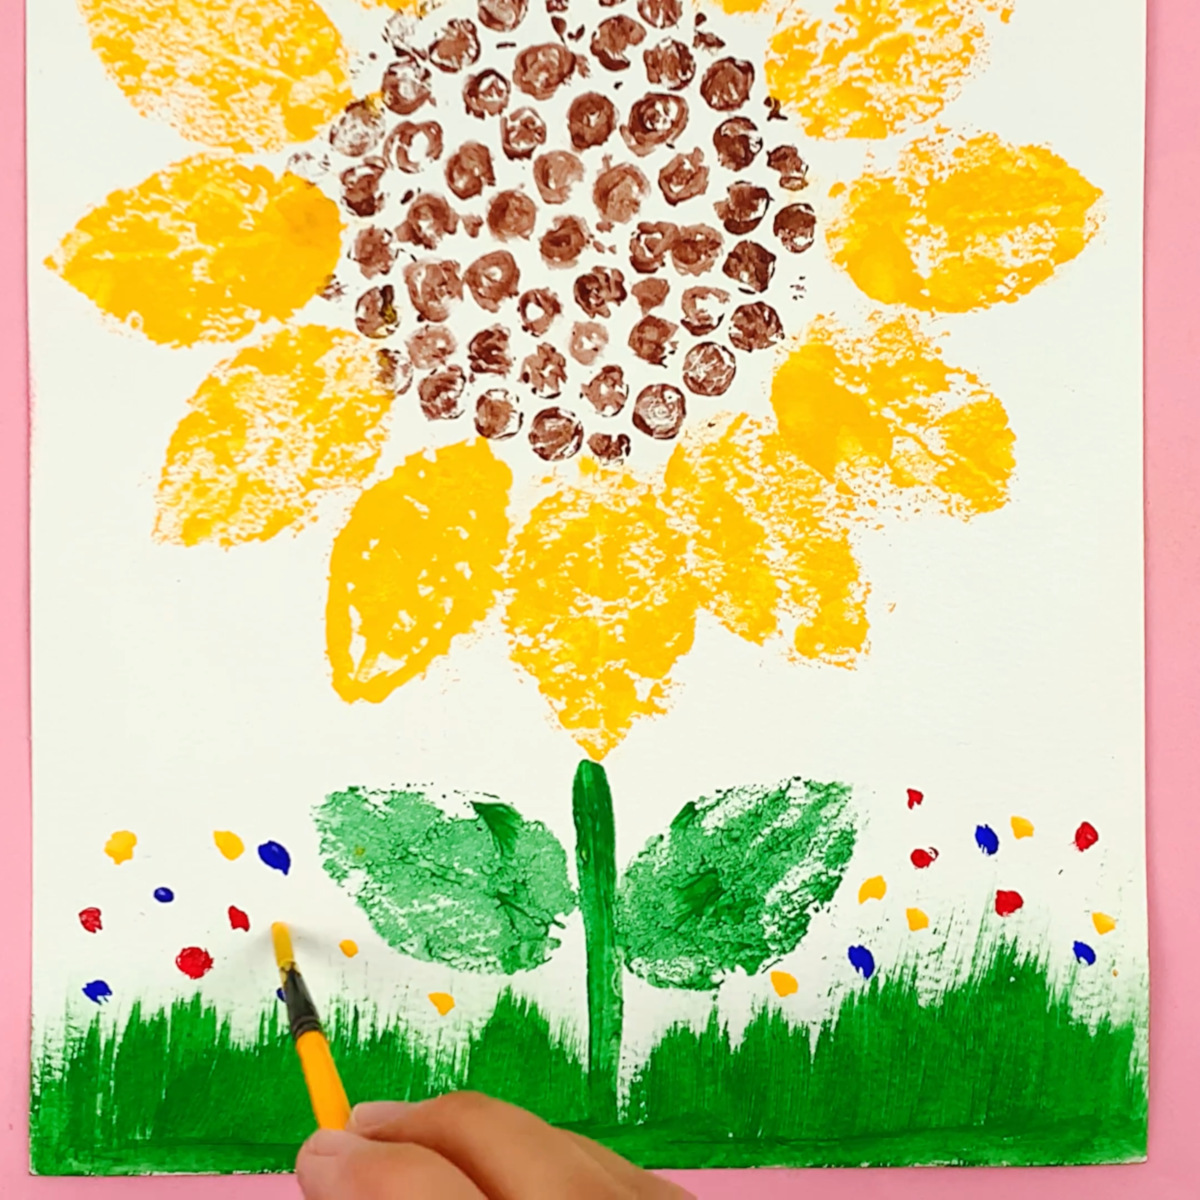
Apply some green paint to an old toothbrush and use it to add a grass effect at the bottom of the cardstock. - Add more color!
You can now decorate the painting by adding more color!
Your sunflower painting is complete!

Kids love bubble wrap for its texture—and it’s such a fun way to create patterns without needing a lot of tools. This craft encourages exploration, coordination, and creativity, all while keeping things simple. With my background in Art Education, I’ve found that when kids can see a “big” result from a small action (like pressing and peeling), it builds confidence and excitement about making art.
More Painting Fun for Kids
If your kids loved this, keep the creativity going with these playful painting ideas:
- Painted Rocks – Let kids decorate smooth stones with silly faces, animals, or words of kindness.
- Salt Painting – Add glue designs, sprinkle with salt, and paint with watercolors for a magical raised effect.
- Food Painting – Try stamping celery, apples, or lemons dipped in paint for cool natural prints.
- Puffy Finger Paint – Mix shaving cream and glue for fluffy, squishy paint that’s fun to touch.
- Naturally Homemade Watercolor Paints – Make your own pigments with berries, turmeric, and tea for an earthy, eco-friendly art day.
- Summer Finger Painting Ideas – No brushes needed—just color, paper, and fingers for bold, expressive art.
- Leaf Prints – Easy and fun way to dress up everything from totes to tags.
I would love to keep you fully stocked with creative ideas, yummy recipes, fun crafts, and loads of free printables. Subscribe to Skip to my Lou to get new ideas delivered to your inbox. Follow me on Facebook, Pinterest, Twitter, and Instagram for all my latest updates.


