Welcome to the Bake Craft Sew Along! If you love to sew then you won’t want to miss a day of sewn handmade gift ideas. According to Kelly is featuring gifts that can be crafted and A Southern Fairytale is sharing recipes perfect for making edible gifts! Don’t forget to enter our SEW Amazing Giveaway. Just visit Melly Sews today.

Hey y’all, I’m Melissa, and I blog over at Melly Sews, where I help you take your dreams and learn how to sew them into reality.
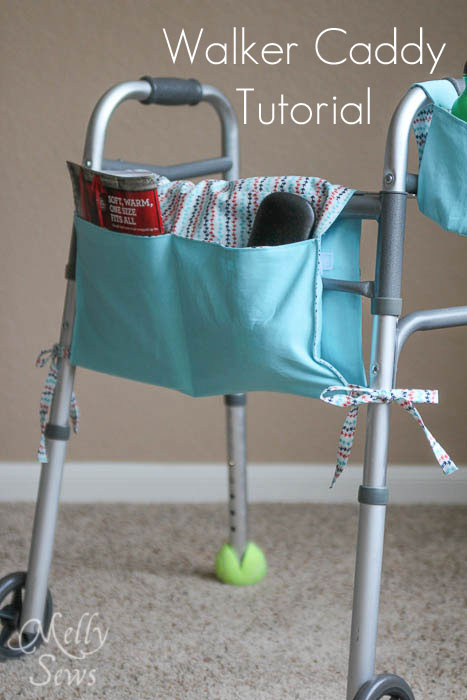
Today I’m going to show you a gift that is great for elderly relatives. But this is also pretty easy to adapt for those who have just had babies, because they’re often pushing their own walkers around – in the form of a stroller! Stroller or walker, this Walker Caddy Tutorial will show you an easy-to sew way to help those with their hands full.

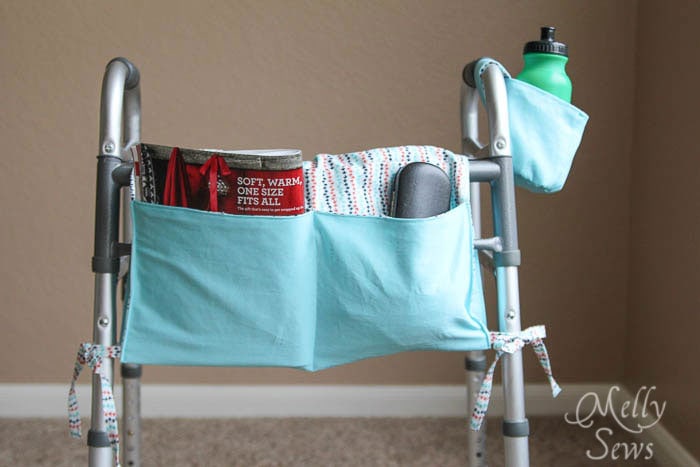
With front pockets for larger items…
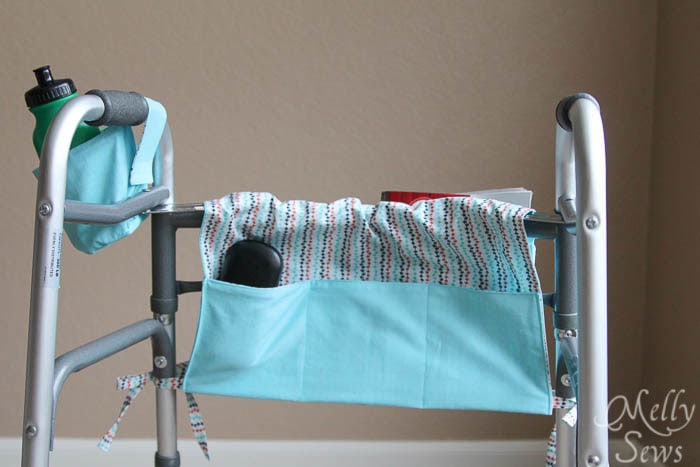
And back pockets for items that need to be easily accessible (like glasses).
To make this caddy you’ll need
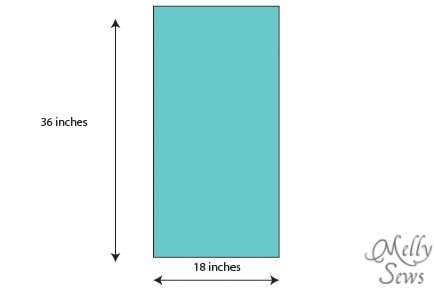
- Two pieces of fabric measuring 18″ x 36″. One of these should be a heavier weight fabric – like heavy twill, denim, canvas, etc.
- Ties or ribbon – I used ties made of bias tape sewn shut – you’ll need 1 1/2″ yards
- 1/2 yard of sew on velcro
To start, cut your two pieces of fabric to 18″ by 36″
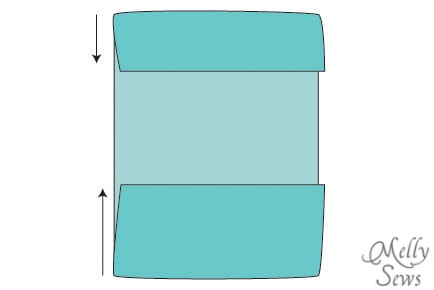
With your sturdier fabric wrong side up, fold the two ends up as deep as you want the pockets to be. I made the pockets on one side 8 inches deep and 5 inches deep on the other side. Iron these folds so that you leave a crease in the fabric. Then, with pockets still pressed up, fold the fabric in half right sides together and press that fold as well.
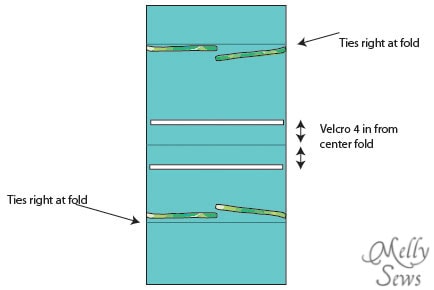
Cut your tie ribbon into 4 equal length pieces. Using your pressed creases as a guide, lay your fabric right side up and pin the ties right next to the pocket folds, and pin the velcro about 3-4 inches to each side of the center fold. Sew on velcro and ties.
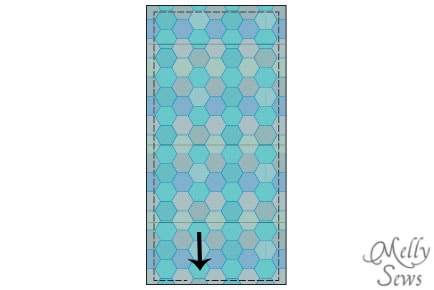
Place your other piece of fabric right sides together with your tied/velcroed piece and sew around the edges, stopping with your needle down at the corners to turn and leaving an opening for your hand to turn this right side out.
Turn the caddy right side out. Press the edges and topstitch all around the edges, closing the hole you used to turn the caddy right side out. Then fold the pockets back up and stitch down sides, backstitching to reinforce the top edges of the pockets. Sew dividing lines on the pockets, backstitching at these top edges as well.
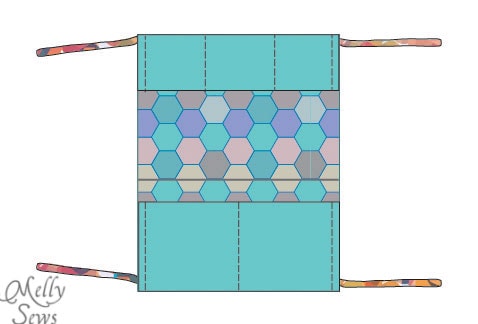
And then all that’s left is to fold this caddy onto the recipient’s walker, securing the velcro and the ties.
P.S. – I have a tutorial for the cup holder shown in these pictures here.
Thanks for having me, Cindy, and I hope some of y’all will stop by and say hi!

SEW Amazing Giveaway worth over $1000
Stop by Melly Sews for more sewing inspiration and to enter the SEW Amazing Giveaway today (you get a new entry everyday)! I am giving away more than $1000.00 worth of sewing goodies! You won’t want to miss this!

My Favorite Sewing Tools
I would love to keep you fully stocked with creative ideas, yummy recipes, fun crafts, and loads of free printables. Subscribe to Skip to my Lou to get new ideas delivered to your inbox. Follow me on Facebook, Pinterest, Twitter, and Instagram for all my latest updates.


I need to make a bag for my grandson, who’s getting his gait trainer (walker) later this month. I will need to scale it down, as his trainer is only 13 inches wide on the inside, and 25 inches high. He needs a bag to carry his communication device with him when they go out, and it would be a really nice way to carry his toys around the house. (he’s not quite 3 yet) I plan to simply make it smaller by cutting smaller pieces of the fabric, so the final bag is about 10 inches wide and 18 inches long. Any reason this won’t work, or any suggestions for a better idea? I plan to make a paper pattern first, just to make sure it works.
Thank you for sharing this amazing pattern for the walker caddy and cup holder. Both will be great gifts for my 93 year old Mother.
Thank you for this site. My husband is having total knee surgery and I was searching for a bag for the walker he will be using. Your pattern was the best one I found and looking forward to getting this ready for his walker.
Keep up the wonderful work your doing in sharing so much sewing information.