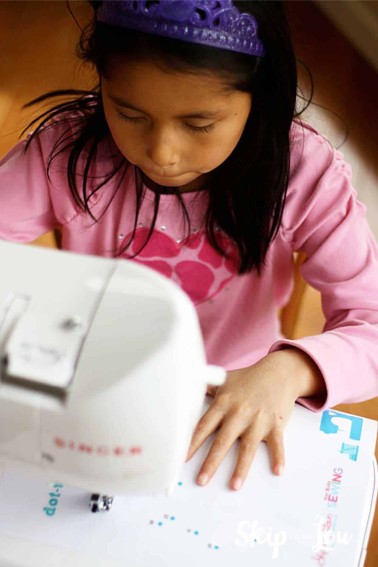
Welcome to our first kids sewing project with Singer. We are making a headband today. I must admit when Bella and I chose the projects for this series we were only thinking of ourselves, so the projects are pretty girly! However, after she made this simple headband she said with different fabric a boy can use it too. She took a few pictures to show! We will also be thinking of some more manly projects. Any requests?

Singer has created a pattern for us to download.
SINGER & SkiptomyLou Kids Series Headband Project 1

![]()
Do I prewash fabric before I start sewing?
If what you’re sewing will ever need to be washed, it’s a good idea to prewash the fabric before sewing. Prewashing allows for shrinkage and or texture changes to happen to the fabric before it is is cut and sewn. The bolt of fabric at the store will have the care instructions printed on the end. I don’t always do it but it is a great habit to bring fabric home from the store and prewash, even if you won’t be sewing right away. This way it is ready to do whenever you are ready! So follow the care instructions, launder and the press and you will be ready!
How to sew a headband
Cut a 5″ X 44″ (approximately 44-45″, we just used the natural width of the fabric) piece of fabric. To make it easier to cut I drew a line on the fabric with a Disappearing Ink Marker![]() . As with most projects it is best to have quality supplies! Sharp scissors and pins will cut down on frustration!
. As with most projects it is best to have quality supplies! Sharp scissors and pins will cut down on frustration!

Fold the strip in half lengthwise so you have a 2 ½” X 44” rectangle. Make sure the right sides are together on the inside and you see the wrong side (back) of the fabric on the outside.It is important to match up the raw edges. Pin to keep them lined up during sewing.

Start at the end and stitch along the whole length of the strip. We used about a half inch seam with a 3 stitch length. Notice that I put a piece of blue painters tape across the machine for a guide. A piece of foam tape also works well, since it is raised up.
Lower presserfoot and begin sewing, reverse a few stitches and then begin stitching forward again.

Place large safety pin or Bodkin![]() on one end.
on one end.

Feed it into the tube all the way through until you can pull it out the other side turning the tube inside out.

Press. I did this part. Bella wasn’t sure about the iron. That is okay, we have more chances to pick up these skills.

Tuck the edge of the open end inside the tube of fabric about a 1/2 inch.

Stitch across the end. Repeat on the other end.

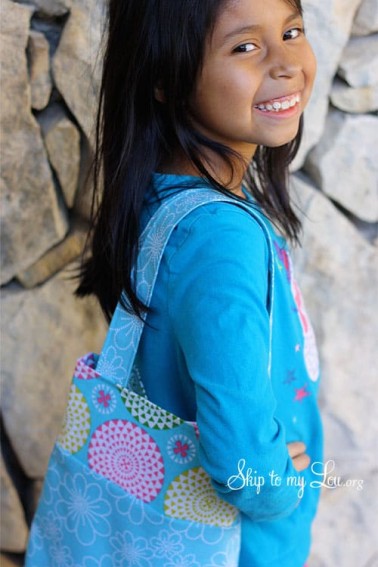
Look how simple! Just wrap around the head and tie.

Now if you are a boy, it would make a great warrior headband!

This warrior had some serious moves!

My Favorite Sewing Tools
I would love to keep you fully stocked with creative ideas, yummy recipes, fun crafts, and loads of free printables. Subscribe to Skip to my Lou to get new ideas delivered to your inbox. Follow me on Facebook, Pinterest, Twitter, and Instagram for all my latest updates.
Hey Cindy,
It’s amazing how easy and cute this project is. It is a great project to sew when teaching your child. I’ve included in our Kids sewing projects roundup at https://hellosewing.com/30-fun-easy-sewing-projects-kids/
Plus it is a great way to use scraps from other projects, too
All the best,
~Helen
hello, im not sure if this pic is your daughter or not but i just happened to be looking at a local fabric shop site and saw her image on there. and i said to myself i know that kid-she looks familiar..and sure enough here she is. so i thought i’d just give you a heads up that someone else is using her picture. idk if you gave permission for them to use her image, but if not, here is the spot i saw it. http://nichefabricstudio.com/pages/parties
My 4 year old granddaughter asked for a sewing machine for Christmas. She got a Janome New Home and a sewing kit and a pack of precut squares. After Christmas she and her 7 year old brother came to spend a few days so we could sew. Her brother was a little upset he didn’t get a machine so I let him borrow one of mine. He then got a pack of 6 1/2″ squares from my stash and we made 2 quilts, a doll-size one for her and a larger, throw-sized for him. He finished the top. She finished the top, sandwiching and then part of the quilting. She finally helped me add the binding before she allowed me to rest, the little slave driver. I was amazed how well they both did. Once the boy got the hang joining 6 squares into a strip I left him to do it with me supervising. I sat by the 4 year old and kept my finger by her presser foot as there really isn’t any way she could keep the seam width right. But that was ok because we like being close! This weekend I’ll help her hand sew the binding and he will be able to sandwich and quilt his top. I think I’ll be giving him the Janome Gem he borrowed from me and his own sewing kit too.
It only takes patients……and maybe Mema has more of that. I’ll be introducing them to these simple projects too. She wants to make clothes, I hope the headband will satisfy her! He wants to make a log cabin quilt next.
I have 3 grandchildren, ages 6, 8, and 10. I start them at age 4-5 doing the foot pedal while I handle the fabric. By 7-8 they are able to do both foot pedal and fabric, while I watch. By age 10 Hannah knows how to thread machine, fill bobbin and sew by herself. The boys, ages 6 & 8, love sewing as well. We made all the Christmas presents for other family members– anything that can be done as a rectangle–potholders, pillows, scarves, sleeping bags for teddy bears. Bags. I hope that they will all be self-sufficient for sewing, mending, ironing, and replacing buttons. I didn’t teach their Mom,(my bad). but I’m loving teaching my grandchildren. Boys can also make stuffed animals and monsters.
Marvelous Help and advice, thanks for the tips. Meant for adult men and women that also expect to get skinny quick, attempt our website for the most appropriate method to lose the fat fairly quickly.
To cool. Even though I can use this for my students, I think I will make a few for myself. 🙂
We Did it 🙂
http://imperfectlyperfect74.blogspot.com/2013/03/sewing-with-kids.html
Cute…And yep…that Ninja idea will definitely appeal to the guys 🙂