These custom fabric luggage tags would make a useful little gift for any friends, family, co-workers or teachers that travel. They are also a great way to use up some fabric scraps.
Handmade Custom Fabric Luggage Tag Tutorial
To print name and address on fabric, cut white muslin and freezer paper 8 1/2″ X 11″. Iron shiny side of freezer paper to back of fabric. Send paper through an ink jet printer. You can also buy fabric especially made to go through the printer. I also talk about this technique here. Press printing when finished to help set ink. You could even scan in a business card and print that onto the fabric.
Cut one 3 1/2″ X 5″ piece of printed fabric with name and address, 1 – 3 1/2 X 5″ piece of fabric, two 3 1/2″ X 5″ pieces of heavy weight iron on interfacing and one 2″ X 12 piece of fabric for strap.
Following manufacturer’s instructions iron interfacing to wrong side of both 3 1/2″ X 5″ pieces of fabric.
Press strap piece in half lengthwise, open up, press each side to the middle then fold in half. Edge stitch down each side. For an illustrated example see tote bag instructions.
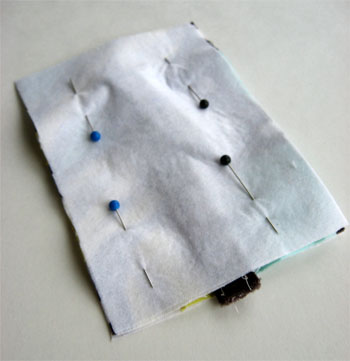
Pin fabric pieces right sides together. Fold strap in half and place inside the fabric with cut edges sticking out 1/2″. (Make sure not to accidentally stitch into strap as you sew around the edge.)
Using 1/4″ seam, stitch all the way around the outside edge, leaving an opening for turning.
Clip corners.
Turn, press, and edge stitch along the outside edge making sure to close the opening. Stitch another row of stitching if desired.
Here is a tutorial for a


It looks great, so much better than those ugly ones that came with my bag. I’ll have to try this. Thanks for sharing. I’m having a giveaway if you’d like to stop by later.
Lovely! I would be thrilled to receive these as a gift. Thanks so much, I’ll be linking.
This is a beautiful idea!
You could use them as the gift tag on the present also. Love it!
fabulous idea and DIY
WOW, WOW, WOW!!! These are so cute! What a fabulous gift! Thank you for this great post!
I will also be making these as tags for my Christmas presents. Adults will then have luggage tags and the children will door hangers or book bag tags in addition to their gift.
Thanks I’m excited to get started on this extra special touch to my gift wrapping.
This is perfect for my husband’s uncle who travels ALL THE TIME for his work!
Super Idea!!!! I would love to make these as teacher gifts. If only I could find the home address easily… Hmm. Gotta figure out how to get that.
Fabulous!! Suitcases are so booooring, but add a pretty fabric luggage tag….
Linked to your tutorial on Craft Gossip Sewing:
http://sewing.craftgossip.com/tutorial-fabric-luggage-tags/2009/11/10/
–Anne
love love love them
THESE ARE A.W.E.S.O.M.E!!!!! THANKS!
This is one of the best ideas I have seen for scrap-busting and gift-giving. I love it!
These are terrific! I’ll be making a bunch of these for Christmas presents! Thanks for sharing this!
Cindy, these are terrific! I’ll be making a bunch of these for Christmas presents! Thanks for sharing this!
So great, Cindy! Dang, I wish I got to travel once in a while…