Have you ever wondered how to make tissue paper flowers? Making flowers out of tissue paper is a fun and easy craft. Little kids can do much of the work in making these, and school-age kids can actually make these all by themselves.
If you love flowers, check out these DIY paper flowers — so many beautiful ideas to add a charming bouquet, centerpiece, or another handmade touch to a special celebration.

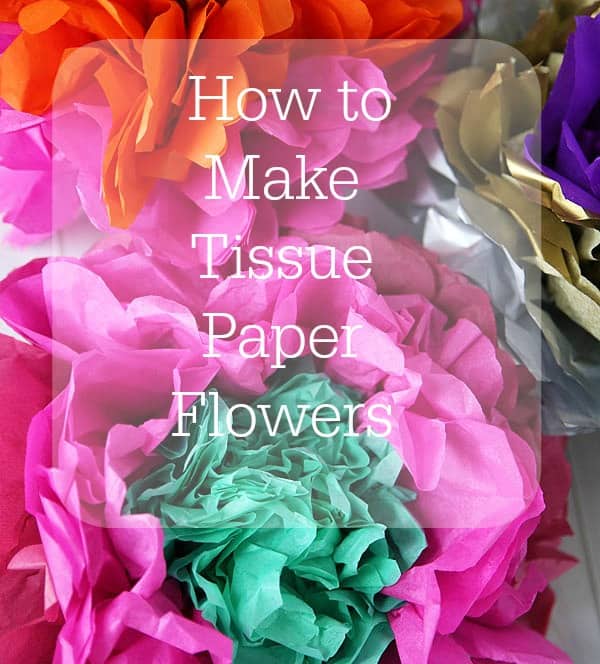
Tissue Paper Flowers
DIY tissue paper flowers are super easy and make a beautiful display, especially for parties! Think how beautiful these tissue paper flowers would be at weddings, bridal showers, baby showers or even a birthday party. They make the most gorgeous photo backdrops. Or how putting together uniquely vibrant wreaths for your door to celebrate the seasons?
If you find yourself without flowers for May Day, some giant paper flowers would be perfect in a May Day Basket. Read on for more decorating ideas! The color combinations are only limited by your imagination, and the supplies are easy to find and very economical.
How to make tissue paper flowers step by step
Learn how to make tissue paper flowers in just ten simple steps. Here is what you need to get started, plus a paper flower tutorial video!

Tissue Paper Flowers Supplies
- 5 – 6 sheets of tissue paper (two each of three colors)
- thin wire
- scissors
- chenille stem (pipe cleaner)

How to make paper flowers video
[brid autoplay=”true” video=”454176″ player=”18814″ title=”Tissue Paper Flowers” description=”Easy tissue paper flower tutorial, make beautiful flowers in minutes!” duration=”71″ uploaddate=”2019-08-22 15:07:42″ thumbnailurl=”//cdn.brid.tv/live/partners/14570/thumb/454176_t_1566486216.png”]
Make flowers out of tissue
You will never believe that stacks of tissue paper and the humble pipe cleaner can make such gorgeous flowers! These tissue paper flowers are perfect for party decor and home decor! The best part is they are easy and fun to make — after you make a few with these instructions, feel free to experiment with the petal shape, small or large sizes, using crepe paper or even patterned papers!
1. Stack 5 sheets of tissue paper on top of each other: Two sheets each of two colors and one sheet for the center of the flower. If you want a bigger center, add another sheet to the center.

2. Next, cut the stack in half.

3. Now make one stack, sorting the colors together. Trim the center color of the flower (top 2 sheets) about two inches on each side.
4. Next, cut slits along each side.

5. Accordion fold all the tissue paper together.

6. Now, twist a piece of wire around the center of the folded tissue paper. You can use pipe cleaners, floral wire, or even jewelry wire.

7. Round off each end with scissors. Cut your tissue paper in a curve, concave, or wedge shape to make the petals look different on each flower if you’d like.

8. Now, open up the tissue paper. Here’s where the flower starts to take shape!

9. Starting with the top layer of tissue paper, carefully bring each layer to the center. Tissue paper can tear easily, so you may need to guide a child with this step.

10. Place a chenille stem around the middle and twist to make a stem.

Decorating with Tissue Paper Flowers
Beautiful tissue paper flowers in minutes! A flower to keep, or a gift to give! Why stop at just one?
This DIY tissue paper flower is such an easy project, you can have your very own garden in no time — these make absolutely stunning wall, class bulletin boards, or ceiling decorations. How about recycling gift wrapping paper into flowers with patterns adorning each petal? Super cool!
Beautiful and full of color, they are sure to brighten up the space of classrooms, parties, and holidays. The bright colored flowers are cheery and would make a great pick-me-up bouquet for a friend having a hard week, or as a gift for a neighbor “just to say hi”. You could take a couple of flowers to someone during their hospital stay, or brighten up the space of a loved one in a nursing home. Best of all, they keep long after real flowers fade.

More Decoration Ideas:
- Valentines Day: use rose reds, pinks, and whites
- St. Patrick’s Day: use shades of green, white, and black
- Easter: use pink, yellow, blue, green, and any shade of pastel
- July 4th: use red, white, and blue
- Halloween: use orange, yellow, white, and black
- Thanksgiving: use orange, gold, yellow, and brown
- Christmas: use red (think poinsettia)
- Baby showers: use pink and white or blue and white
- Graduation: use the school colors
How do you make a tissue paper pom pom?
A tissue paper pom pom is basically two flowers put together by their backs to make a nice round ball. Just attach two of the same colored tissue paper flowers together and fluff until the shape is uniform. Now you can hang it from the ceiling, or string multiple pom poms together!
How do you make different tissue paper flowers?
Change the look and shape of your flowers by simply trimming the ends of your paper differently. After you’ve completed the accordion folds, try cutting the ends of the paper in a triangular point, a curve or wave, or creating fringe for fancy flowers.
Another way to change the shape of your bloom is to fold the paper into wider or narrower strips. A wide fold will result in large, fluffy petals like a peony or tea rose. Narrow folds will result in a carnation-like flower.
You really can’t go wrong either way, so just experiment and see what strikes your fancy! Do you have any tips for the perfect tissue paper flower? Leave a comment and let us know how you use your paper flowers!
If you are looking for more fun craft ideas here are a few of my most popular tutorials: Reversible tote bag, I Love You Bunches Flower Handprint Craft, DIY Stepping stones, or even this DIY bird feeder.
All of these projects are a fun craft that you can complete with a school-age child. They also make great gifts! Who doesn’t love a sweet handmade gift? How would you use these flowers?
If you make these for a wedding or baby shower. These cream cheese mints are easy to make creamy melt in your mouth mints are a great addition to any shower.
I would love to keep you fully stocked with creative ideas, yummy recipes, fun crafts, and loads of free printables. Subscribe to Skip to my Lou to get new ideas delivered to your inbox. Follow me on Facebook, Pinterest, Twitter, and Instagram for all my latest updates.


your ad videos literally do not go away and i’m unable to read your post.
What size sheets of paper do you recommend using?
Thanks for the instructions!!
These are so cute!! I need to make a few to hang in the corner of my daughter’s room!!