Sew up these darling zakka gift bags for the holidays. These tiny sewn bags make gifting money, gift cards or small gifts extra special! So when someone on your list as a gift card on their list you can still give them a handmade gift! This month we are sharing over 100 handmade gift tutorials. I have teamed up with Thirty Handmade Days and Your Homebased Mom to share the best homemade gift ideas. We have over 100 tutorials so you will have the best homemade holiday ever! Each day be sure to visit the guest poster’s blog for a chance to win BIG! Up for grabs is a Cricut cutting machine, a Blendtec blender, a Baby Lock sewing machine and a $300 Michaels gift card! Grab a new entry every day! Visit A Happy Stitch today to enter to win the Baby Lock Sewing Machine.

Hello Skip to My Lou readers! My name is Melissa and I blog over at a happy stitch. I’m so excited to be involved with this whole series, it is one of my favorites. 100 handmade gifts! Can’t beat that for jump-starting the handmade holiday season.
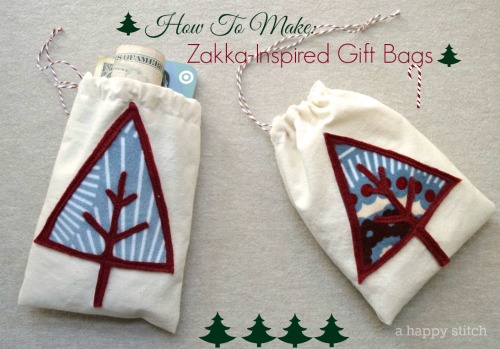
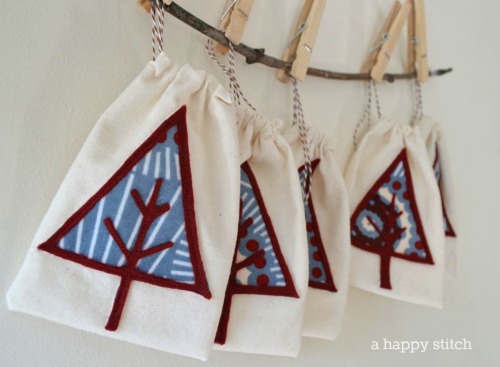
I’m going to share how to make decorated gift bags with you. I love having a dozen or so of these on hand for Christmas. These bags are perfect for so many things but an especially handy way to give people money without feeling awkward! Let’s be honest, sometimes we want to give people money (teachers, childcare providers, siblings, tweens, etc.) but it feels weird. It’s weird because it can feel like a last-minute gift when you’ve actually been really thoughtful! That is where these zakka-inspired bags come in handy. It’s so much easier to give money (or a gift card), if the money comes in a beautiful, hand-decorated gift bag! In fact, these bags are great for anyone on your list who prefers a gift card or cold hard cash. (Need some other ideas? Check out my post on 10 inventive ways to use gift bags.)
Let’s get to it!
Gather Supplies:
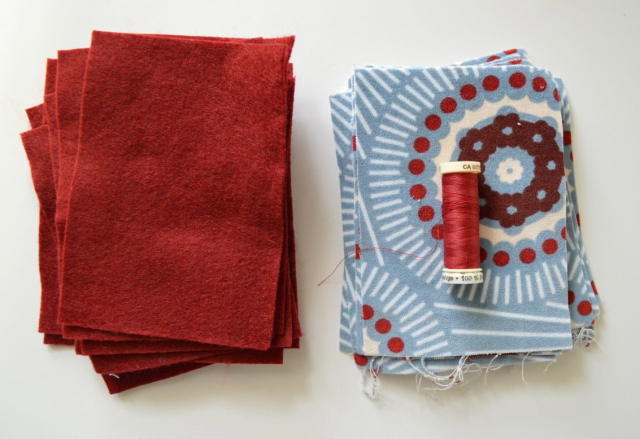
+Sheets of felt in your preferred color
+ Scraps of fabric at least 5.5 inches tall
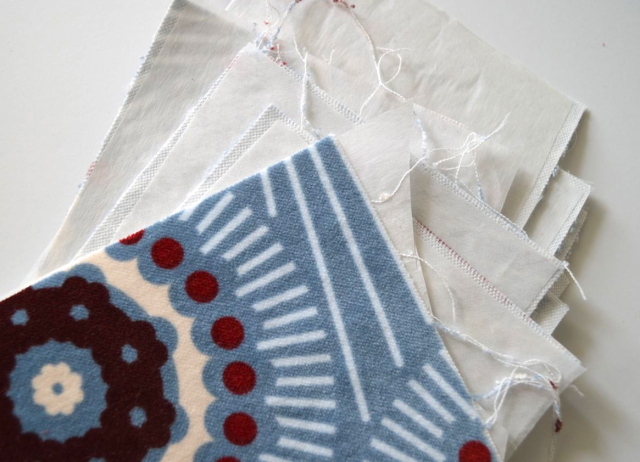
+ Wonder Under (This is a Pellon product but any two-sided fusible web with paper-backing with work)
+ Muslin fabric, about a yard
+ Baker’s twine
+ Chalk marking tool
+ Safety pin
+ Standard sewing supplies including matching thread, seam ripper, fabric scissors and a sewing machine
Instructions:
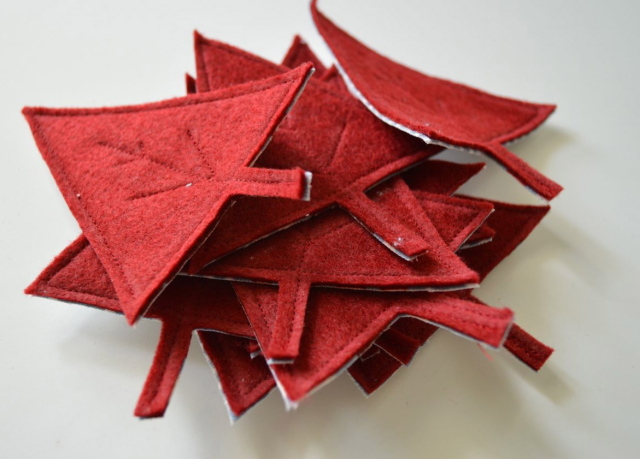
1. Cut pieces of felt and fabric into 4 inch by 5.5 inch rectangles. Prepare your machine with matching thread.
2. Adhere Wonder Under to back of fabric pieces according to package instructions (Do Not Remove the paper backing)
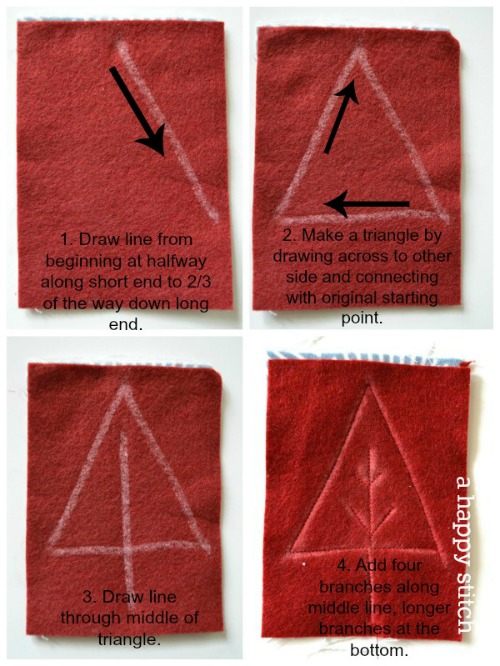
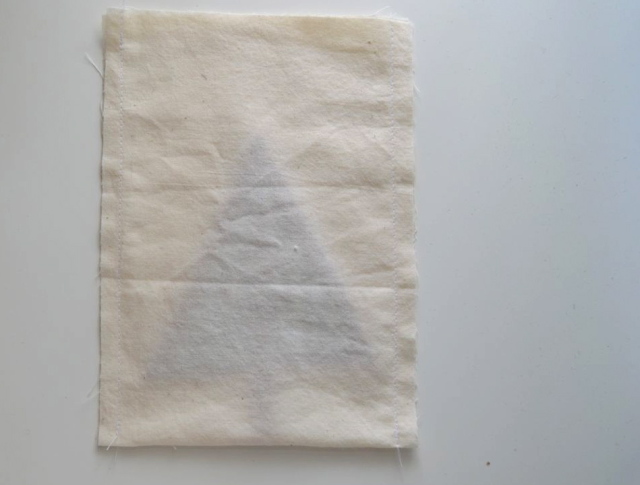
3. Place a felt rectangle directly over the top of a fabric piece and draw a tree in the manner illustrated in in the picture. Stitch over the lines you have drawn including the four tree branches.
4. Remove the paper backing once your have finished sewing the tree.
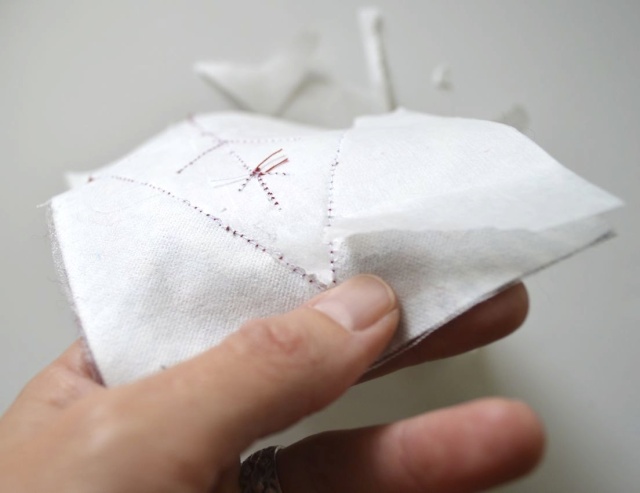
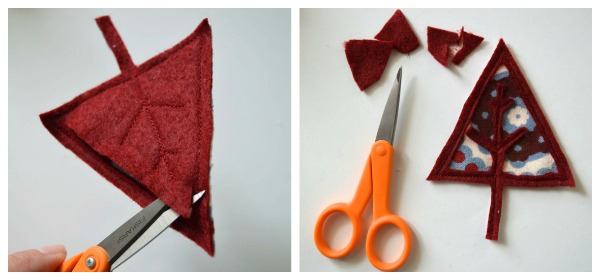
5. Cut away the outer edges of the felt with scissors.
6. With a pair of small scissors cut the FELT ONLY along all the stitches sewn on the inside of the tree. Cut carefully.
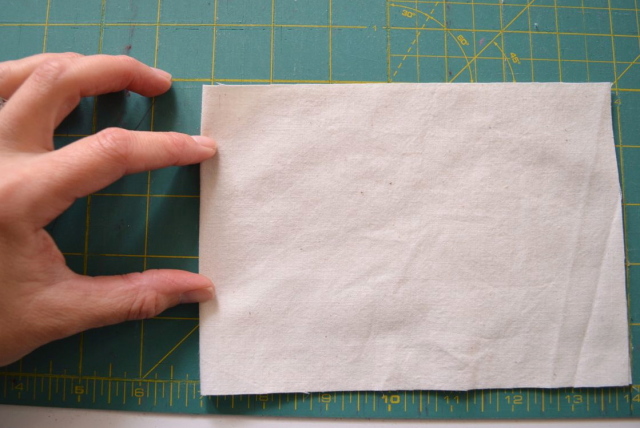
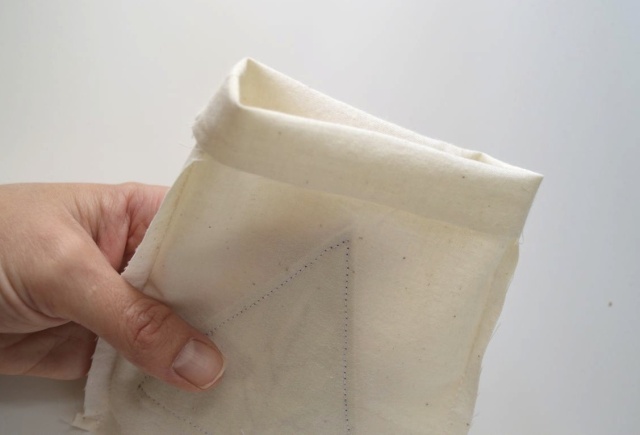
7. Now we have created the decoration, we can make turn it into a gift bag. Begin by cutting your muslin fabric 5 inches by 14 inches long and baker’s twine 17 inches long. Fold the long strip of muslin in half so that the short ends meet and crease at the middle fold.
8. Iron your tree onto the muslin by placing the stem of your tree decoration right above the creased middle fold with the wrong side of the tree facing the muslin, iron on the muslin to adhere it in place. You may also want to sew along the outside edges to make sure it stays in place.

9. Fold the wrongs sides of the muslin together and stitch along both long sides.
10. Fold the top of the bag down 3/4 or an inch and stitch around the whole perimeter.
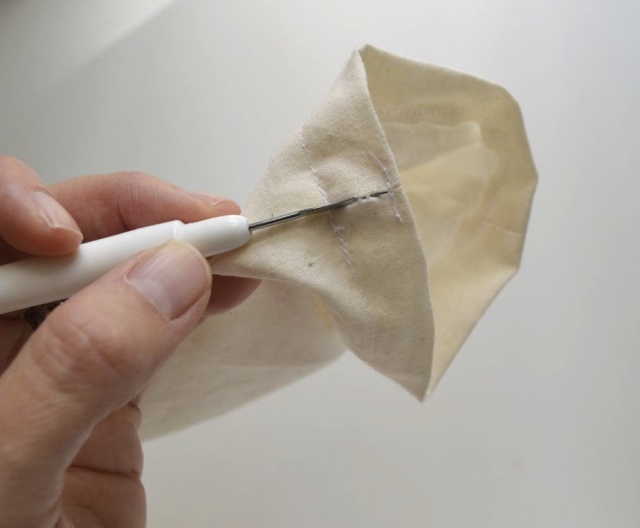
11. Turn the bag right sides out and use a seam ripper to pick out the stitches on one side of the casing you formed at the top of the bag. Add a few extra stitches at the top of the seam casing to keep it secure.
12. To insert the drawstring, cut a 17 inch long string of bakers twine and tie a knot in one end. Insert a safety pin into the knot of the twine and put it into the opened end of the casing on the bag. Wind the safety pin along through the casing until it comes all the way around the perimeter and out the same end you inserted it into. Remove the safety pin and knot the twine once at the base of the bag casing and once to tie both ends together.
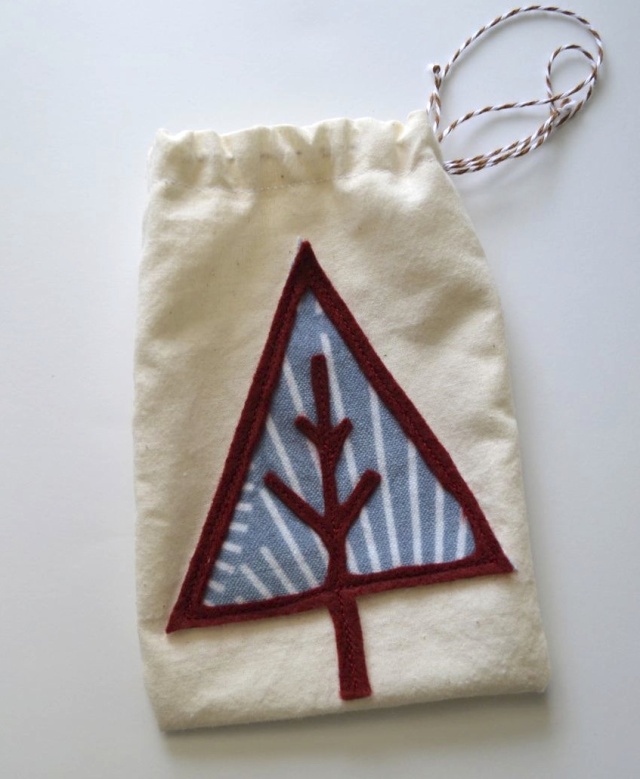
13. Repeat to make as many bags as you need! Be sure to check out all my ideas for creative ways to use them in gift-giving.

Melissa Q. is a coffee-buzzed, cheese-stick eating sewing frenzy who blogs at a happy stitch. She is also a sewing instructor and mother of two wild, nature-loving boys living in the suburbs of New Jersey. She comes from a long line of people that make things from clothing to furniture to moonshine. Her curiosity about how things are made, a deep love of fabric as well as a drive to bring the joy of making to others propel her to sew almost every day. Watch her video to learn more. Catch some of her most popular posts: Memory T-shirt Quilts, Screen-printed hostess apron, and the Glitzy Travel Bag. Find her on Instagram, Facebook and her friendly, accessible patterns on Etsy.


Yes! Finally something about devenir riche
sans diplome.
Great tutorial!! I love Melissa’s work xx