Learn how to make a paper crown for hours of royal play! I have the best craft bloggers sharing fun kids craft that will take away summer boredom and encourage imaginative play all summer . Be sure to check out all our summer crafts and activities ideas to keep kids active and entertained this summer! From DIY Kids summer journals to handmade popsicle bookmarks you will find creative ideas!

“Logic will get you from A to Z; imagination will get you everywhere.”
― Albert Einstein
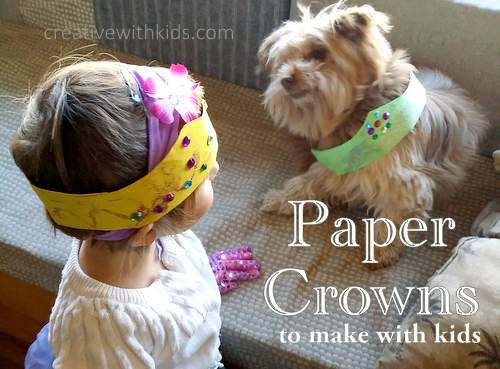
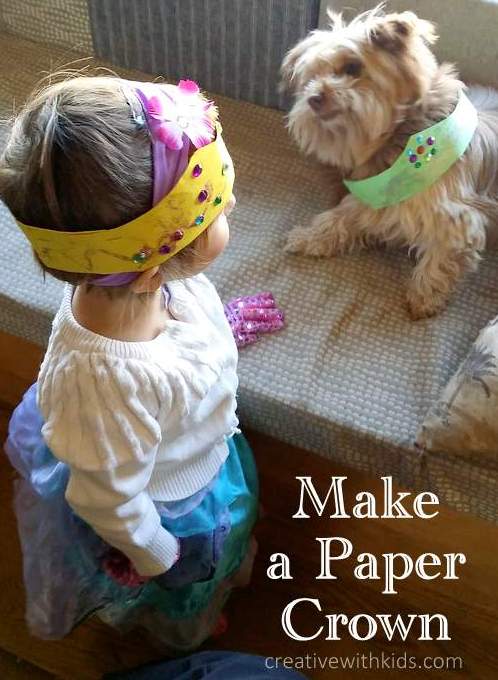
We’re sending you on a royal adventure today with instruction on how to make a paper crown. These bejeweled crowns are a simple construction paper craft that is easy to make and fun for kids to decorate.
Around here we’re a fan of uncomplicated activities you can grab quick – these fit the bill. I love paper crowns for how simple they are compared with how much joy they bring. They are the perfect project for a play date craft, leading right into a long session of pretend play.
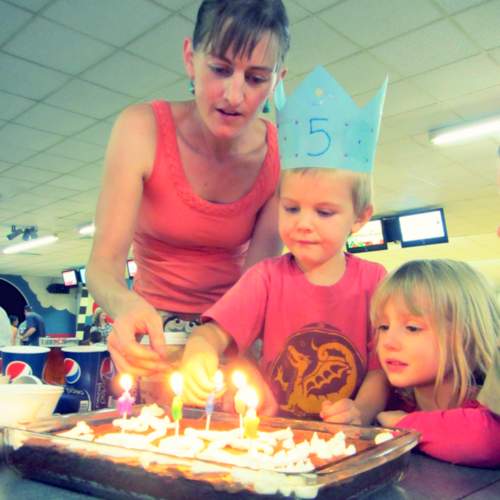
A paper crown for the birthday child is also one of our favorite simple birthday traditions.
They make a sweet gift your kids can make for friends. A couple years ago a friend showed up at one of my son’s birthday parties with a birthday crown that her kids had made for a gift, and you can bet the proud five year old wore his crown for the whole party.
Paper Crown Making Supplies:
- Construction paper
- Scissors
- Stapler
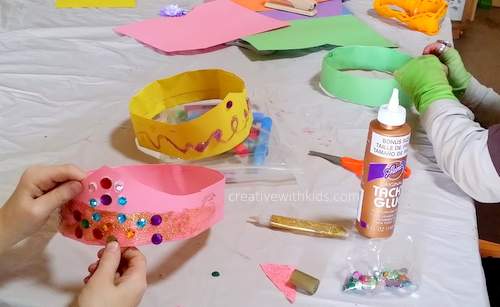
Optional Supplies for Decorating your Crown:
- Glue
- Glitter
- Jewels
- Markers
Easy Peasy Crown Making Instructions:
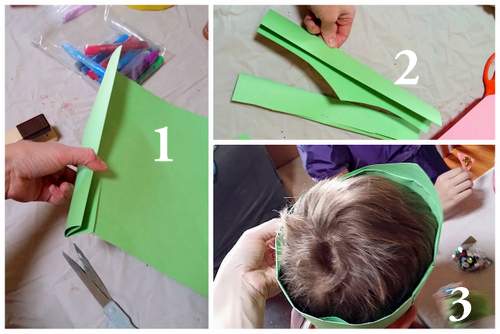
Hey – it’s not that complicated, of course, to make a crown. The nice thing about the way I’m going to tell you is that with the folds in the band, it has a bit of durability. These crowns last through more than one round of pretend play.
1. Fold a piece of construction paper to the width you’d like your crown band and cut straight across.
2. Staple your first band in the center and cut a second strip – this time cutting a crown shape in the center.
3. Insert the straight band into the front crown shape band and staple on one side. Hold the crown around your child’s head to get the right size, then staple the other side together.
4. Pass out crowns for glitter and jewel placement.
Final step – put on finery and greet your subjects.
Consider teaching special queenly waving.
 Alissa Marquess is the founder of Creative With Kids where she inspires parents to find joy in the everyday chaos. She’s a homeschooling mom to three kids and helps run a brewery with her husband. Yes, it has been over three years since the laundry was all the way done.
Head over to find 100 Ways to be Kind to Your Child, learn why you need to Banish the Should Mama, or discover fun family conversation starters.
Get Parenting Secret Missions from her on Facebook and join the CWK Community Newsletter to get ideas on joyful parenting for real people sent to your inbox.


