Today, we have another fun origami photo tutorial that shows you how to fold a beautiful origami flower with individually folded petals.
Paper flowers are one of the most popular origami projects to tackle, and the end product is perfect to use as a decoration on birthdays, and anniversaries, or to add a personal touch to a thoughtful Valentine’s Day gift.
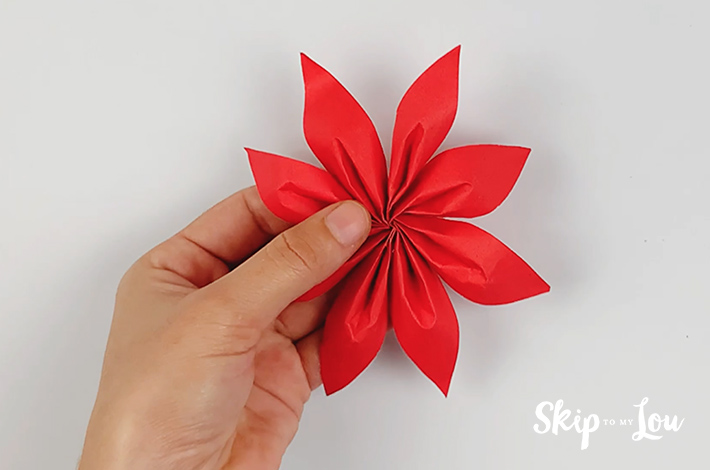
And the type of flower? Well, to me, it’s very much like a poinsettia, and I love them!
Follow these easy steps and in no time, you’ll have a stunning eight-petaled flower to be proud of. It’s quickly become my favorite traditional origami flower to fold.
We have a range of other origami tutorial blog posts, including, Origami Fish, Origami Cat, Origami Bunny, and Origami Crane.

Why Making an Origami Flower is a Good Idea
Not only is origami an excellent stress reliever for adults to try, but it benefits children too, teaching them to concentrate on a task while also helping them with problem-solving and building patience.
Supplies
You will need the following supplies:
- A pair of scissors
- 4 pieces of square paper (lightweight paper is best as it is easy to fold).
- Glue
- A paper dot
- A piece of ribbon
Video: How To Fold An Origami Flower
Step-by-Step Instructions For Folding an Origami Flower
Step 1: Start with your first piece of square origami paper. These will be folded into the shape of the flower petals. It must be square, as a rectangular piece of paper won’t work as well. You can see paper size example in the image below.
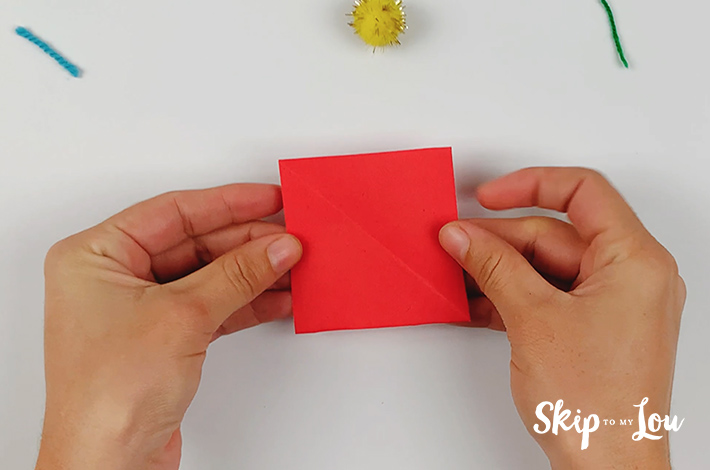
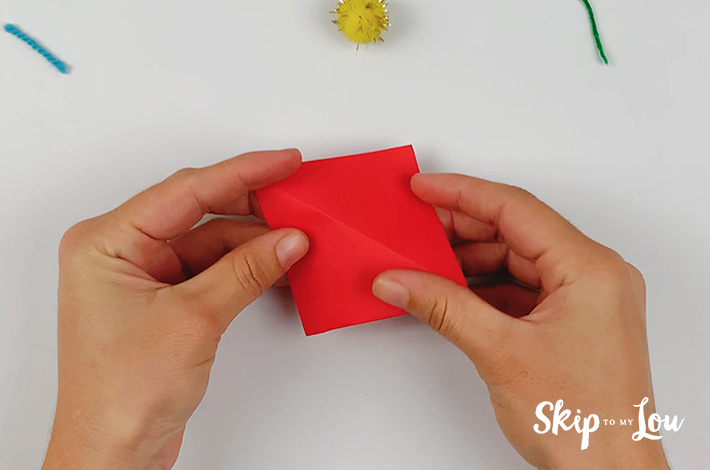
Step 2: Turn it at a 45-degree angle and fold along the paper’s center, as shown in the image below.
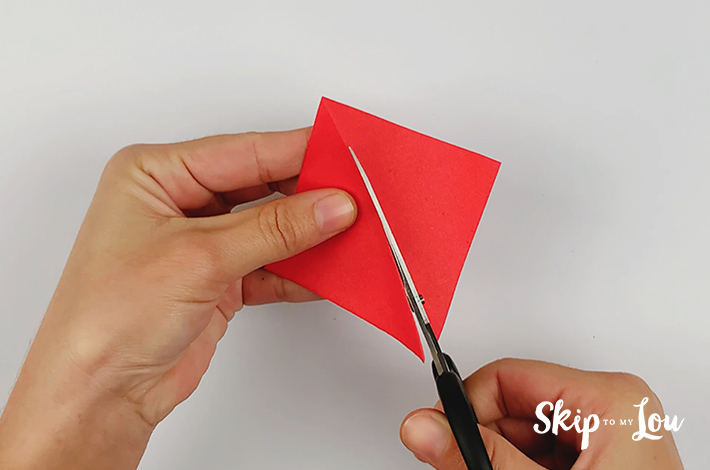
Step 3: Now cut along the paper’s center line and keep the two resulting triangles.
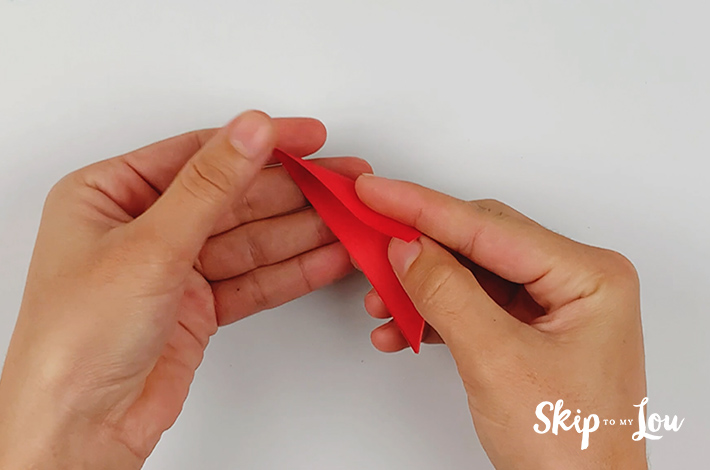
Step 4: Take one of the paper triangles and hold it with the longest side to the left, as shown in the image below. Fold the top corner of the triangle downwards, as show in the image below.

Step 5: Cut off the end as shown in the image below.

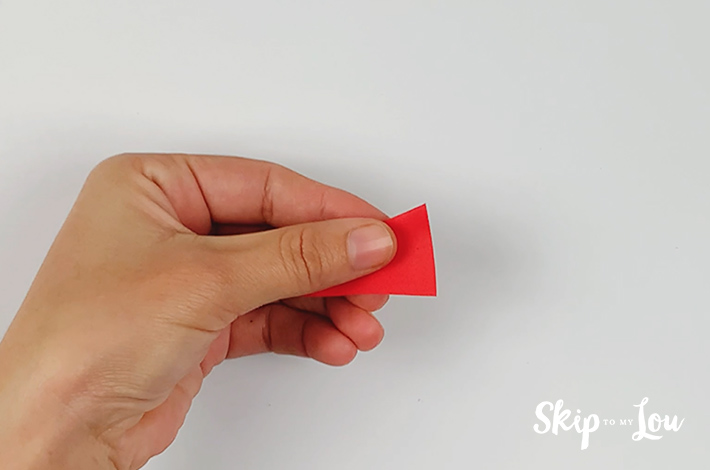
Step 6: Fold the paper as shown in the images below. This is the trickiest part but it’s easy to follow in the video, so be sure to watch that.

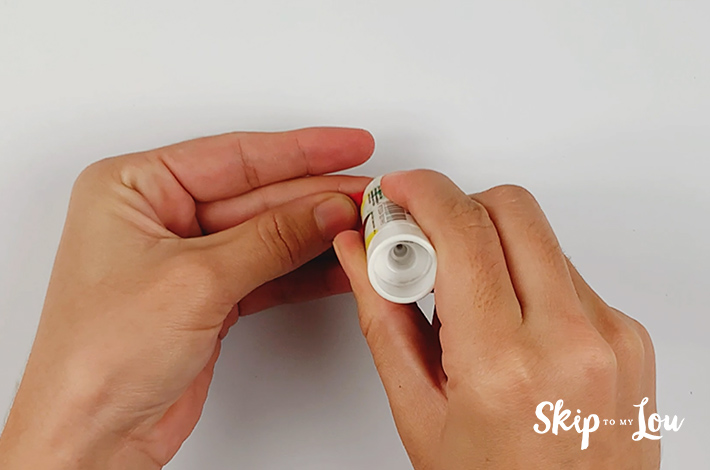
Step 7: Now glue.
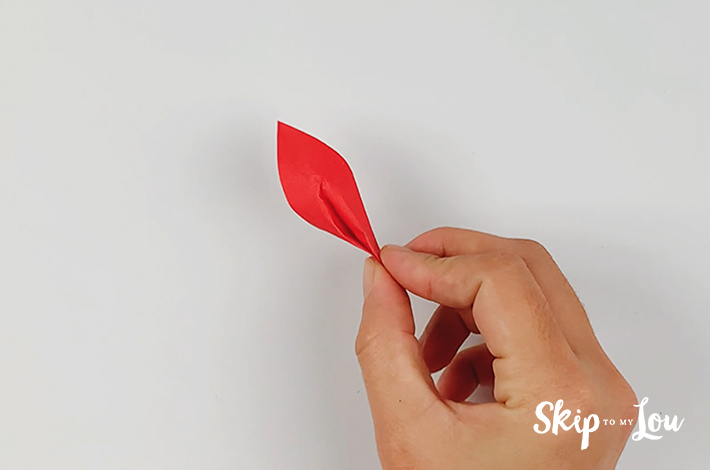
Step 8: It’s time to finish the petal. Again, this is pretty tricky, but the video shows everything clearly. If you are having trouble, be sure to watch this section of the folding procedure.
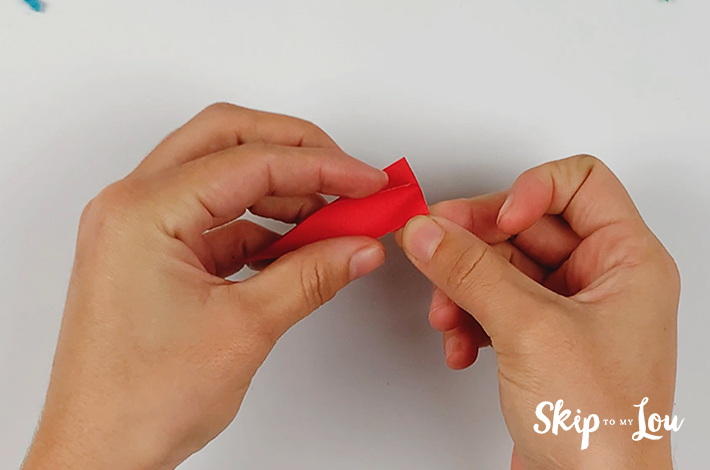
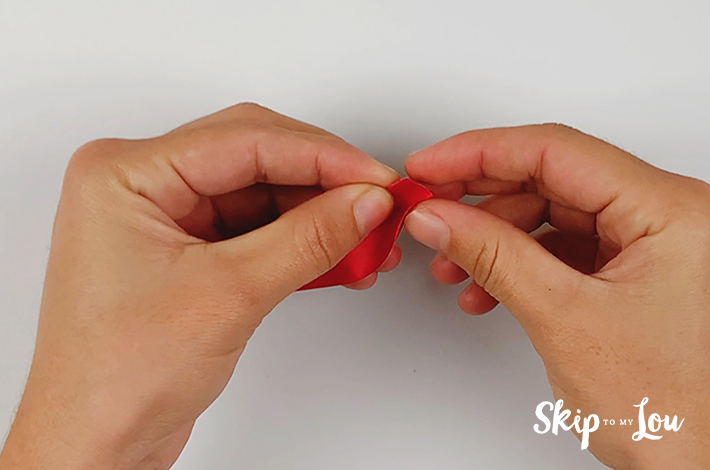
Step 9: The petal is taking shape with a few more folds. Again, the video shows this clearly.

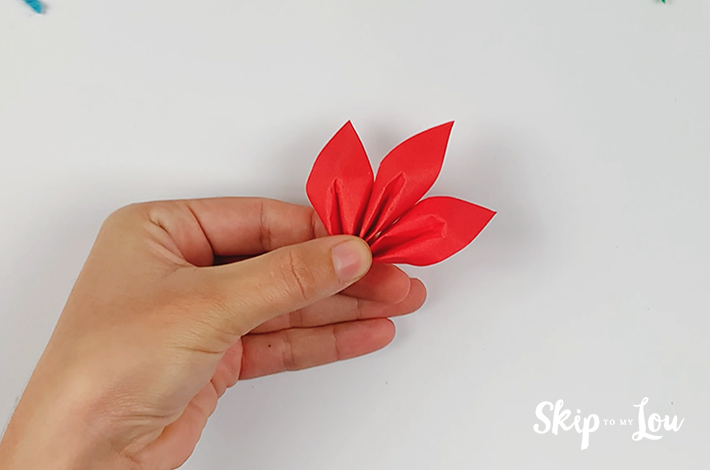
Step 10: Repeat steps 1 to 9 until you have eight petals flaps. Now it’s time to glue them all together. Apply glue to the square folded bottom section of the petal and start gluing them to each other.
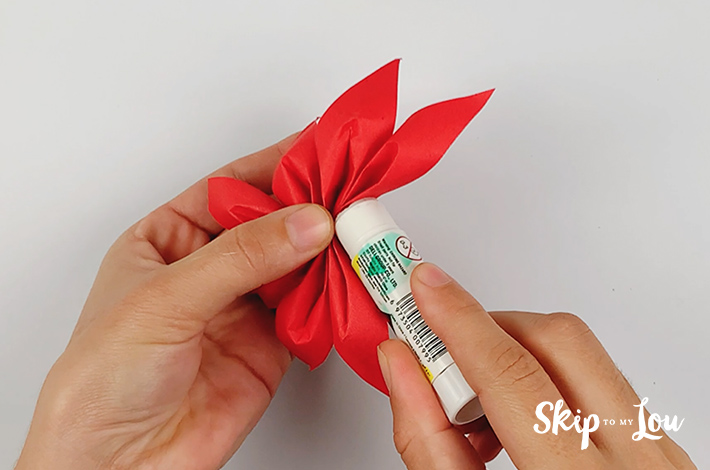
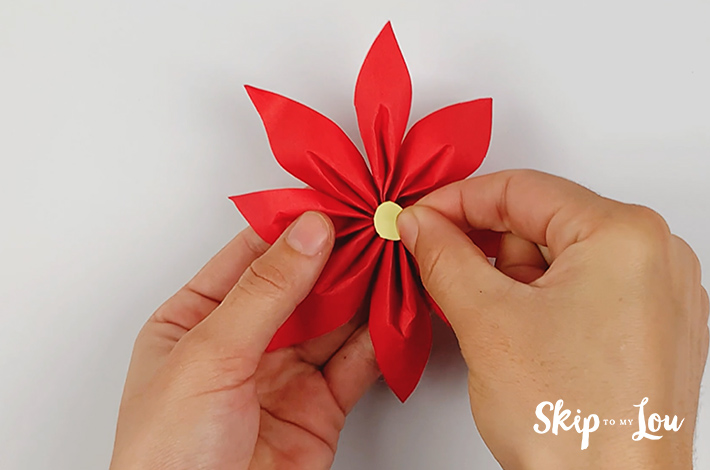
Step 11: Glue the paper dot to the center of the flower.
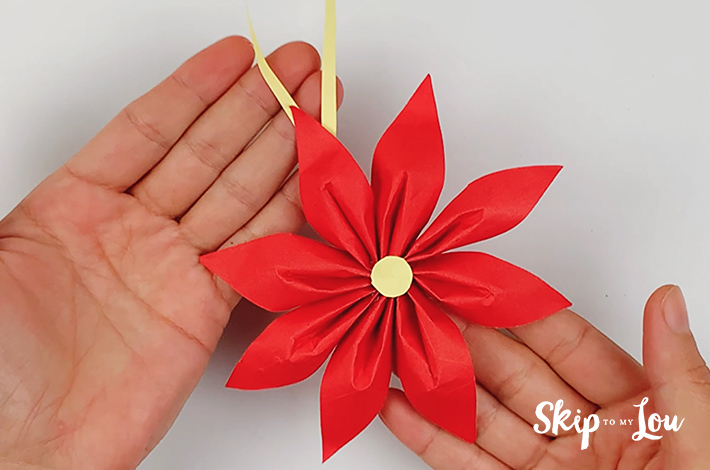
Step 12: Attach the ribbon. Your paper flower is complete!
Additional Ideas For Your Paper Flower
You can add different types of stems. If I am not going to hang them using the cord, I like to attach a chopstick to my folded flower to act as a stem. The kids love it!
Looking For New Origami Tutorials and Other Freebies?
Try these!
- Cat Bookmark
- Hanging Bat Party Favors Craft
- Tissue Paper Color Transfer Wall Art
- Fold A Paper Mayflower Ship {Free Printable}
- Adorable Paper Ghost Craft – BOO!
- How to Make a Paper Spider web
- How to Make Tissue Paper Flowers
- Paper Towel Butterflies
- Paper Flowers
I would love to keep you fully stocked with creative ideas, yummy recipes, fun crafts, and loads of free printables. Subscribe to Skip to my Lou to get new ideas delivered to your inbox. Point your browser to Facebook, Pinterest, Twitter, and Instagram for all my latest updates on social media.
–


