Here is a Friday Flashback about making bath bombs.
Bath bombs make the perfect Valentine’s Day gift when packaged to look like a bomb along with a tag that says, “You’re the ‘bomb’!”
They would also make cute teacher appreciation gifts!
Homemade Fizzy Bath Bomb Recipe
How to make foaming bath bombs
Supplies:
2 Cups Baking Soda
1 Cup Citric Acid
4 teaspoons massage oil ( or 2 teaspoons essential oil and 2 teaspoons olive oil)
Spray bottle with water
mold (60 mm 2 part plastic ball) (I am also thinking the bottoms of two large Easter eggs could be used)
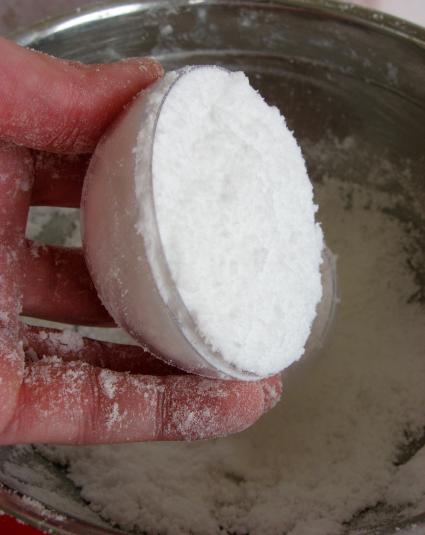
This amount only made 5 bath bombs. If I was making more I would buy the citric acid online in bulk. The small bottle you see pictured (1/2 cup) was $2.50. I purchased it from my local health food store.
Mix baking soda and citric acid in large mixing bowl. Mix very well! You can use an electric mixer if you like.
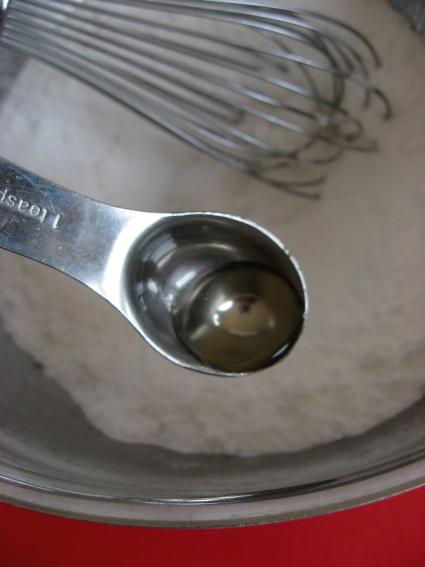
Add in 4 teaspoons of scented massage oil (or other combination of skin safe essential oil for scent and another oil for moisturizing the skin). The scent is personal, so start with a teaspoon or so and add more until you are satisfied. Mix well.
This next step can be a bit tricky because you don’t want your bath bomb to start fizzing. Start by adding a couple of fine mist sprays of water to your mixture and mix well.
You will continue spraying until the mixture will clump in your hand when squeezed. (I used 5-8 sprays, however this will depend greatly on your local climate)
Fill one half of your mold. Pack it tightly.
Fill the other half of the mold and place them together—don’t snap together. I slightly overfilled each half. When I pushed the two halves together they became a ball.
Gently remove the ball from mold. If I had problems with the ball coming out easily I dumped the mixture back into my bowl, added a mist of water (carefully), mixed well and then tried again.
Cut out about a 10 inch circle of black tissue paper.
Wrap tissue up around your bath bomb and trim if necessary.
Place a silver pipe cleaner in the center and then wrap a shiny red pipe cleaner around the the tissue paper and silver pipe cleaner. Add a tag and you are finished! You might want to write instructions for using the bath bomb on the back of the tag.
The bath bomb worked great. It provided fizz, bubbles and fun for my daughter’s bath.
Enjoy!


Wonderful! This is a great alternative to the expensive ones in the stores. It’s much more fun to make your own!
I love lush bombs but they can get expensive. Thanks for the alternative. And bonus I have the ingredients! Trying to think of a different way to make them. Do you think this would harm metal? I have half circle metal molds and was wondering if they would be harmed.
Would this work if you misted in lemon juice instead of using citric acid?
Love this! Just do me a favor? Please correct the word “mold.” It should be “mould” if you are creating something whereas “mold” is that gross stuff we all hate that grows in filth. Just sayin’. 😉
what kind of oil do you use? like baby oil or what?
This was awesome. I would recommend wearing gloves though, especially if you have sensitive skin. Silicone molds work wonderful for packing the dough and they release so easy!! These are definately being made for Christmas gifts this year!!!
Rachel, It is one of those two piece plastic Christmas ornament balls you can get at a craft store.
Where do you get a plastic mold to form the ball??
This is one of the better recipes out there, thank you!
@Sara – I do not think you can substitute pure lemon juice. You need a chemical reaction with the citric acid and baking soda to fizz.
Going to have to give this a try! 🙂 It will be nice to custom make my own with different ingredients. Always the benefit of also knowing what is “really” going into things when you make it yourself (consider myself to be a bit of a health nut).
Can the citric acid be substituted with pure lemon juice?
What about adding color ?
use witch hazel instead of water to spritz. I used to make these professionally.
This was one of the first pins I repinned on pinterest and the first DIY from that site that I tried. I love this and need to make some more!!!
This is just AMAZING!great idea 🙂