This Fabric Scrap Friendship Bracelet is a easy project. My daughter loves friendship bracelets! These 20 minute throw pillows are a fun way to update any room in your house. For the kid on your list (or anyone) make a diy tablet case!
This month we are sharing over 100 handmade gift tutorials. I have teamed up with Thirty Handmade Days, Classy Clutter and Your Homebased Mom to share the best holiday decorating ideas and homemade gift ideas. We have over 100 tutorials so you will have the best homemade holiday ever! Each day be sure to visit the guest poster’s blog for a chance to win BIG! Up for grabs a Baby Lock sewing machine a $100 in Riley Blake Fabric! Grab a new entry every day! Visit See Kate Sew today to enter to win the Baby Lock Sewing Machine.

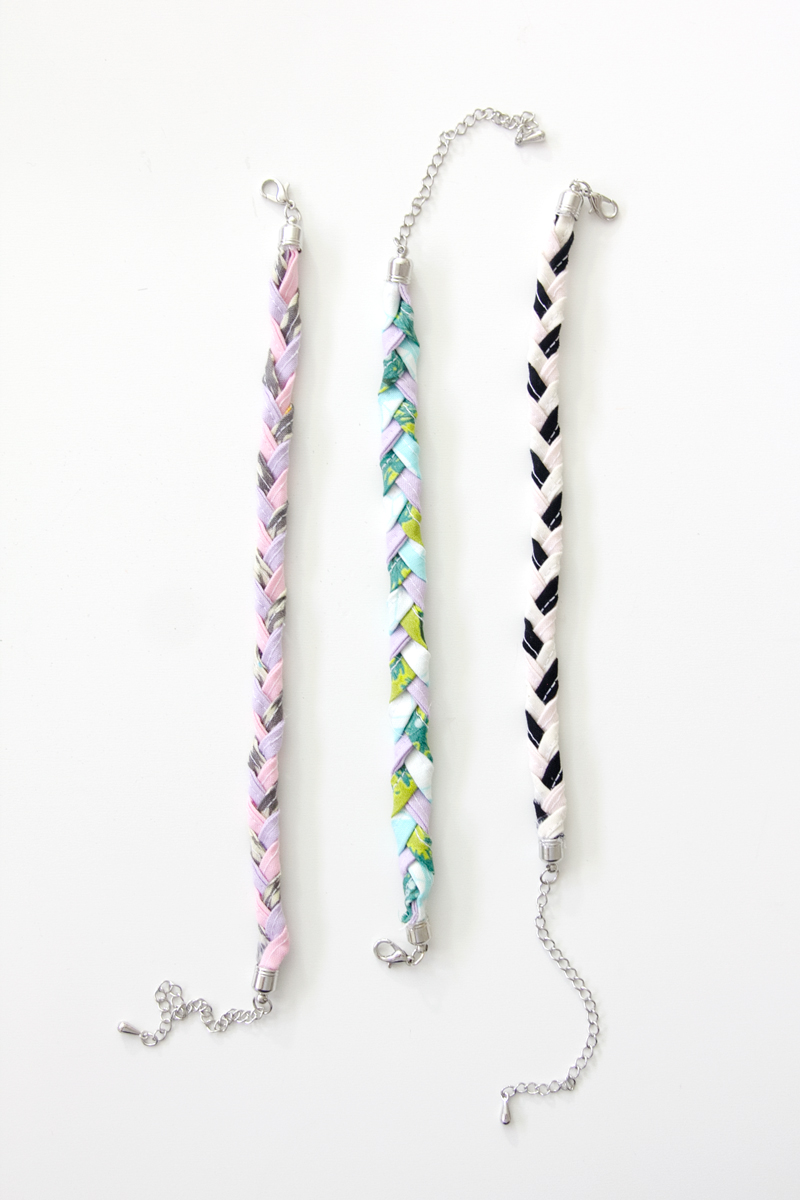
Today I’m going to share a simple way to bust through some of your fabric scraps! These fabric scrap bracelets make the perfect holiday gift for friends and they are even simple enough to involve your kids in. I love the idea of wearing my favorite fabrics in an easy and chic way, so these bracelets will cover all those bases and also make great stocking stuffers!

So pull out your fabric stash and let’s get making!
Fabric Friendship Bracelet Tutorial //
Materials:
-3 strips of fabric, 10″ long by .75″ wide
-Jewelry Endcaps
-Glue


- Cut 3 strips of fabric 3/4″ wide by 10″ long. *Use 1″ wide strips for a thicker variation
2. Fold long edges of strips in so they meet in the middle. Press.
3. Fold strip in half so the raw edges are enclosed. Press well.
4. Stitch strip to secure. Repeat with all 3 strips.
5. Glue ends of strips together with a dab of glue between each one. Create a stack.
6. Glue end of stack into endcap hardware.

7. Press into the hardware as far as it will go and let dry.
8. Braid strips. Continue until your bracelet is the desired length.
9. When it is as long as you want, glue ends together.
10. Clip ends.
11. Glue other side into the other side of jewelry hardware.
12. Clip the bracelet together and you’re done!


For a thicker bracelet (like the green, blue and purple one above) use 1″ wide strips.

I hope you enjoyed this project and can put it to good use this holiday season! I regularly blog at See Kate Sew where I design fabric, patterns and share free tutorials for sewing and more! I’d love to see you over there!
Check out these posts:
DIY Zipper Book Clutches
Make your Own Dolls
Sewing Room Tour


great tutorial. Where did you purchase the endcaps?
thanks for your help!!
What kind of glue did you use?
What kind of glue do you use? I’m envisioning it falling apart pretty quick if it’s not done with the right glue and would love a pointer on that! Thanks 🙂
What kind of glue do you use? I always seem to have problems with glue.
These look Fabulous! Thank you