This Easy Book Cover Tutorial is a easy way to get creating! It is a fun kids activity you can do for your kids that will keep kids reading all summer! If you are looking for more boredom busting ideas check out all our summer crafts and activities ideas to keep kids active and entertained this summer! The best craft bloggers are sharing fun kids crafts! From making a Sling Library Bag to a nature sun garland you will find fun creative ideas!
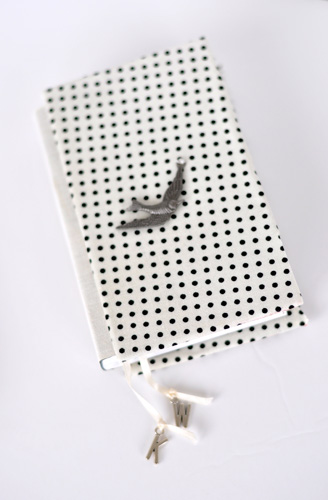
I’m Mandy from Little Birdie Secrets, a crafty blog featuring kids crafts, recipes, crochet patterns, sewing tutorials, recipes, and more. I’m sharing this darling covered book tutorial that you can make with any fabric, finished off with a cute beaded bookmark. Great for summer reading or back-to-school!

Book cloth is a paper-backed cloth that is used in bookbinding. You can find it online and in paper stores like Paper Source. Book cloth is worth using because the paper backing keeps the glue from soaking through the fabric and ruining it. But it can be expensive, and there are few color/print options. So we made our own using fabric, iron-on adhesive, and tissue paper.We used a small book of scriptures for our project, but you can cover any book or notebook you want. Here are the other supplies you’ll need:
Supplies
Chipboard
Fabric (we tried a decorator’s weight fabric and a quilting cotton and both worked great)
Coordinating fabric or book cloth for binding
Heat ‘n Bond Ultrahold iron-on adhesive
Tissue paper
PVA glue (bookbinding glue–find it at Paper Source or other online retailers)
Foam brush
Ribbon
Metal charms for bookmark (optional–find these in the jewelry aisle at craft stores)
Metal embellishments for cover (optional–ours are by Tim Holtz)
Needle and coordinating thread
Scissors, Exacto knife, rotary cutter and cutting mat
Start by measuring your book. You will need measurements for the cover’s height and width, and the spine’s height and width.
Make Your Own Book Cloth
Iron a piece of fabric about twice the size of your book cover (one piece for front and one piece for back cover). Then, following the manufacturer’s directions, iron on a piece of the Heat ‘n Bond adhesive about the same size as the fabric on the back of your fabric. Peel off the paper. Cover the adhesive with tissue paper and iron press entire area. It will bond quickly–don’t heat for more than a few seconds. Your fabric is now book cloth!

Cover
Using an Exacto knife, cut two pieces of chipboard 1/2″ longer than the height 1/4″ shorter than the measurements of the cover.
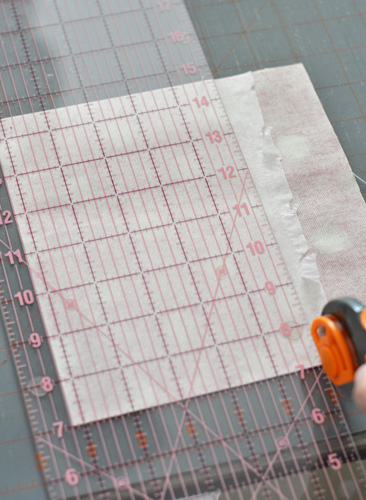
Cut two pieces of bookcloth 3″ longer and 3″ wider than the chipboard pieces. We used a rotary cutter and quilting ruler to cut it to the specified measurements.

Bookmark
Cut a piece of ribbon that is the length of the spine plus 3″. Tie on any metal charms you wish.

Spine
Cut a piece of book cloth that is the same height of the spine and twice the width.

Glue about 1.5″ of the bookmark ribbon to the top end of the spine. Tuck in the rest inside the book with the charms coming out the bottom so it stays out of the way.

Center the spine book cloth on the spine and glue in place with PVA glue using a foam brush, smoothing it down along spine and front and back covers.

Cover the Chipboard
Center a piece of chipboard on the back of the cover book cloth. If you wish to embellish the cover, fold the sides of the book cloth over to crease them and mark the center.

Sew metal charms or other embellishments to the cover with coordinating thread and a needle.


Spread PVA glue on one side of the chipboard and glue it on the center back of the cover book cloth.


Cut the corners off the book cloth in a rounded motion, being careful to leave about 1/8″ of fabric from corners (otherwise chipboard will show on corners on finished cover).


Apply glue to each flap and fold over, smoothing onto chipboard.

Repeat steps for back cover.

Fit chipboard covers to book covers by allowing them to hang over 1/4″ on three sides with about 1/2″ of the spine showing. Apply PVA glue to center of covers and adhere to book covers. You’re done!


We hope you love this craft and will try it to turn a few of your kids’ books into beautiful works of art this summer! Check out our handmade book and other notebook tutorials for more summer crafting fun!
 Japanese Bookbinding Tutorial (how to make a book from scratch)
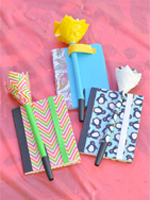 Duct Tape Covered Notebooks (and pens!)
 How to Make a Notepad (from scratch paper!)
 Mandy and Jessica are the two birdies of Little Birdie Secrets, a craft blog born from the crafting obsession of friends living in the Pacific Northwest. It started with crafting play dates and blossomed into a place where we could share our ideas, knowledge, and finished projects with fellow crafters. Our mission is to share fun and creative crafting projects, tips, and tutorials to make crafting easier and more fun. Our main areas of focus are crocheting, quilting, small sewing projects, kids crafts, home decor, recipes, and paper crafting. We hope our tutorials will inspire you to be creative in every aspect of your life. Come visit us at littlebirdiesecrets.com today!
If your kids love crafts they may also like this Gak or Borax free slime.


WOW! These are great! What an interesting and creative idea! Thank you so much for the inspiration!