I am excited to be offering 30 days of fun crafts to keep kids active and entertained this summer! You won’t want to miss a day of these fun crafts for kids from some amazing bloggers! Please be sure to pay them a visit!

Gail, from That Artist Woman, writes……

My kids love puzzles (so does my Dad)!
These String Puzzles, which are based on a traditional puzzle from the west coast of Africa, are easy enough for the kids to make and will keep them occupied for many a puzzling hour until they learn the SECRET!
This is also a great gift for Father’s Day!

Now do the bases of these puzzles look familiar?
I was trying to figure out how to cut and drill enough of these for school when the light went on (literally)!
A light switch plate works perfectly and you don’t have to fuss with all those power tools.
I love that puzzle at the bottom…I was looking at the plate with the strings coming out and it looked just like my old “Hall and Oates” tape being eaten by my walkman…(oh those teenage memories…oh .private eyes they’re watching you….) ….umhum, sorry let’s get back to the how to:
MATERIALS REQUIRED:
– light switch plate, wood or plastic
– some string, or a shoelace, ribbon, or yarn
– acrylic craft paint
– 1 or 2 rings
– mod podge, optional
– 2 pony beads

So I found 2 good switch plates at the hardware store. A paintable plastic one (34 cents) and a nice unfinished wood one (about 2 dollars).
Both work well.
Now you need to make sure your rings are larger than the middle hole. I’m using doll pin stands from Michaels (20 for $5.00) but you could use metal rings, large beads, whatever you can find.

If you want a more finished look you can add a piece of cardboard to the back of the plastic plate.

Just glue into place.

Paint your switch plate with acrylic craft paint.
I sanded the plastic one lightly to give it a little tooth for the paint to adhere to.
You can add a coat of Mod Podge for a nice shiny coat when the paint has dried if you want.

You can also decoupage the switch plate for a different look.
If it’s for Father’s Day you could draw a few small pictures of Dad and podge those on.

You can paint the rings as well.
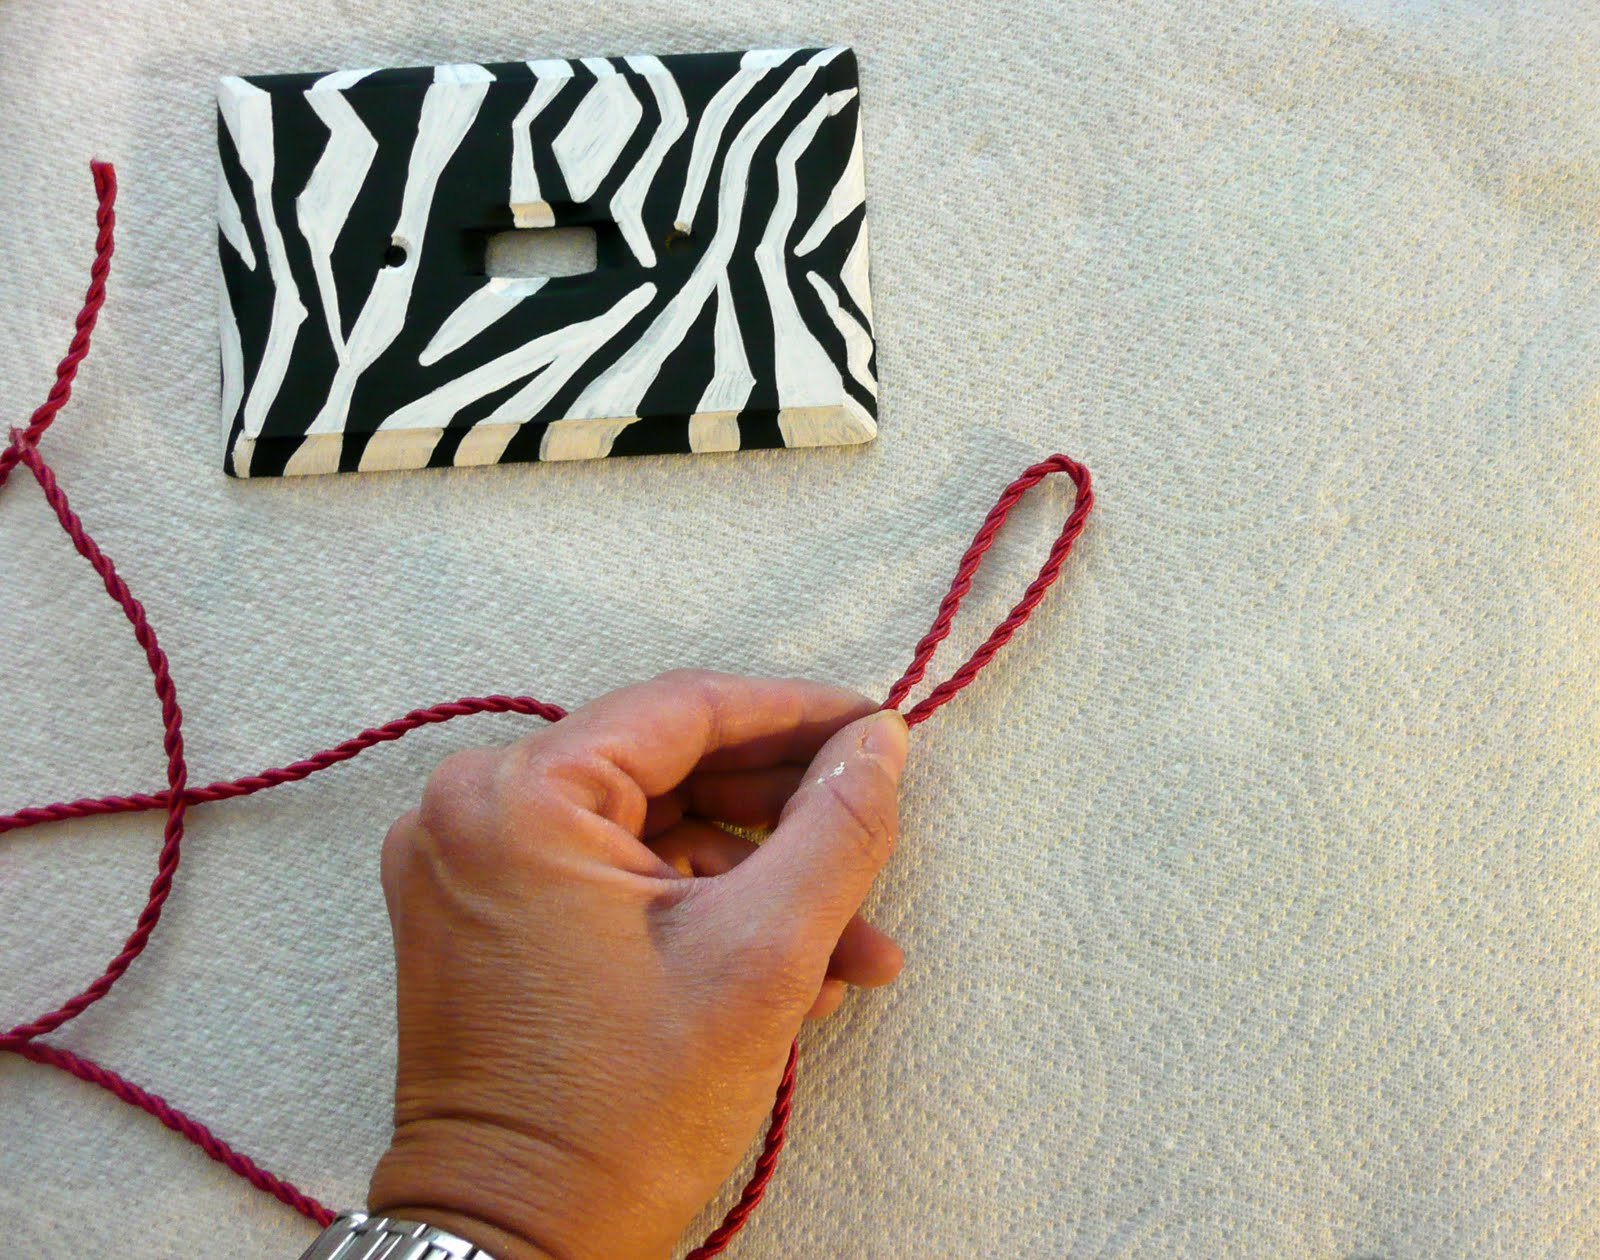
Take about 90cms or 3 ft of string. If it’s too long you can trim when making your knots. (better a little too much than not enough)
Fold in the middle.
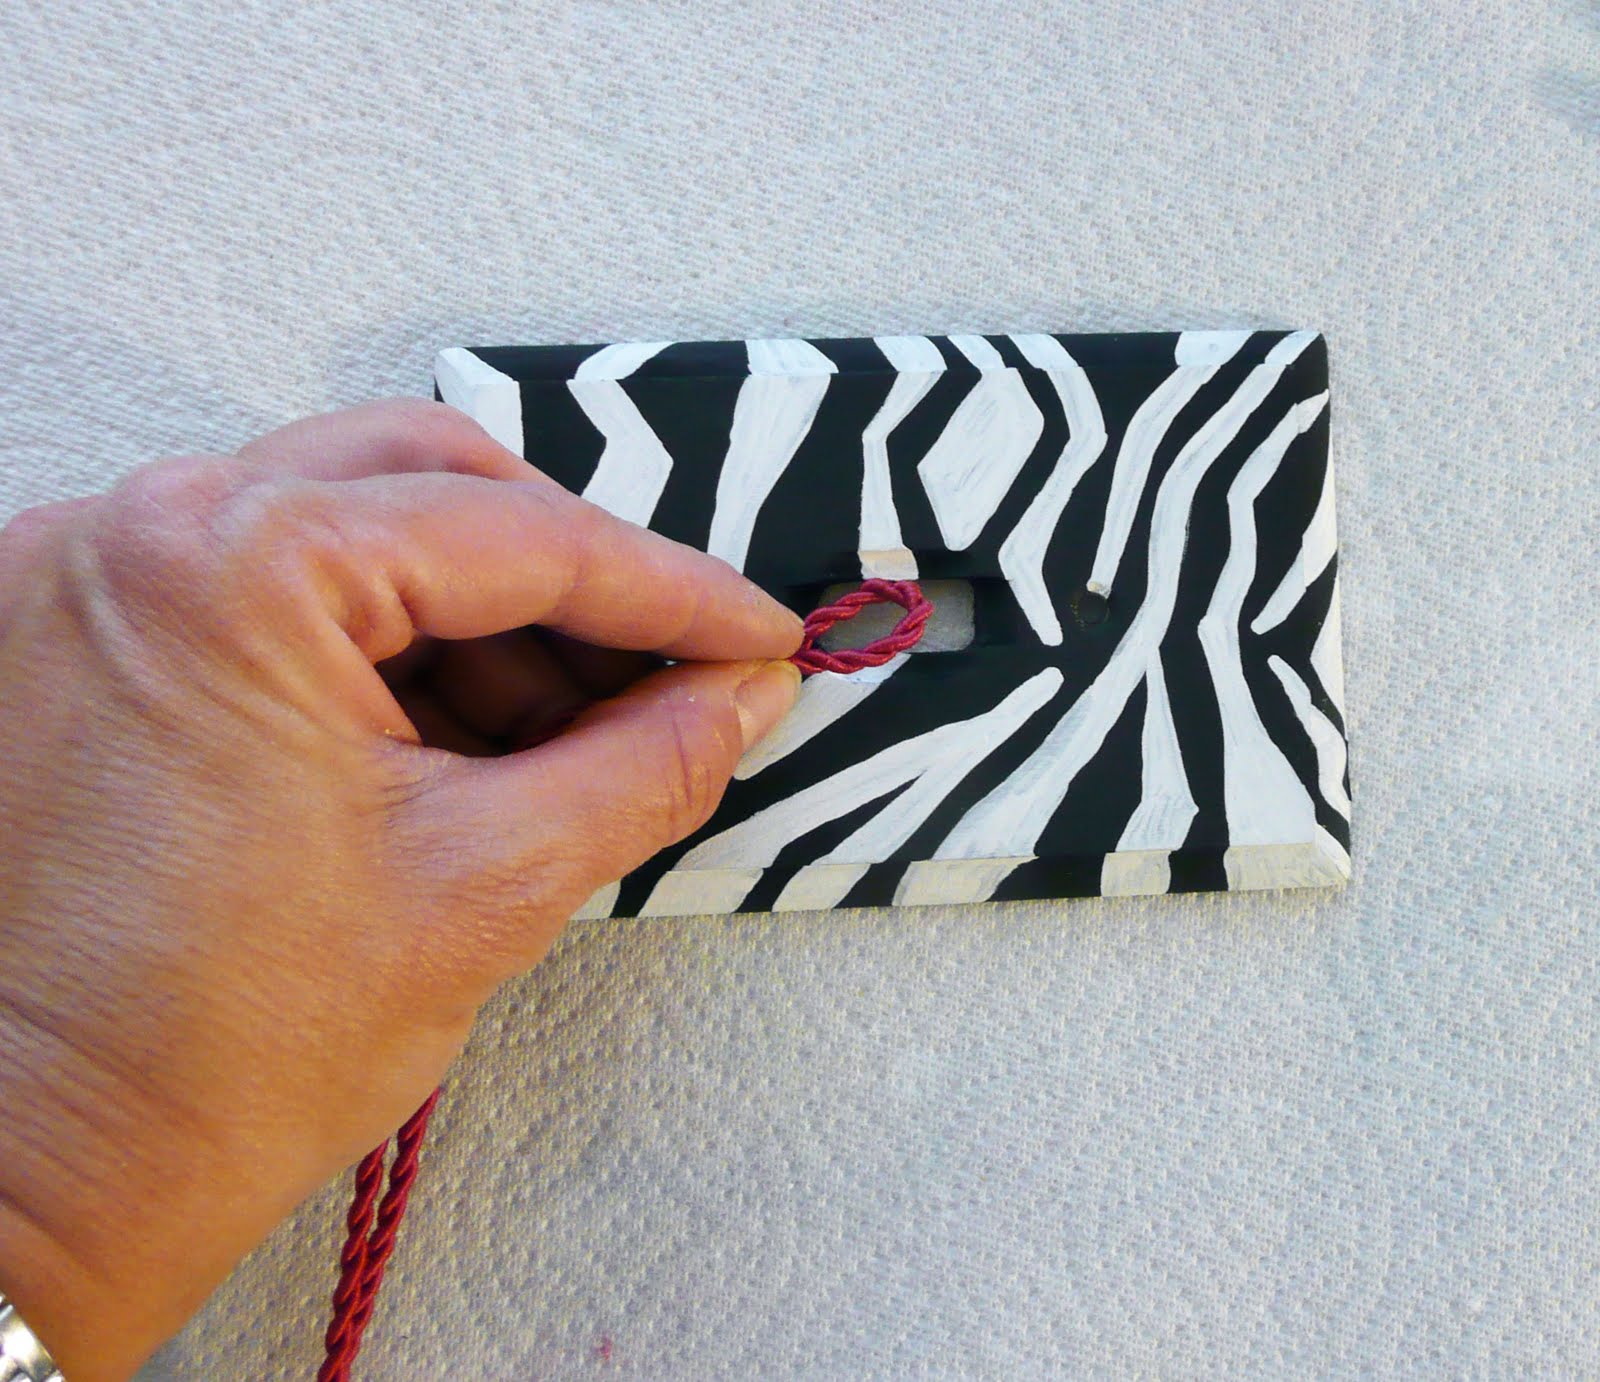
With the switch plate right side up pass that loop through the middle hole.
Pull the loop down.

Pass the 2 ends through the loop forming a slip knot.

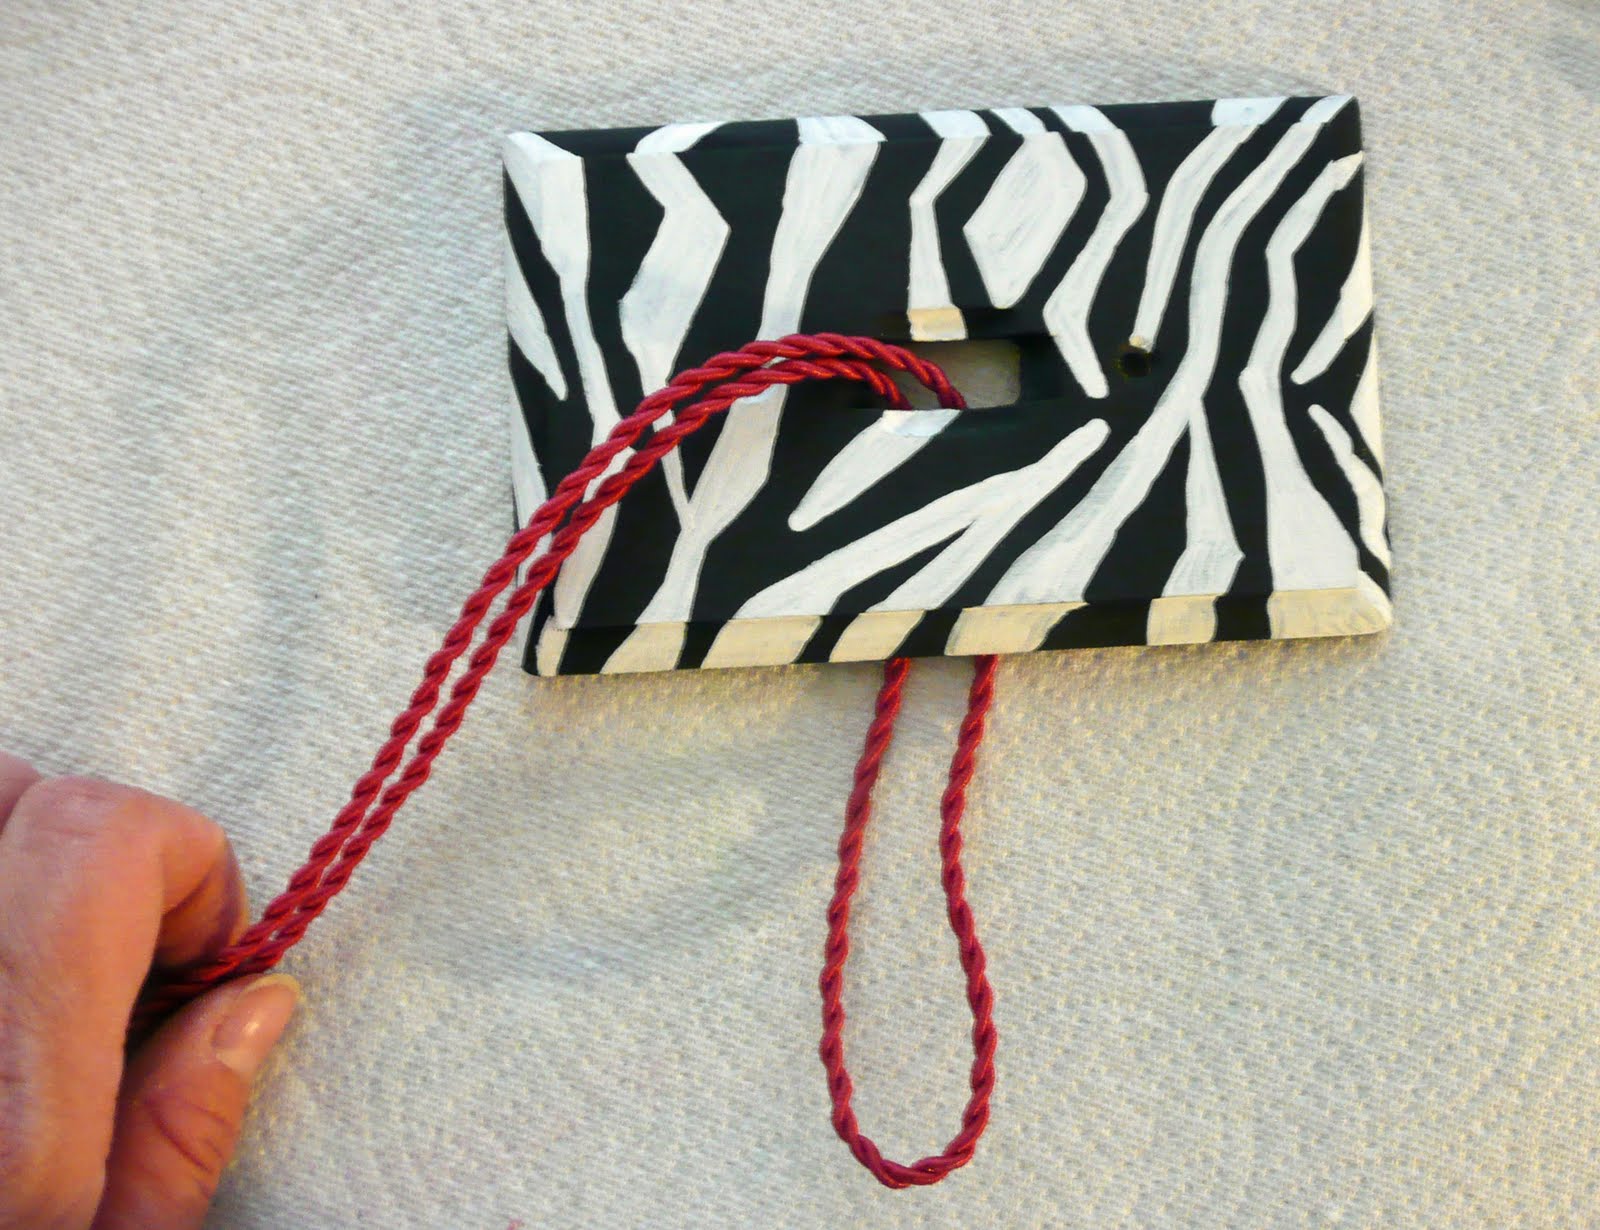
Thread the ring/s onto one of the ends.

Thread the ends of of the string through the 2 screw holes.

Turn the switch plate over. Thread on a pony bead and then knot the end a few times. The pony helps keep the knots from unraveling during all that intense puzzling.


So it should look something like this when it’s all done.

The goal of the puzzle is to move one of the rings or the ring (if you only used one) over to the other side.
Trust me it’s not that easy to figure out!

After several failed attempts to photograph and then draw out the solution I decided to just give you this link to a nice little cheat sheet from Geeks Wasting Time.
Just in case!
Have fun…..


Okay, even I’m puzzled, ha! Now I’m gonna have to make it just for me to play with! But what a great way to keep kid’s minds alive, great for problem solving 🙂
What a neat idea! My 8 year old would get a kick out of this! @Beejay, I don’t think this series is titled “How to entertain your kids all day because they can’t or won’t entertain themselves” its just a fun series with different ideas to do in addition to what they do the rest of the day. I love crafting with my kids, but I certainly don’t do it every day, all day long. “Entertaining” my kids actually entertains me too and its fun to work alongside them doing something both of us enjoy. Lets be honest, I can only play with legos and barbies for so long before I get bored! Adding some variety, as this series is suggesting, is exactly what I need sometimes! 🙂
Love this idea!!
I totally agree with @heather – Dollar Store Crafts. It is nice to have new tricks; I remember getting so bored with the same few activities we did in the summer. It’s so great to share ideas like this!
That’s fun! @Beejay, I don’t think anyone is suggesting that kids have to be entertained every minute of every day, but it sure is nice to have new tricks up your sleeve now and then.
I think this is brilliant! This keeps those kids thinking. Thank you.
In response to BeeJay- Keep it positive. This site offers so much wholesome creativity for Moms to offer to their children. I’m sure all our kids get plenty of free play, but we also like to engage, play and interact with our children and great ideas I see here are always perfect. Your comment was rude and unnecessary.
Never seen anything like this. It is a fantastic idea. I will be making these for car toys for an upcoming long road trip.
Wonderful! I am a librarian at a VERY small public library, and I’ve been trying to come up with inexpensive crafts to go with our themes for the Summer Library Program. This one will work perfectly for our “trip” to Africa! (And I can give them the solution at the end of summer program.) Thanks so much! 🙂
thanks for the fun puzzle my grandchildren will love it
Oh wow, that is awesome! I so have to give that a go!
Great project! I’ll be finding a way to use this in my Sunday school lesson this week, to keep the older boys occupied 😉 Thanks for sharing!
I don’t get the solution…
Do kids ever engage in free play anymore? I don’t think kids have to be “kept entertained.”
what an ingenious craft/puzzle/activity to keep the kids busy and entertained. and they could make it themselves too! amazing Gail, as always!
AWESOME! I love this!
What a creative idea! I love this!