Teacher Appreciation Week, May 7 – 11, 2012 is right around the corner. Starting today and through all of April I am excited to share some amazing ideas from some of the most wonderful bloggers for the return of my Teacher Appreciation series! It’s going to be a great month! You will be totally prepared with ideas to thank your teachers!

Please welcome our first guest the sweet Bev from Flamingo toes!
Bev writes….
Hello Skip To My Lou Readers!! I am so excited to be here as a part of Cindy’s Teacher Appreciation Series!
My name is Bev and my blog is called Flamingo Toes.
I love to create jewelry, especially knock-offs, fun sewing projects and stuff to dress up my home!
When I heard about this series, I immediately called up my sis – since she’s a 1st Grade Teacher, I figured she’d be the expert on cool teacher gifts!
She said that fun, pretty things for organizing her room are always great. And also, that she has enough scented lotion and candles to last her the rest of her life.
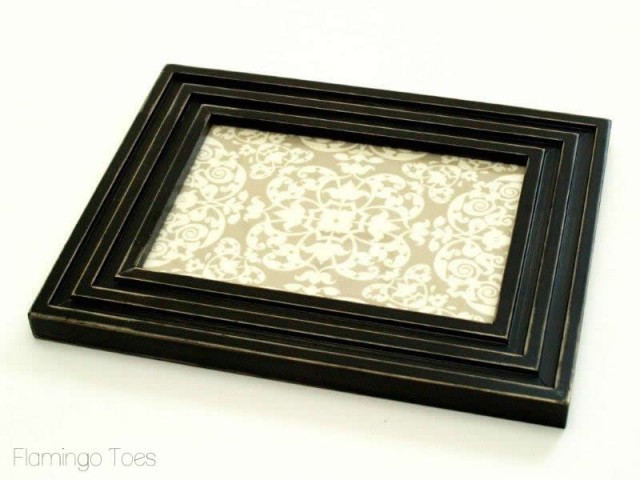
So I got to work creating a new Desk Organizer! I wanted it to be useful, but still pretty!
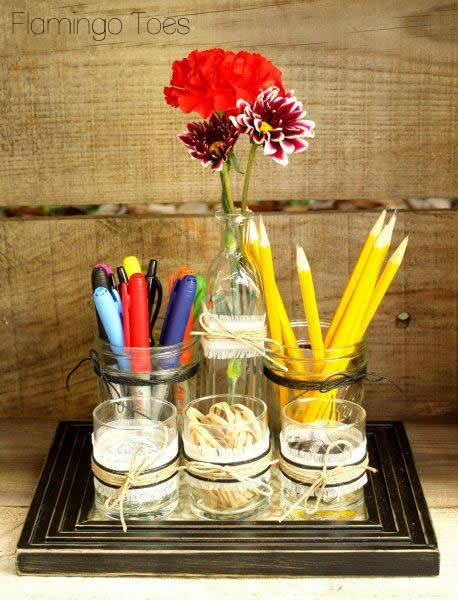
I’m so happy with the way it turned out!
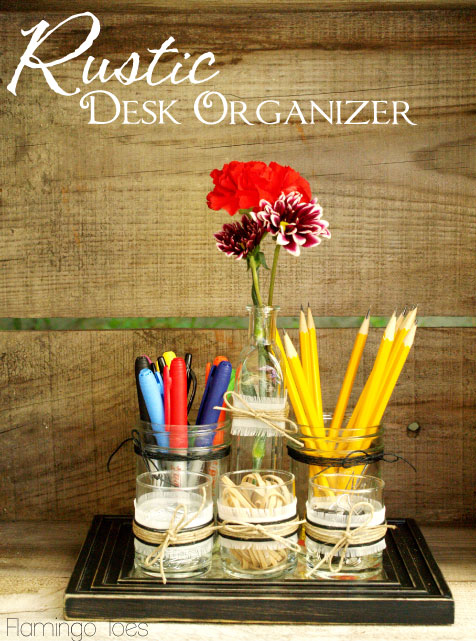
Isn’t it cute? I love that there’s a place for lots of supplies – but there’s still room for sweet little vase to hold all those flowers for teacher. 🙂
This is so quick to put together too – and it’s easy to customize for your teacher – or even for your desk at home!
Here’s what you’ll need:
Frame – this one is a 5 x 7
Fabric piece – 6 x 8
Posterboard or cardboard – 5 x 7
Adhesive or Wonder Under for fabric
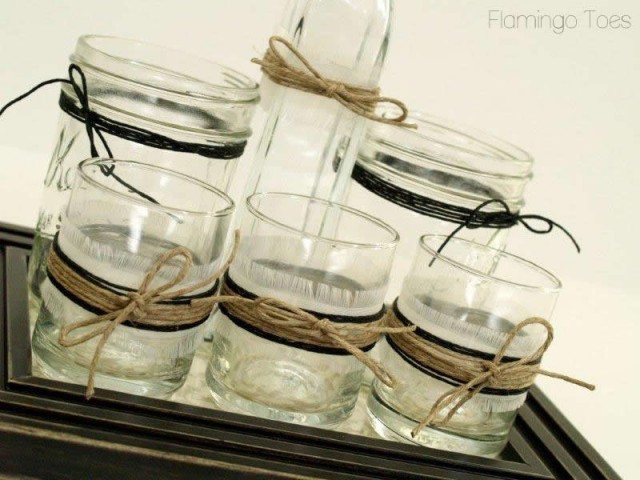
Small Jars to fit in the glass space of frame
(These are three small votive holders from Michael’s, 2 small canning jars and one small vase)
Twine, cording and fabric for wrapping
Hot glue
Begin by cutting out your fabric and posterboard pieces for your frame. The posterboard is to stabilize the fabric so it will lay in the frame nicely.
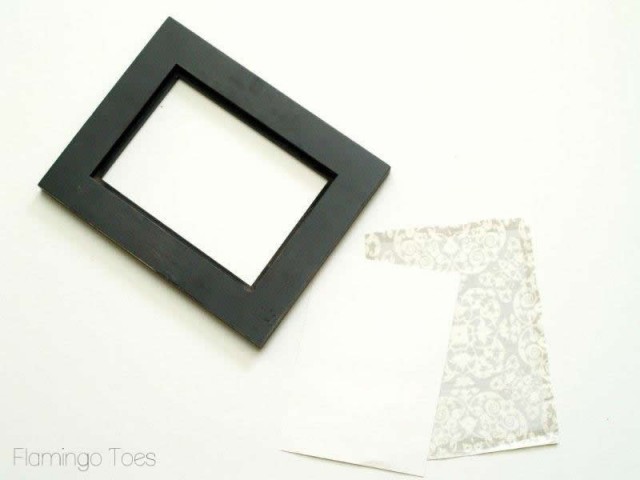
You’ll want to apply some sort of adhesive to the fabric. You can use a spray-on glue or use Wonder Under, like I did.
Apply the fabric to the posterboard.

Place your fabric piece into the frame behind the glass and put your frame back together.
Now we have a pretty base tray for our organizer!
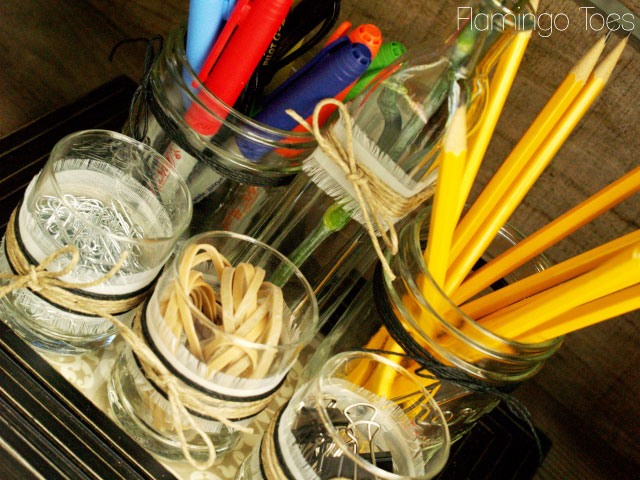
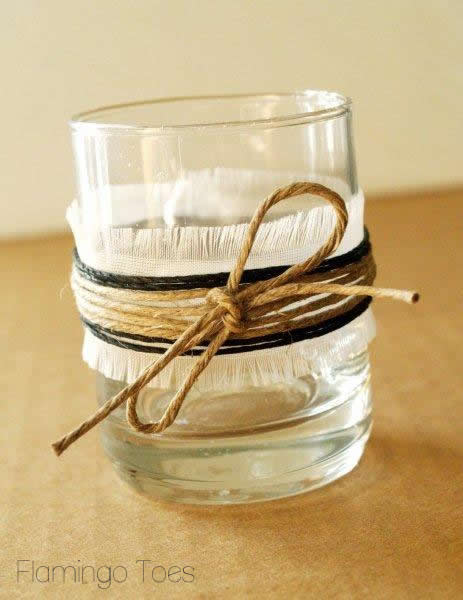
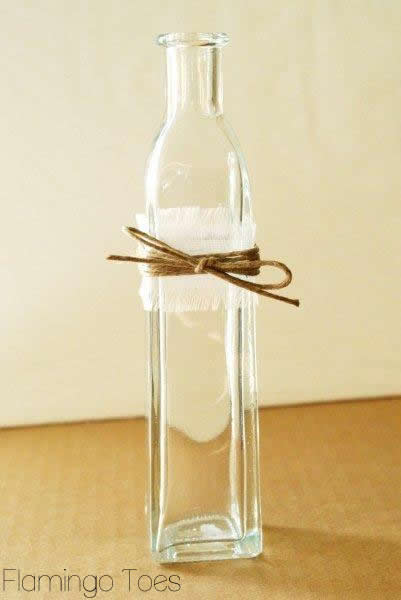
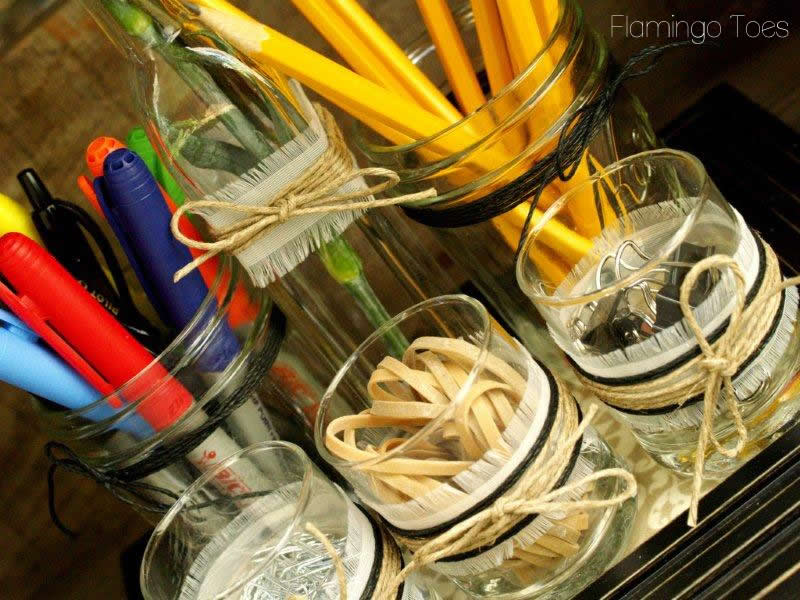
Now begin wrapping your glass pieces. I used a combination of black and brown jute, and organza.
For the organza, cut the pieces for the small vases and then pull the long threads off both sides to give it a frayed look.
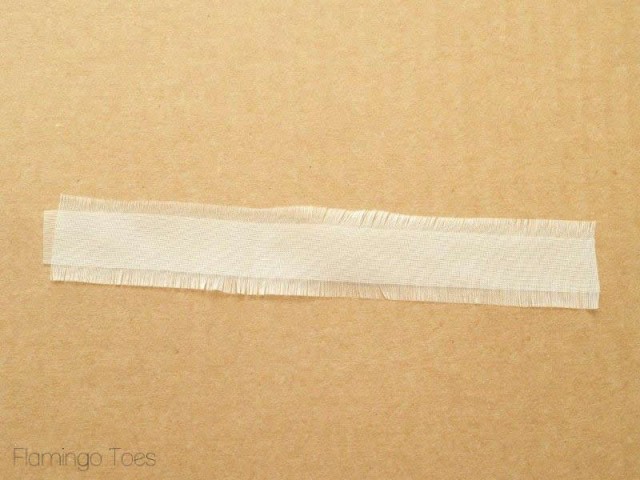
Wrap the fabric around the small glass pieces and hold it in place with a little hot glue. (Not too much or the fabric will be lumpy.)
Wrap your jute or cording around the fabric and tie in a pretty bow.
Repeat for your other pieces –
Place all your wrapped pieces on the frame. Add just a tiny bit of hot glue to the base of each piece to hold it in place.
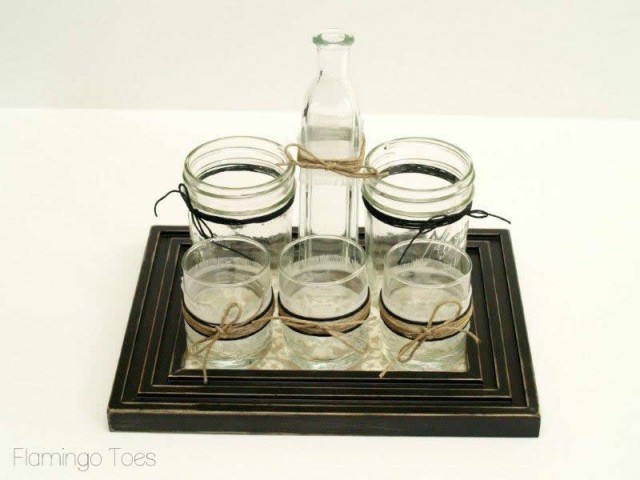
The only piece I didn’t glue down was the vase, so it could be easily washed out. I think it’s so cute already!
Now you can fill it with fun supplies to finish off the gift! How easy was that?!
I love that it’s unique but still useful!
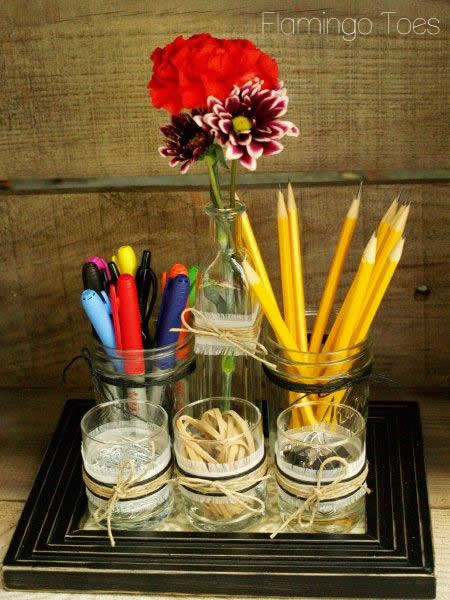
I think this would even be great for those hard-to-buy-for guy teachers – just wrap the jute without the bows, maybe choose more masculine fabrics and lose the vase!
I hope you give it a try!
I would love for you to stop by Flamingo Toes and check out my other projects! My tutorials page is here, it’s a great place to start! We also have a fun link party every Sunday – I’d love for you to join us!
Thanks so much Cindy for including me in this great series!
You might also like these other teacher appreciation ideas.


I found this idea. Thought maybe I could figure out how to make and kids could bring in school supplies for her. Little things like you see here?
This is such a cute idea! I love the organization of it. Imagine filling one of those jars with flower pens! That would be both beautiful and handy.
This is gorgeous and a savvy idea!
Thanks so much for sharing this! I love giving gifts to help with organization, especially for teachers. Was wondering if the base could be replaced with a metal sheet. That way tins with magnetic bases can be used instead. It would then be useful on it’s original “frame stand” and items can be placed on the base with closed see through lids. I like freeing up space as well and the thought of the frame upright with magnetic tins attached is appealing to me. Also could hang on a wall as well since items have lids. Just an idea. Thanks again so much for sharing.
What a clever idea! I am going to make this for my desk 🙂
What a n awesome project! Great for Mother’s Day and Father’s Day too! Like Suzanne, I have a bunch of cute jars and bottles this will find a use for!
This is absolutely lovely! I would do this just to have at home. I would eliminate one of my pet peeves though. Can’t have the pencil leads pointing up! Safety hazard for hands and arms reaching across. 🙂
That’s a great way to use those fun little jars that I love so much but can’t bear to recycle.
Adorable, Bev! Very clever to use the frame as the base. Its so cute AND functional! The perfect teacher gift. 🙂