Welcome to the Bake Craft Sew Along! If you love to sew then you won’t want to miss a day of sewn handmade gift ideas. According to Kelly is featuring gifts that can be crafted and A Southern Fairytale is sharing recipes perfect for making edible gifts! Don’t forget to enter our SEW Amazing Giveaway. Just visit Girl Inspired today.
")
Hi! My name is Stef and I share my crafty endeavors over at Girl Inspired
I am just so thrilled to be part of the Holiday Bake, Craft, & Sew Along and I’m excited to share a tutorial today for a quick and festive holiday pillow.
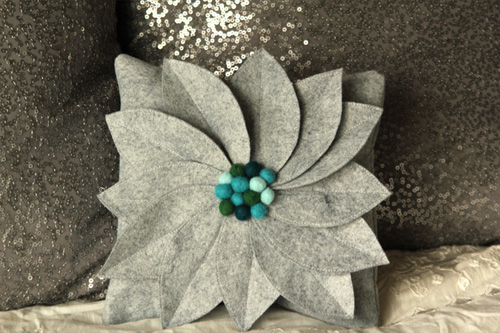
Throw pillows are so much fun. They can add visual interest, color, and texture to any room and can be sewn up quickly. I think this is a great holiday project to make for yourself or to give to a hostess, teacher, or friend! Let’s get started!
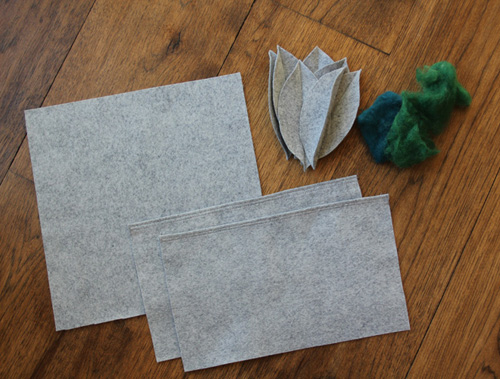
For this project, you will need:
- 1/2 yard good quality wool felt
- wool roving for felted balls or pre-made felted balls
- pillow form or fiberfill
 First, prepare your front and back pillow cover. For a 10-inch square pillow, cut a 10 1/2-inch square from the felt for the front cover. For the back cover, you can either cut another 10 1/2-inch square (for a non-removeable cover) or make an envelope-back (for a removeable cover). I did the latter. Set your pillow cover pieces aside.
 Next, cut 12 petal-shaped pieces from the felt. You can download a template from my blog today or make your own. You’ll want the petal to be approximately 1/2 the length of your pillow diameter (e.g., 5 inches). Press the center crease of each petal well. I added some stitching detailing to each petal before sewing them onto the pillow. Starting at the center, stitch straight down the crease to the outer edge, then rotate the petal and edgestitch all the way around to the other point and continue back to the first point. You could also do this stitch detailing with embroidery floss for a nice effect. Add detailing to all twelve petals.
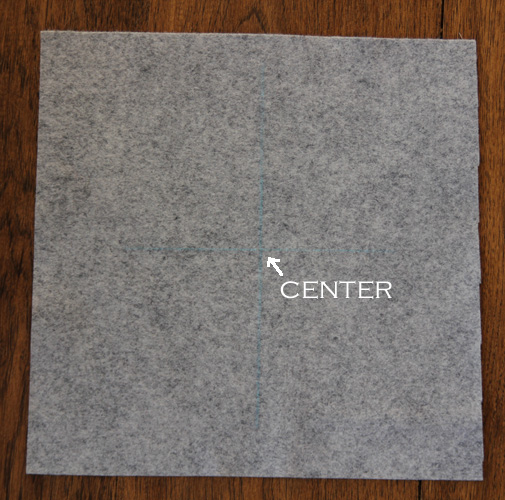 Next, set your front cover out in front of you and make an x to mark the center crosspoints with a water-soluble fabric marker.
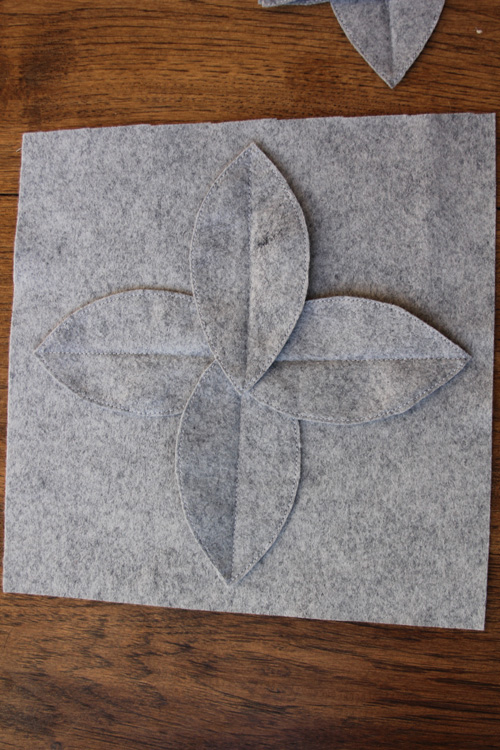 Begin placing the petals in a flower shape. Align one petal with each intersecting line, points meeting at the center (they will overlap just slightly).
 Space two petals in each of the four quadrants to form the flower. Overlap one petal on top of the next so that the right side of the petal is over the one to the right of it and the left side of the petal is under the petal to the left.
 You may have to fidget a bit with the center pieces so that everything lays flat. Check around the outer perimeter of the petals to make sure there is about 1/2-inch between the points of the petals and the edge of the pillow (for seam allowance).
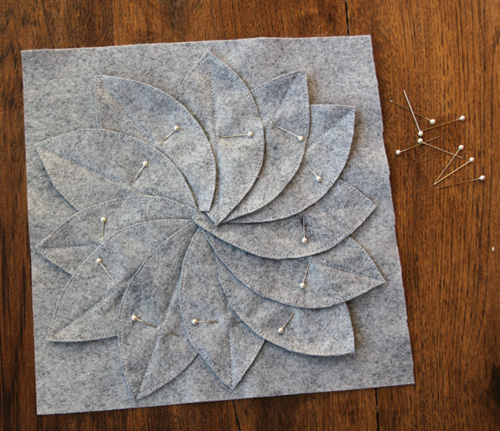 Now, pin all the petals in their place. You’re ready to stitch them down.
 Start with the petal just to the left of center top. Carefully fold back the petals around your target petal. Starting at the center of the petal, you’re simply going to stitch down the remaining portion of the petal that was not pre-stitched in the initial prep of the petals. Stitch from center of the petal toward the center of the pillow. Continue stitching petals in a counter-clockwise direction until you have stitched all of the petals onto the pillow cover.
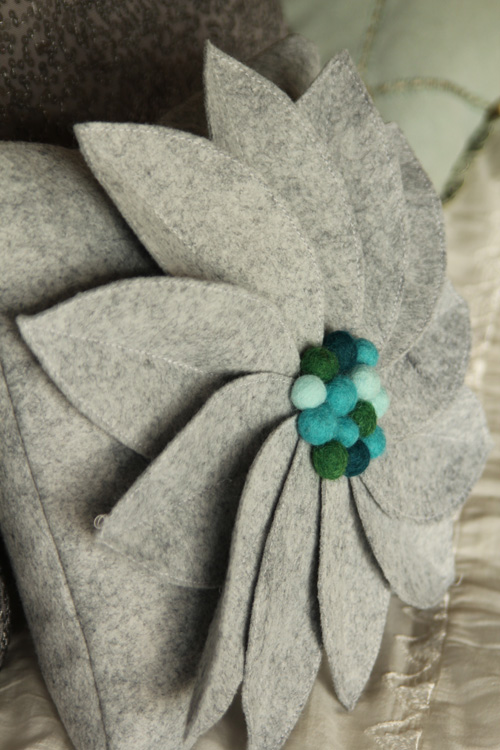
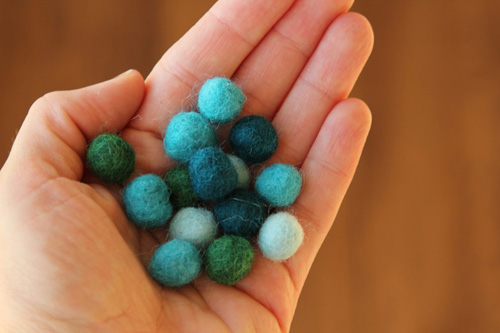 Now, you’re ready to add some color to the center of the pillow! I used mini-felted wool balls. These are so easy to make; if you haven’t made them before, you can visit my tutorial here. My mini-balls here are about 1/2-inch in diameter. I hot glued mine to the pillow, but you could also stitch them on! I think a little pile of jingle bells would be really cute, too!
 All that’s left is to turn your cover into a pillow! Lay the front cover right sides together with your back cover (overlapping your prepared envelope back if applicable) and stitch together using a 1/4″ seam allowance. Be sure to gently move the flower petals toward the center of the pillow while you’re stitching so they don’t get sewn into the seam. Turn the pillow right side out and stuff (and stitch opening closed if you did not use envelope back). Voila! Festive pillow ready to go!!
 I’d love to hear about what YOU’RE sewing up this holiday season; come visit me over at Girl Inspired Thank you so much for having me, Cindy!!
SEW Amazing Giveaway worth over $700
Stop by Girl Inspired for more sewing inspiration and to enter the SEW Amazing Giveaway today (you only have today to enter)! I am giving away more than $700.00 worth of sewing goodies! You won’t want to miss this!


Hi, Could you please email me the Petal Pattern? Thanking you in advance. Glenys 🙂
Little confused in the step where you sew the petals on to the pillow cover…stitch where and how? Another picture would be helpful!
This is a gorgeous pillow! Thanks for sharing.
Stef, when I clicked on the link to email you, it wouldn’t come up. What is your email? Thank you! Narita
Thanks so much again for having me, Cindy! If readers want to drop me an email, I will send the petal pattern via email until I get it up on the blog.
This is so gorgeous Stef! Hopefully I will get a chance to try this before the holiday season is over 🙂
What a beautiful idea. I went to the website and the to the petal pattern couldn’t be found. Can you help me? Thanks!