Welcome to the Bake Craft Sew Along! If you love to sew then you won’t want to miss a day of sewn handmade gift ideas. According to Kelly is featuring gifts that can be crafted and A Southern Fairytale is sharing recipes perfect for making edible gifts!
")
Happy Holidays everyone! My name is Carrie from ThisMamaMakesStuff.com where I write about living a creative life, raising compassionate children while mountain biking and running in between. You can find loads of sewing, refashioning, crocheting and crafting tutorials here.

I am thrilled to be a part of the Holiday Bake, Sew & Craft Along again this year. In the past, I’ve shared great gifts to make for the kids: the “On-The-Go” Art Case and “Shape Stretchies” for creative movement. This year I want to share something you can make with the kids.
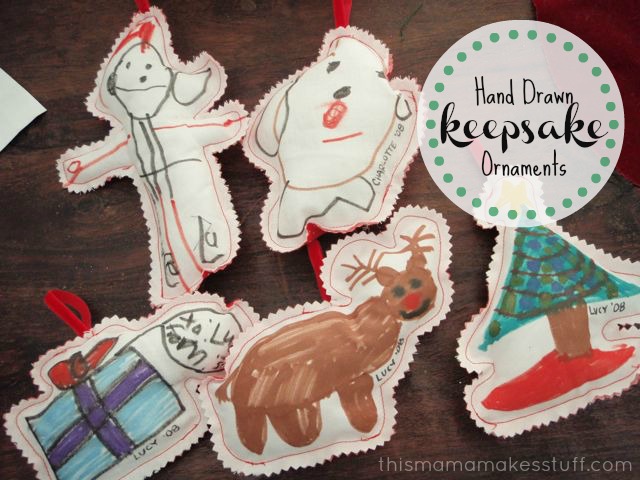
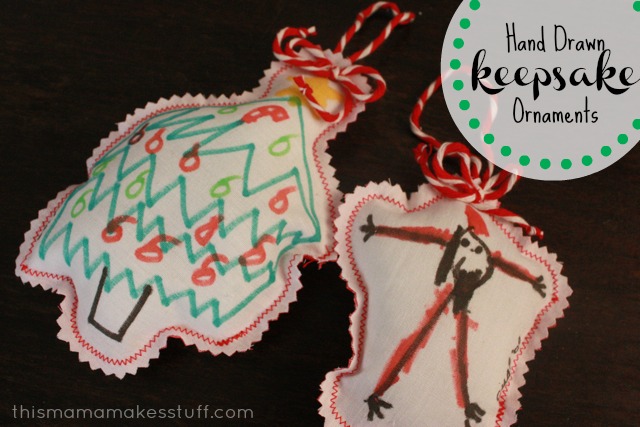
Hand drawn keepsake ornaments have been a yearly holiday tradition in our family since 2008. The kids love unpacking their homemade ornaments each year, giggling as they compare the ornaments they made as toddlers to their newest ones. With minimal sewing involved, I hope you’ll think about making them part of your yearly holiday traditions too! And make sure to make a few extras because grandparents tend to love them too.

Supplies:
White, cotton fabric
Felt or holiday fabric (ornament backing)
Ribbon or string (hanging loop)
Fabric markers
Polyfil or other stuffing
Embroidery hoop or freezer paper
Pinking shears

Stretch fabric across embroidery hoop to stabilize it and let the kids draw their picture. I usually draw a box to give them an idea of how large their picture should be. You can also iron on a piece of freezer paper to the back of the fabric to temporarily stabilize it while the kids draw.
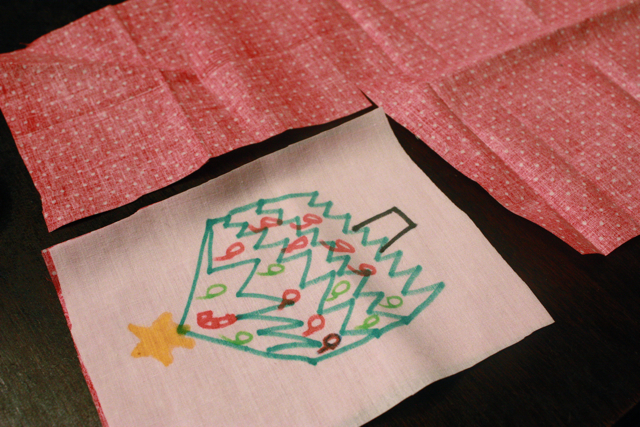
Roughly cut out the drawing along with a piece of backing fabric.
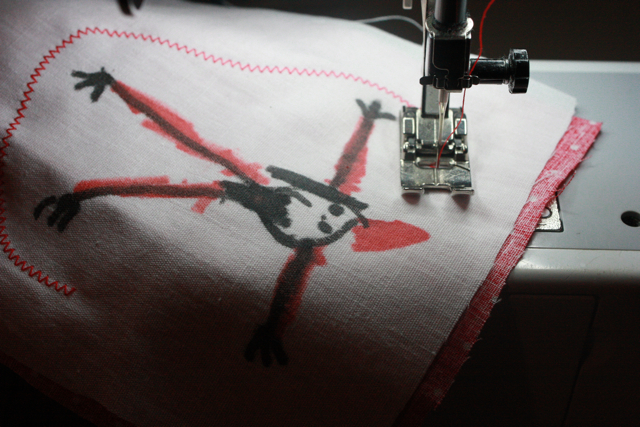
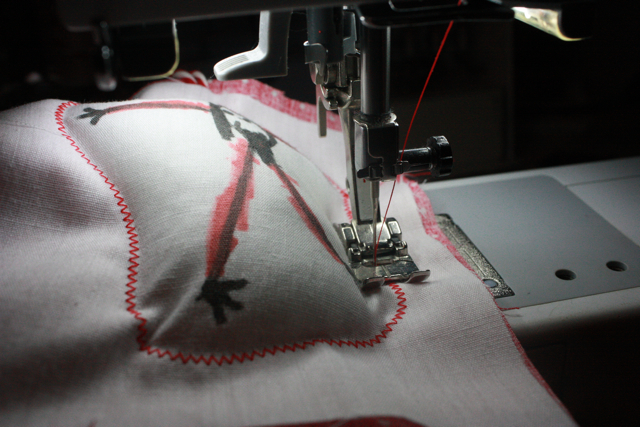
With wrong sides together, stitch the two layers together, starting at the side or the bottom.

When you get to the top, inserts a loop of ribbon or string for hanging and continue to stitch around the ornament leaving a 1 1/2″ opening.
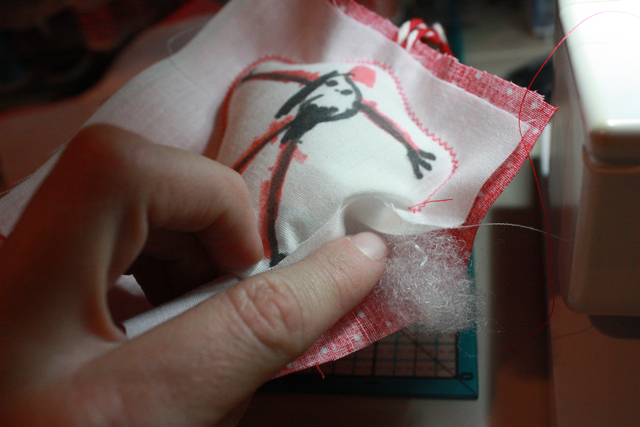
Stuff the ornament with polyfil or the filling of your choice.
Stitch up the hole.
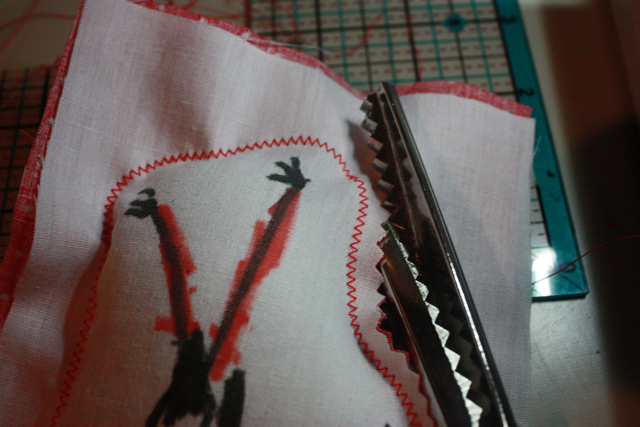
Using pinking shears, cut all around the ornament 1/4″ away from stitch.
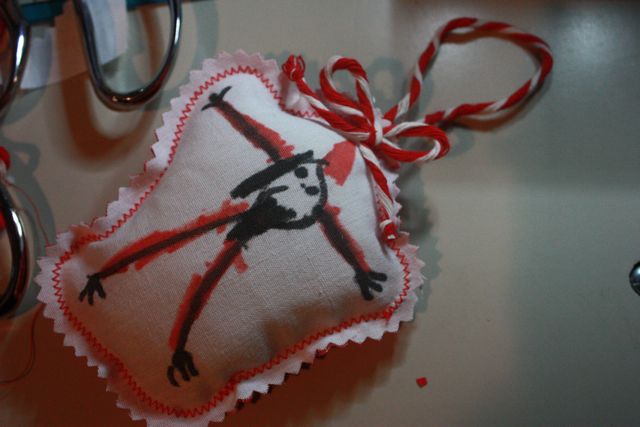
Add a bow at the base of the loop.
Don’t forget to add the child’s name and year somewhere on the ornament!
my favorite coloring supplies
- White printer paper (standard US letter size)
- Non-toxic crayons for toddlers, or…
- Your favorite way to color: crayons, colored pencils, thin markers, tempera paint, watercolors…
- Optional: You may want scissors or safety scissors for kids and glue sticks, glue dots or my favorite glue gun if you’re using these coloring pages for a craft project
- Home printer
Try making an embellished clipboard from your child’s artwork.


These are precious! The perfect project for my neice who is a budding young seamstress. Thanks for posting this so beautifully!
I love this idea! Am definitely going to do this with my daughter!
Loved these! I’m always looking for new ways for kids to express themselves.
This idea is just too GOOD! It is the traditional Christmas keepsake made amazing! 🙂
Great idea. I am pasing this along to my sister to use with her grand kids.