After hearing about the recent closure of Picnik, I have been looking for another easy way to make photo collages. I can’t wait to try this one…
Hello lovely Skip to my Lou readers were excited to be here today from Smitten Blog Designs! We’re excited to share a little blogging tip that can add some beauty and variety to the look of your blog. Photo collages offer a unique and beautiful way to capture an event and tell a story. Have any of you wondered how to make a photo collage? Well, you are in luck because we’re going to show you a completely free and simple way to bring your photos to life using Google’s Picasa program.

Step 1: Download Google’s free program Picasa: https://picasa.google.com/
Step 2: Import your Photos and Create the Collage:
Import the photos you would like to use by opening Picasa and selecting the Import button in the upper left hand corner. You can import the photos from a folder on your computer, or even directly from your camera.
Once you have imported your photos, select the photos you would like to use for the collage by holding the down the Ctlr button and clicking each photo you want to use.

Once you have the photos you would like to use, click Create on the menu at the top and select “Picture Collage” on the drop down menu.
Step 3: Select the Layout of your Collage.

Your photos will then automatically be assembled into a draft collage which can be edited to any layout and size you want! This can be done while making sure you are on the Settings tab, clicking the arrow button next to the initial layout. I personally prefer the Mosiac layout but there are many others including Picture Pile and Frame, etc.
The Page Format section offers you the choices for size. An important note: if you plan on printing your collage, you will need to be sure to select the same printing size you are planning on. If you are only planning on putting the collage on your blog, you will be able to re-size it on your blog any way you would like so the layout size is less of a concern.
You can also add Grid Spacing (you can see it there under the layout style). The Grid Spacing, (also known as adding gutters in digital scrapping) is a way to space the pictures with a colored border (usually white) and create a more uniform feel as seen below in the finished collage.
To change the actual arrangement of the photos, simply click and drag a photo to the place you want it to go. The photos will automatically change places. You can re-arrange the photos as many times as you would like until you are happy with the way it looks.
If you are finding that you simply aren’t happy with the way the photos are being arranged and/or sized, try selecting a different collage size and Picasa will automatically re-format your collage for you.
If you would like to add additional pictures, simply click the Clips tab (next to the settings tab). This will allow you to go back to the library and select more photos/images you want to use. Once they are highlighted in blue simply click the green plus sign and they will be added to you collage. Remember, you can add several at once by holding down the the Ctrl key.
You can see here I added one of the scrapbook pages from our Christmas kit. I will be adding text on top of it in just a sec:

When you are happy with the way it looks, simply click the “Create Collage” button in the lower left hand side of the screen.
Step 4: Adding Text or other Edits:

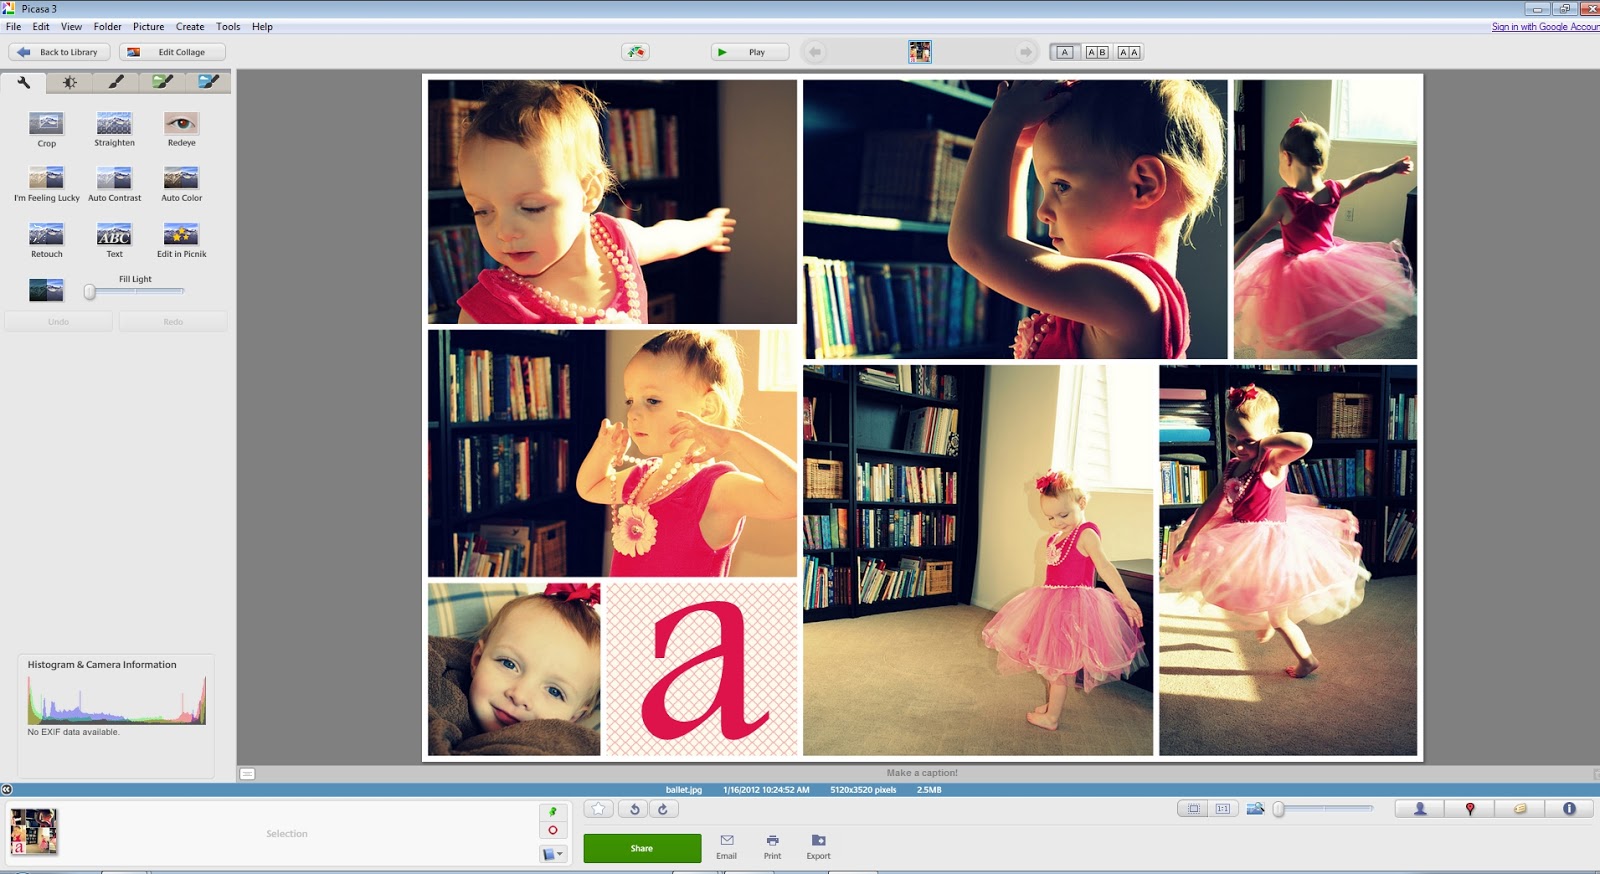
The collage is now added to my Picasa library and I can add text and make any other changes I want to. On the Wrench tab (basic edits tab) I click the Add Text button. There you can choose your font, the size and color you want the text as well as where you want to place it. In this example I’m choosing an initial so I want it to be especially big (bigger than the font default sizes). Click on the text until you get the circle around the text and then pull on the orange button to scale it to your desired size.
Step 5: Ta Da! The collage is now finished!! Now simply go the File drop down menu and select Save As to save the collage in the place that is the easiest for you to find. I prefer my desktop until I blog it and then I save it in my collage folder.
We hope you enjoyed this tutorial and find making collages a wonderful way to beautify your blog posts! 🙂


Letopho–
Try dragging the photo you want to move to the location you want it on. It should automatically move to the new location!
I have been using Picasa for over an year, but never used this option. I will have to go try it now. Thanks for getting me started, this will come in handy.
Compared to some iPhone photo collaging apps, the Picasa tool is still very limited. What if I want a 8×10 collage dimension but want to change the actual layout of my photo. For example, I want to the long vertical position on the left side. You’d have to keep pressing “Shuffle pictures” to do this. What I want the left picture to be a little wider? You can’t adjust the dimensions of the photos within the collage nor can you change how zoomed or which part of the photo is being shown.
Are there any tips to resolve this? I want Picasa to be my one stop shop!
-Letopho
Thanks so much for this tutorial! I’m new to the blogging world, so this helped me a lot!!
Welcome
Thank you sooooo much! I’ve been trying to figure this out for a while. Duh…it’s so easy!
Thanx for the tute! I was feeling a little loss after being informed that my photo editting
site will be closing (picnic). Good to know other good ones exist!!!!
Thank you! I use Picasa and have used the collage but I never thought of using the scrapbook paper as a tile. So smart!
I was seriously bummed about Picnik no longer be available at all and then when they took away the photo collage options all together I couldn’t believe it. I was using them for my blog photos on an almost daily basis. I’m so glad that you posted this article b/c hunting for a new photo collage service was on my to-do list!
i can’t wait to try it! and Smitten Blog Designs did my blog makeover…I could not have been happier with the results or the process…so fun and easy to work with 🙂 Thank you!
I use Picasa, and I love making collages with it! It’s super easy to use! Good post!
Thank you for the great tutorial!!! I so needed this!
Been wondering what I am going to use once Picnik is gone in April.
Thanks for the tutorial. I am pinning it.
Thank you so much for the tutorial. I have used collage but learned a few new tips. Thanks
Great tutorial. I have a bunch of albums in picasa and would love to make a few collages for gifts. Many Thanks 🙂