A corn heating pad is one of my all-time favorite gifts that I have received. This heating pad is a great muscle pain soother, back relaxer, or anything that a little warmth will give a bit of pain relief. The best part is it can be used hot or cold.

CORN HEATING PAD
We call it the Crunchy Little Corn Bag! My mom received one back when I was in high school,
and we were always fighting over it. When I was student teaching, one of my darling students gave me one for Christmas. And here it is – almost 10 years later – my beloved corn bag!

They can be made in all sizes for all purposes. These corn-filled bags are perfect for sore muscles, neck pain, cramp soothers, and hand warmers, and they are also a bed warmer. The possibilities are endless.

WHY USE CORN INSTEAD OF RICE OR BEANS?
Corn stays cleanest the longest, won’t have problems with humidity, mold, mildew, and generally won’t provoke allergies.
CORN HEATING PAD SUPPLIES
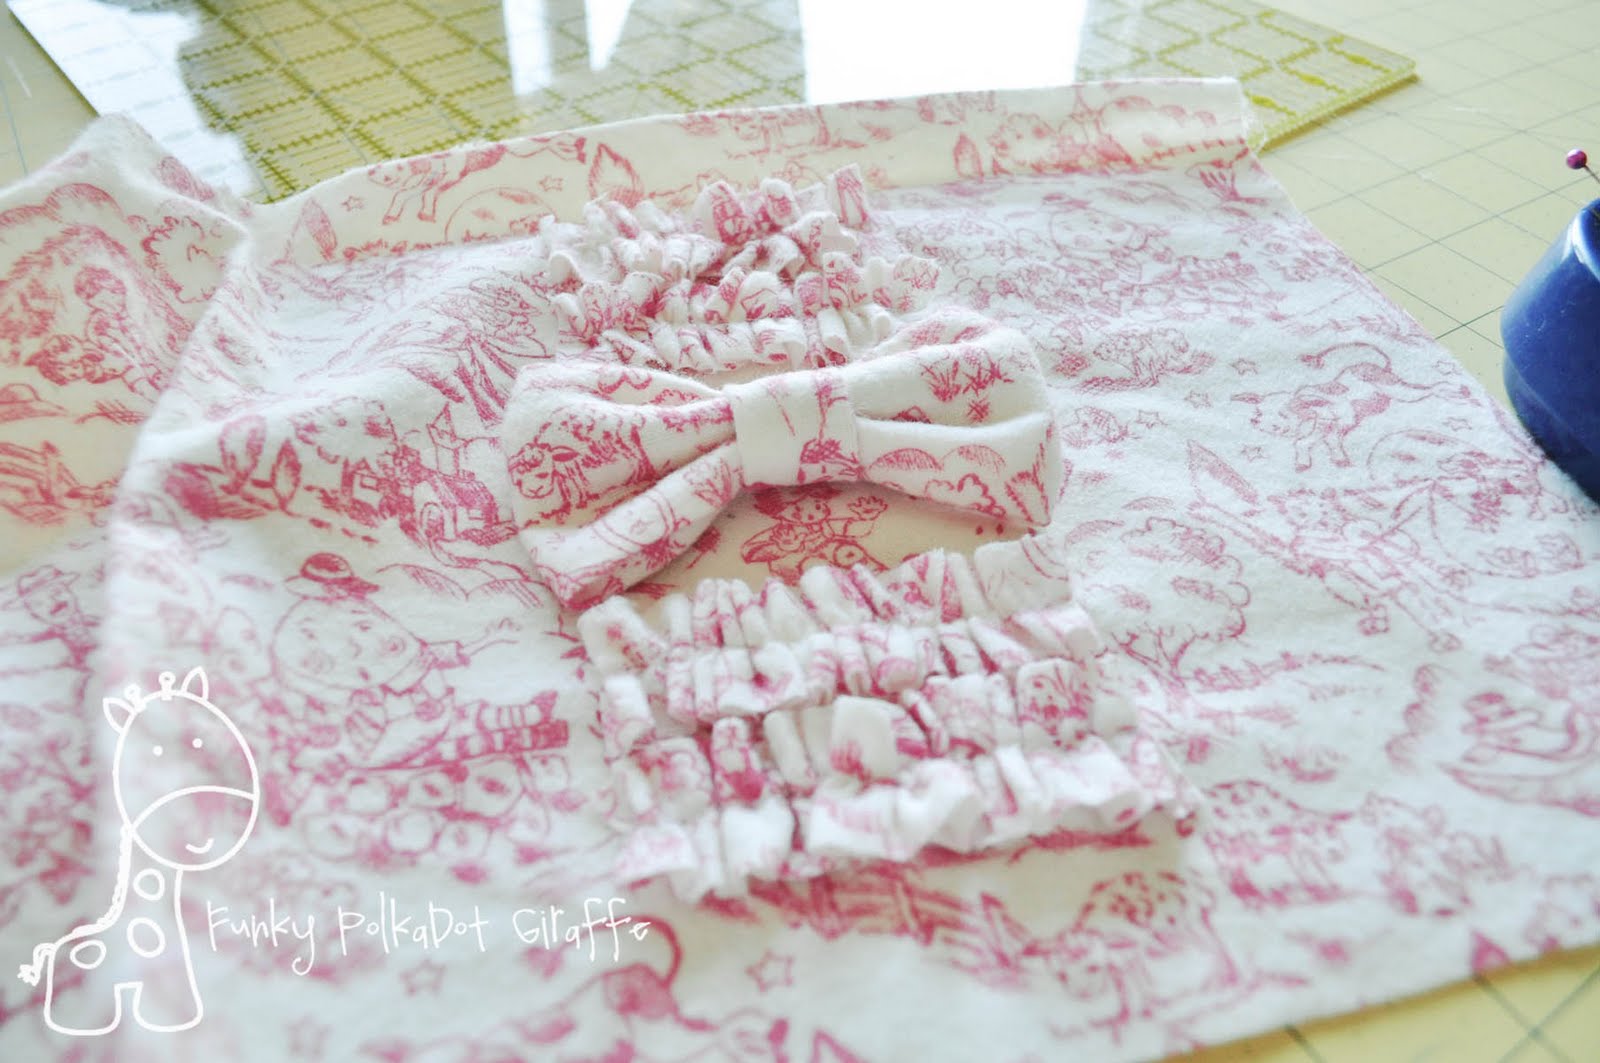
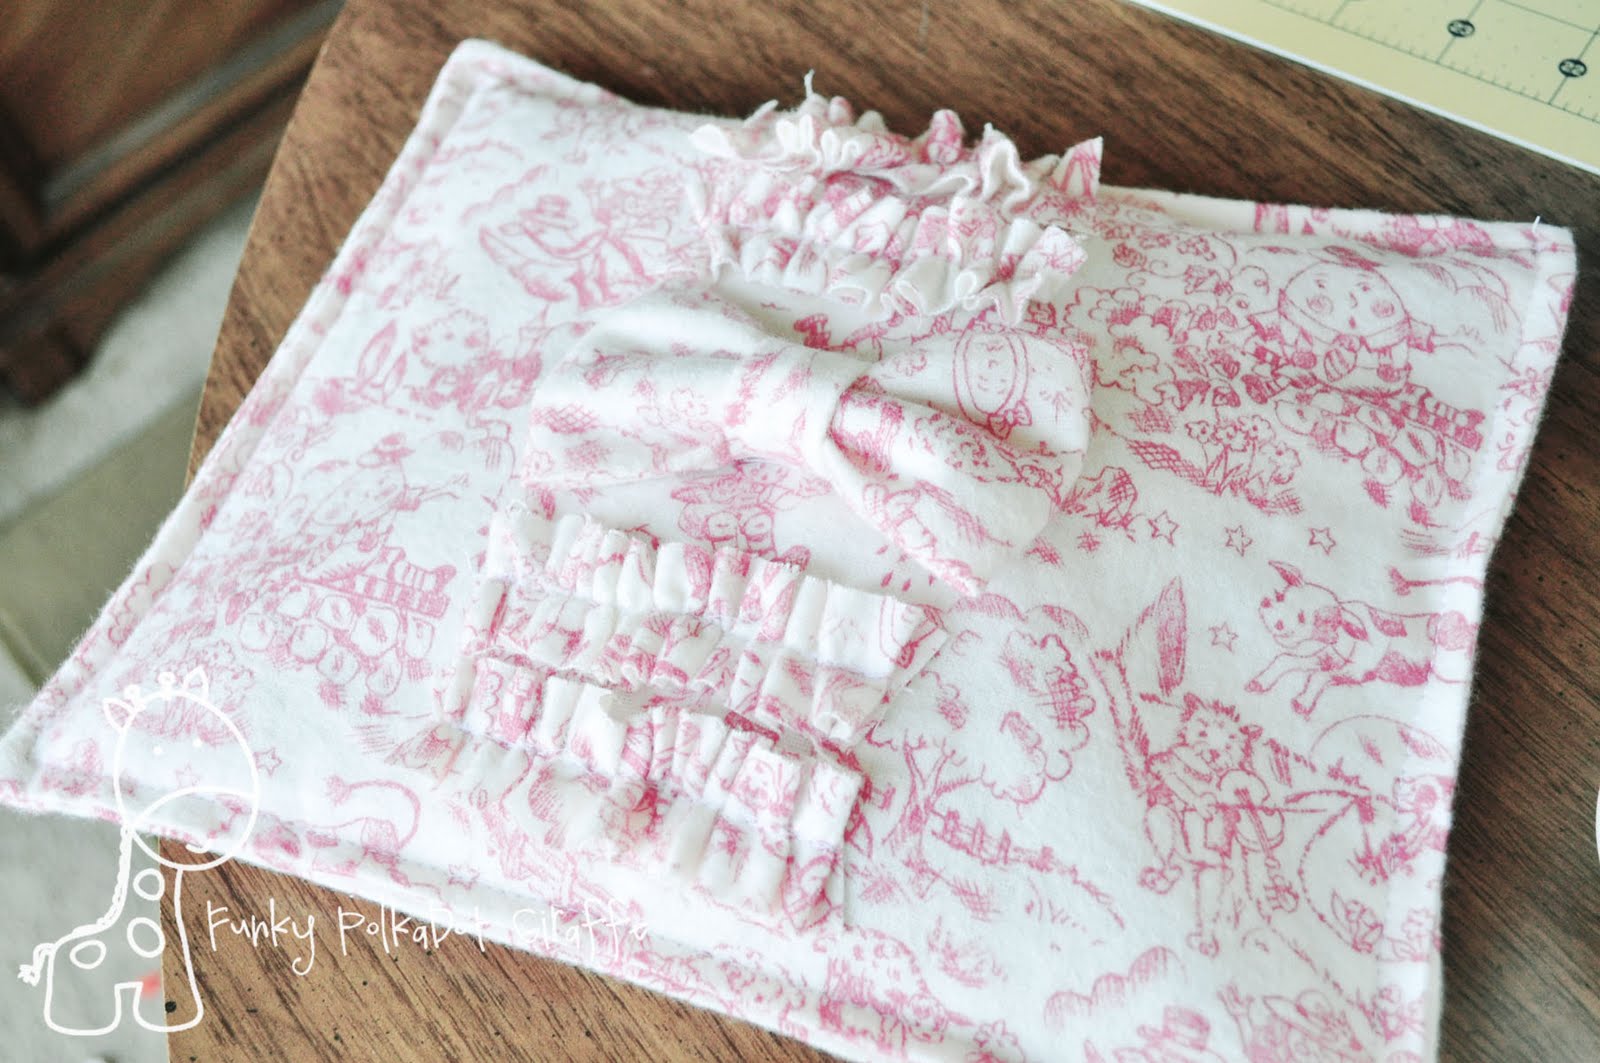
We’re not just making your run of the mill crunchy little corn bag, we’re making an AWESOMEFIED crunchy little corn bag with ruffles. Here is what you need:
Flannel or cotton fabric, cut into the following sizes:
- 9×11″ (for the bag)
- 8×5″ (for the bow tie)
- 2×5″ (for the bow tie)
- 4 pieces of 1×5″ (for the ruffles)
- dried corn (see note about using field corn)
- scissors
- sewing machine
- thread

How to Make a Corn Filled Heating Pad
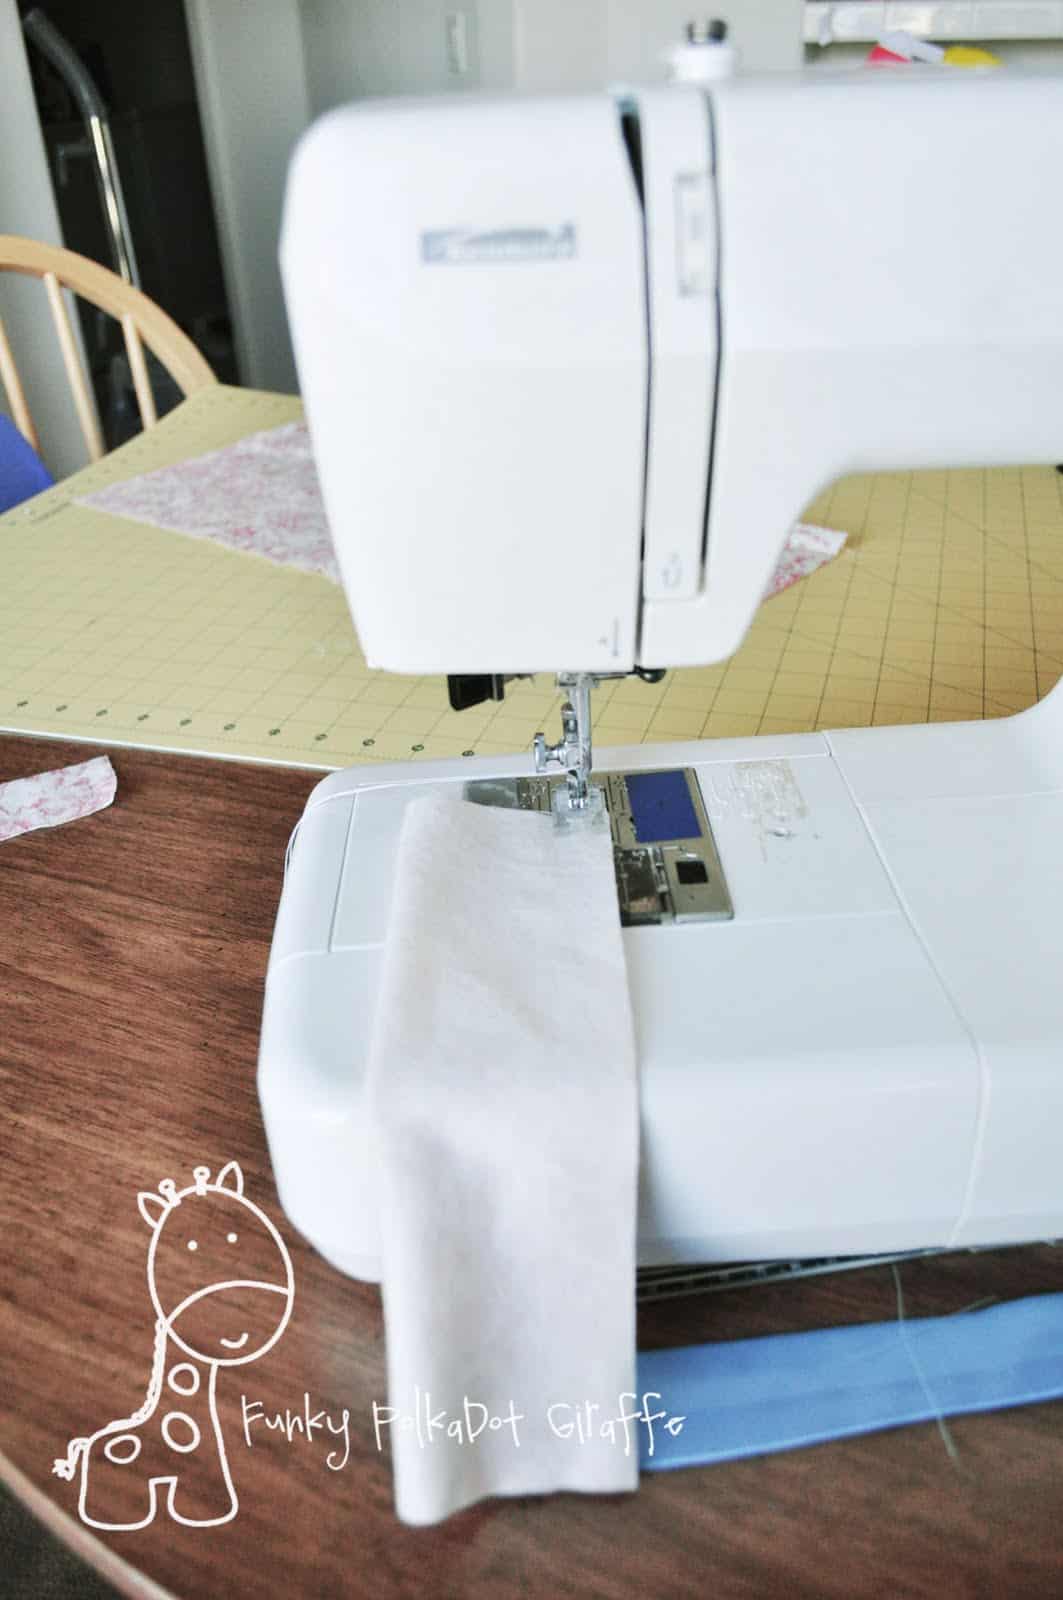
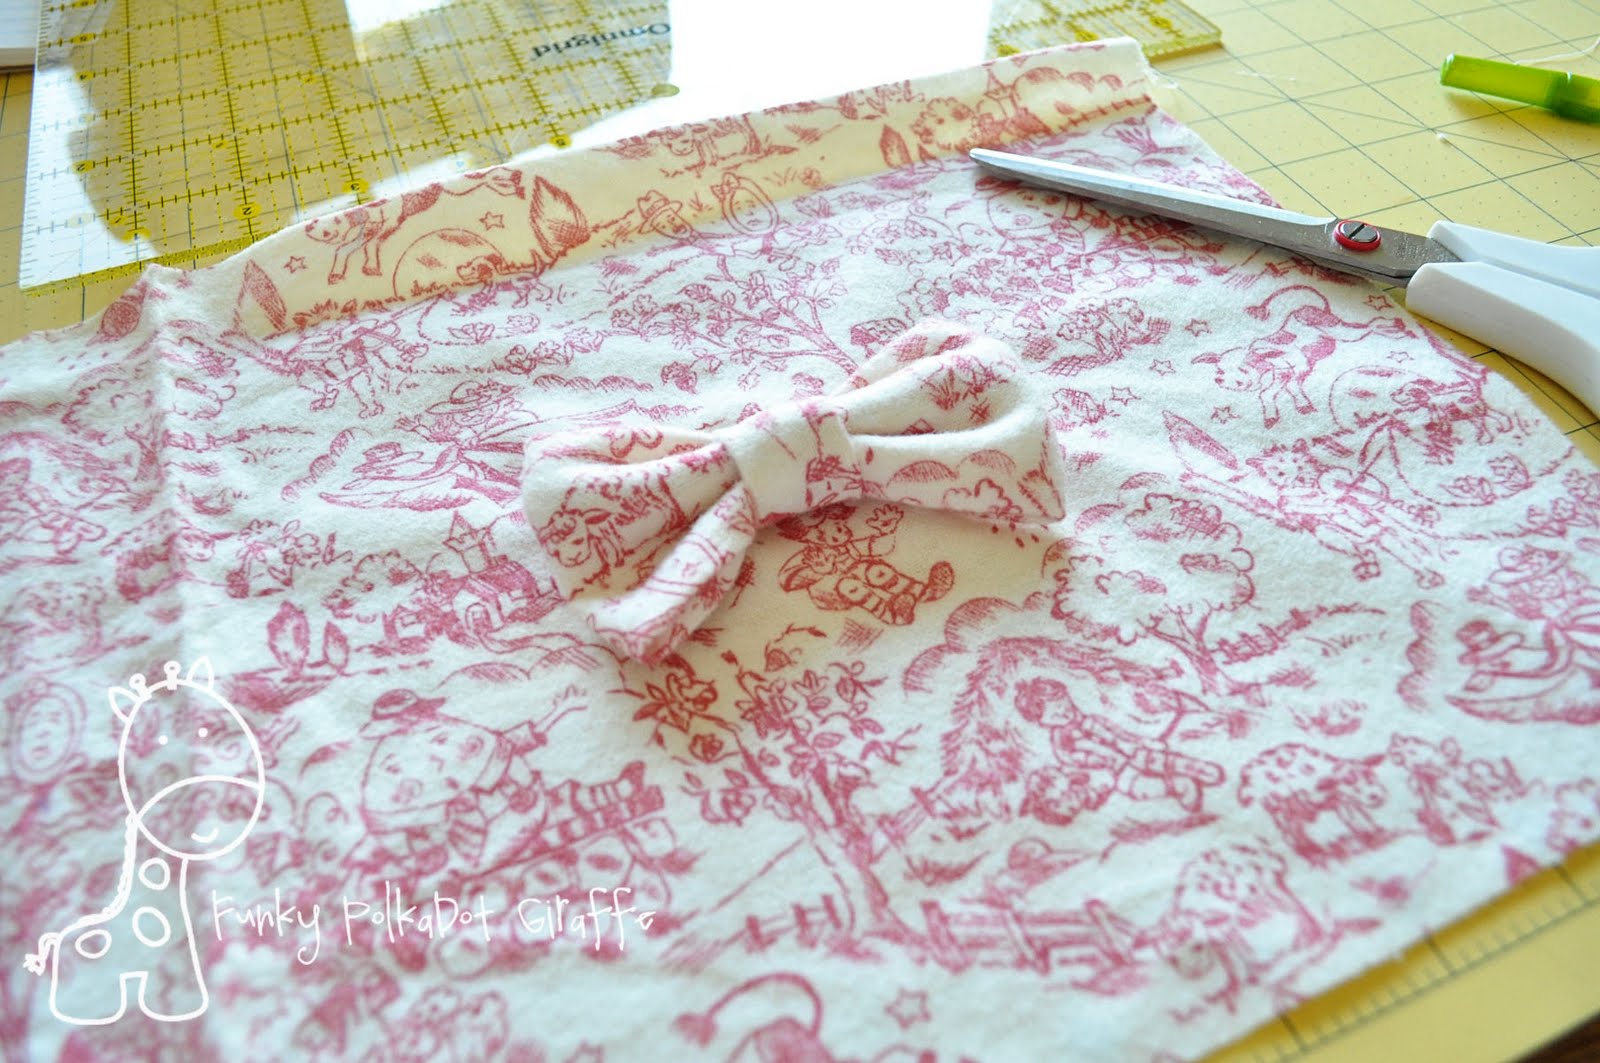
- Take your 8×5″ piece and sew it right sides together with a 1/4″ seam.
- Take your 2×5″ piece and sew it wrong sides together with a 1/4″ seam.

- Turn your 8×5″ with right sides out and press both the 8×5″ piece and the 2×5″ piece with the seam in the middle.

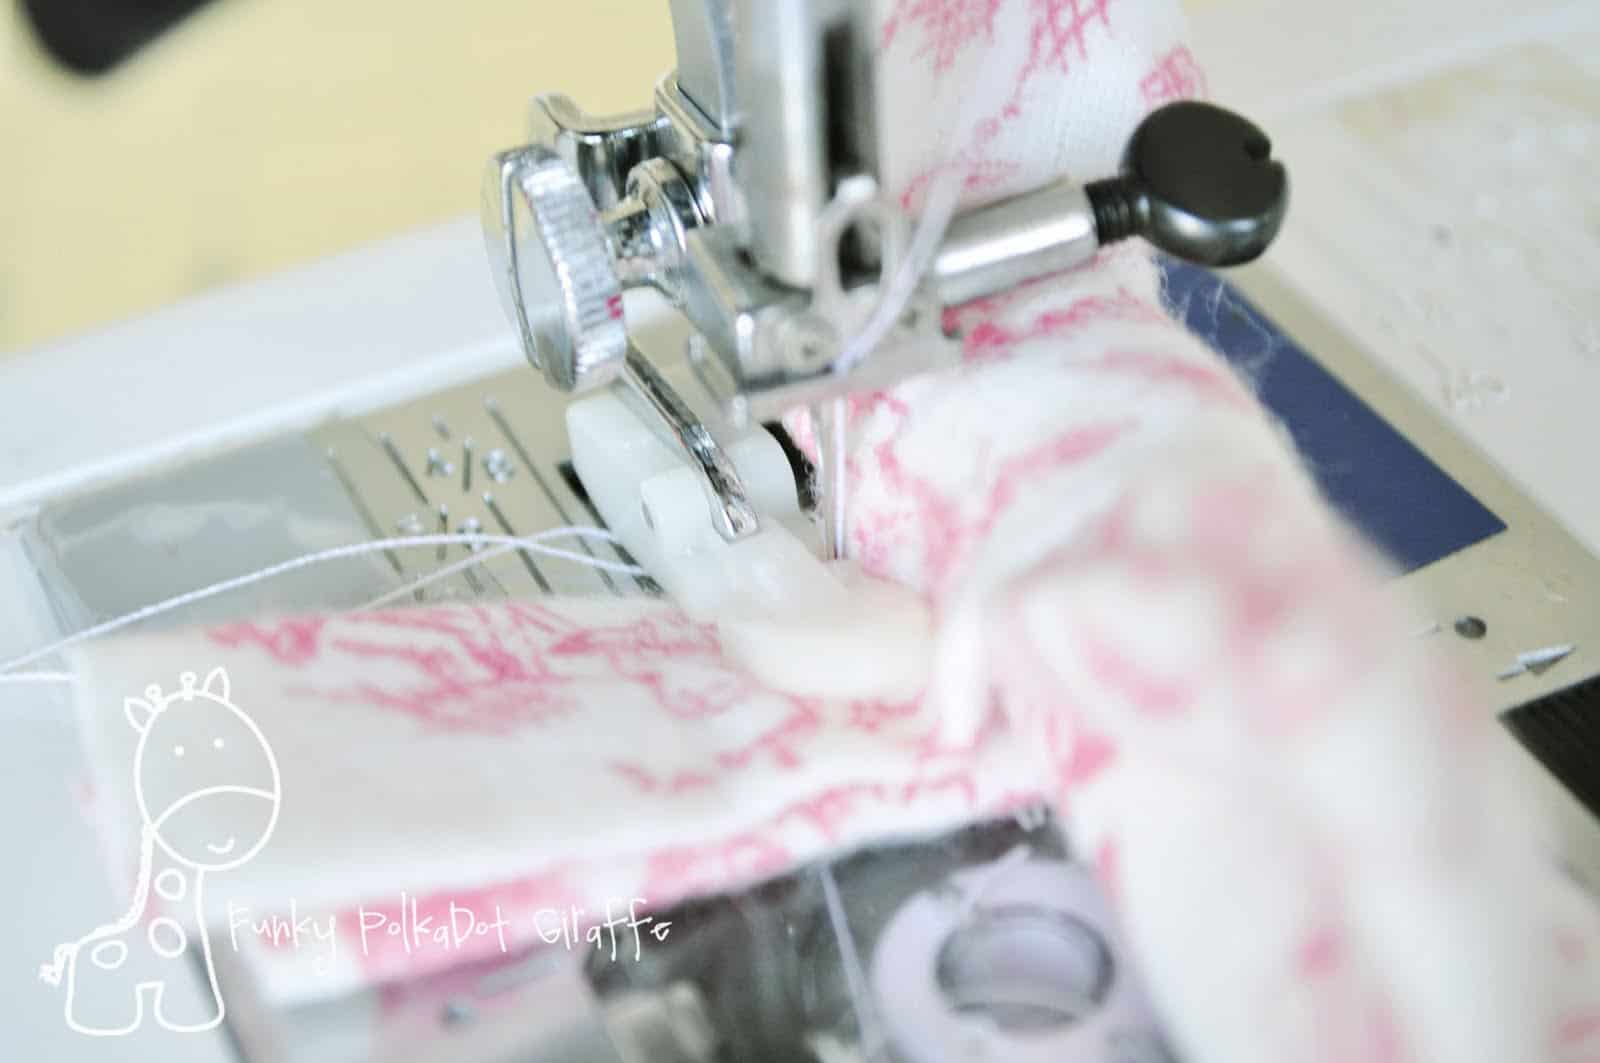
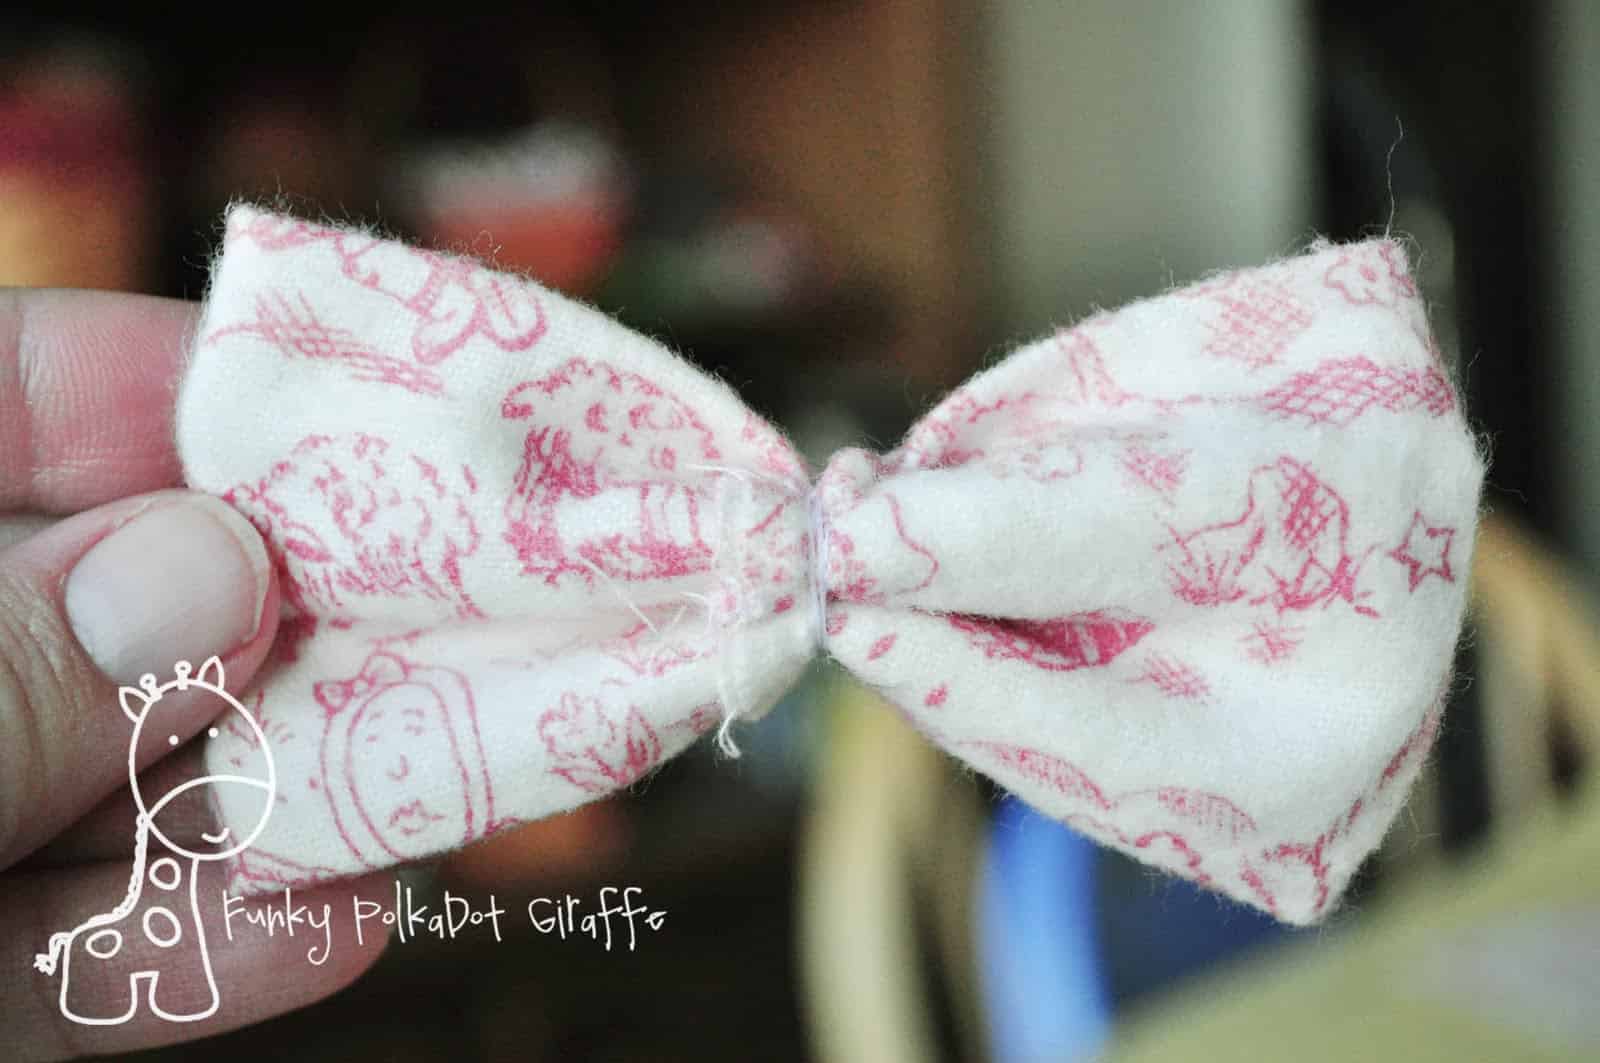
- To make the bow fold the 8×5″, fold the raw edges over to meet in the middle, and sew down the middle.
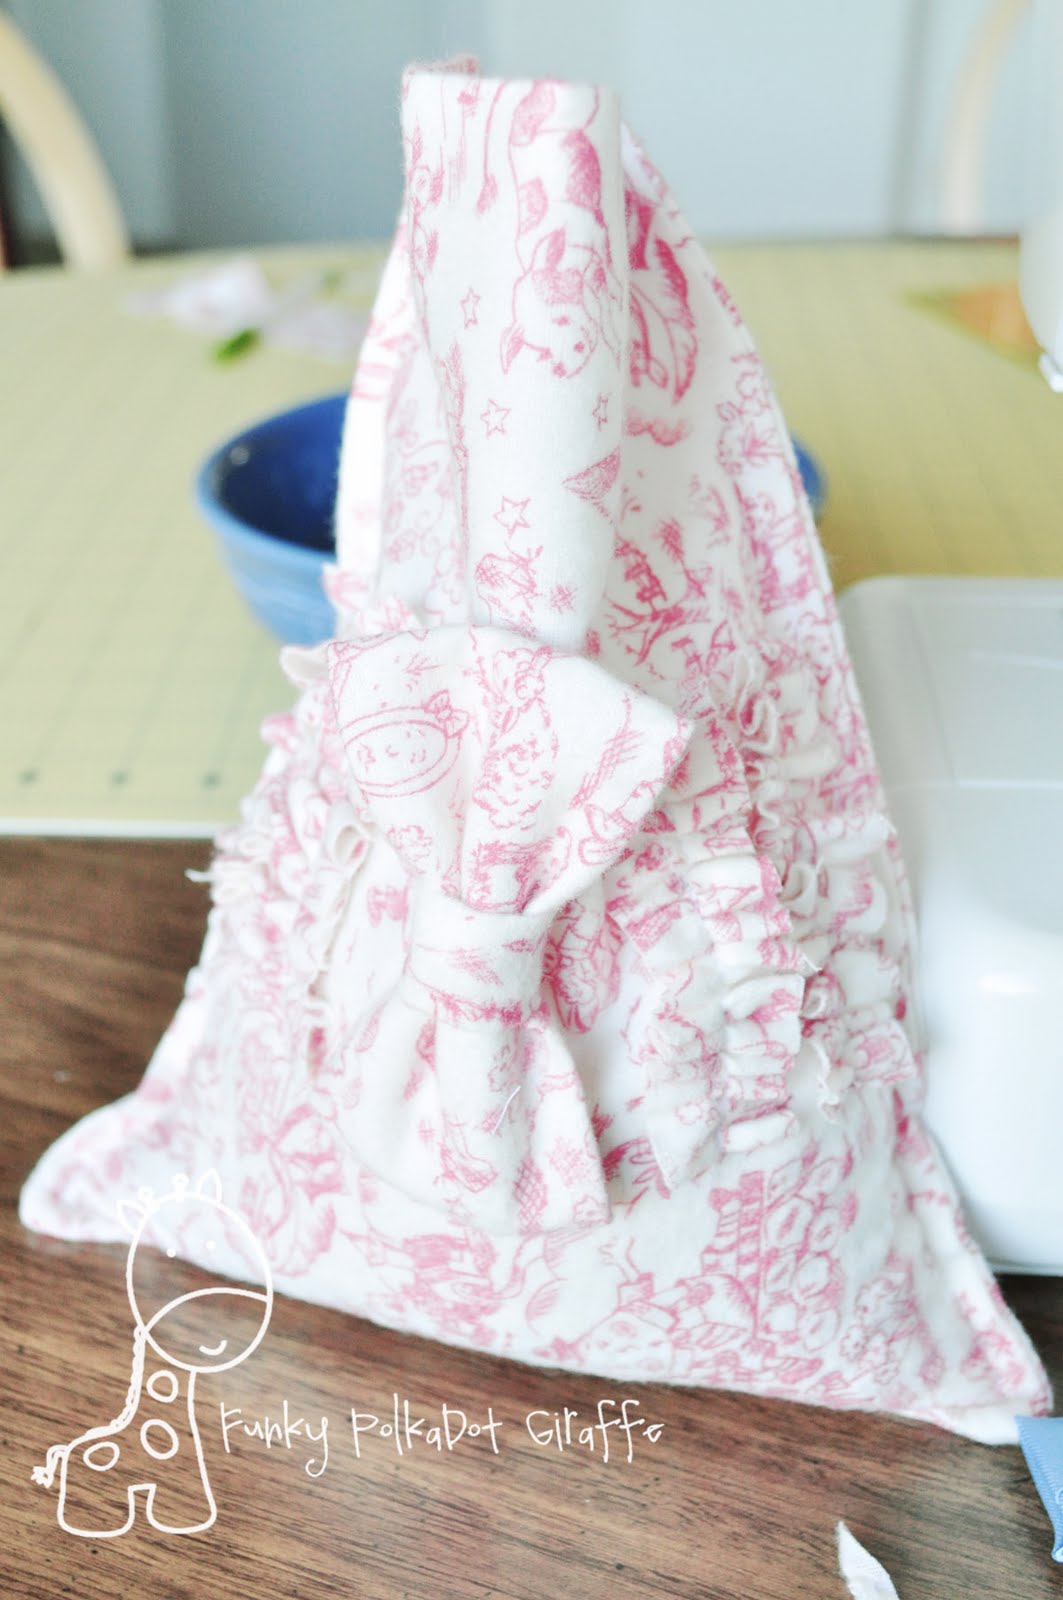
- Bunch it up to look like a bow tie and then hand sew it together.
So it looks like this! - Wrap your 2×5″ piece around your bow tie, and secure with your sewing machine or hand sew. Clip off the excess.
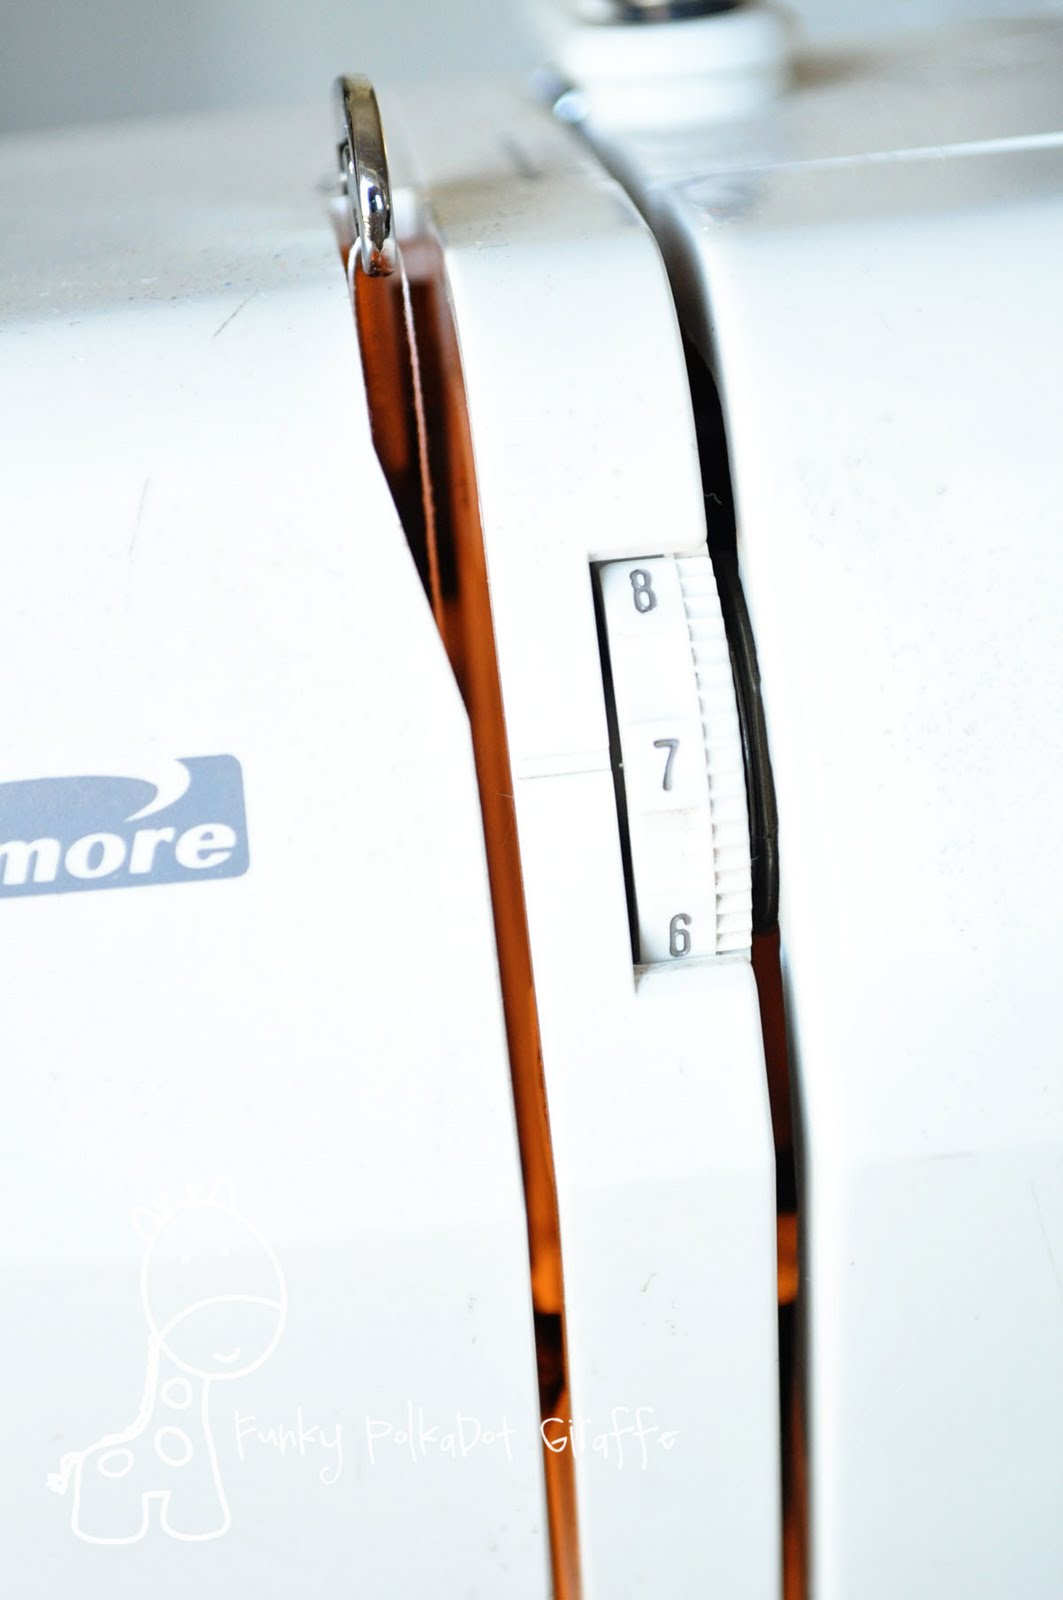
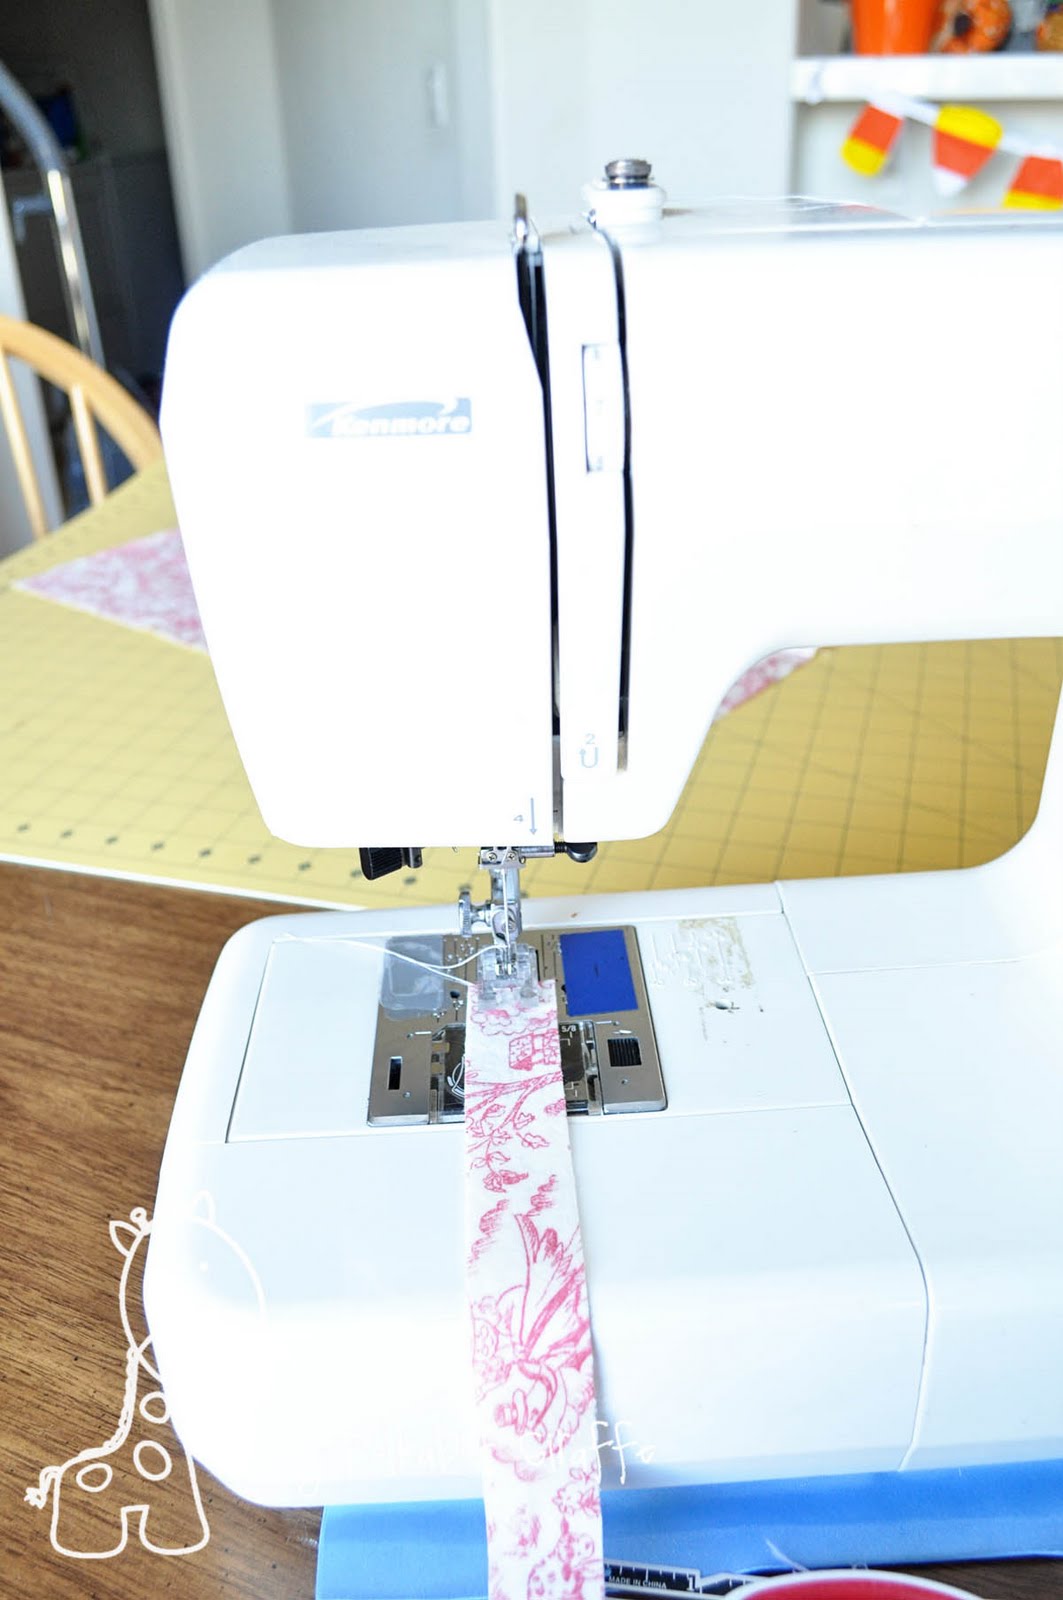
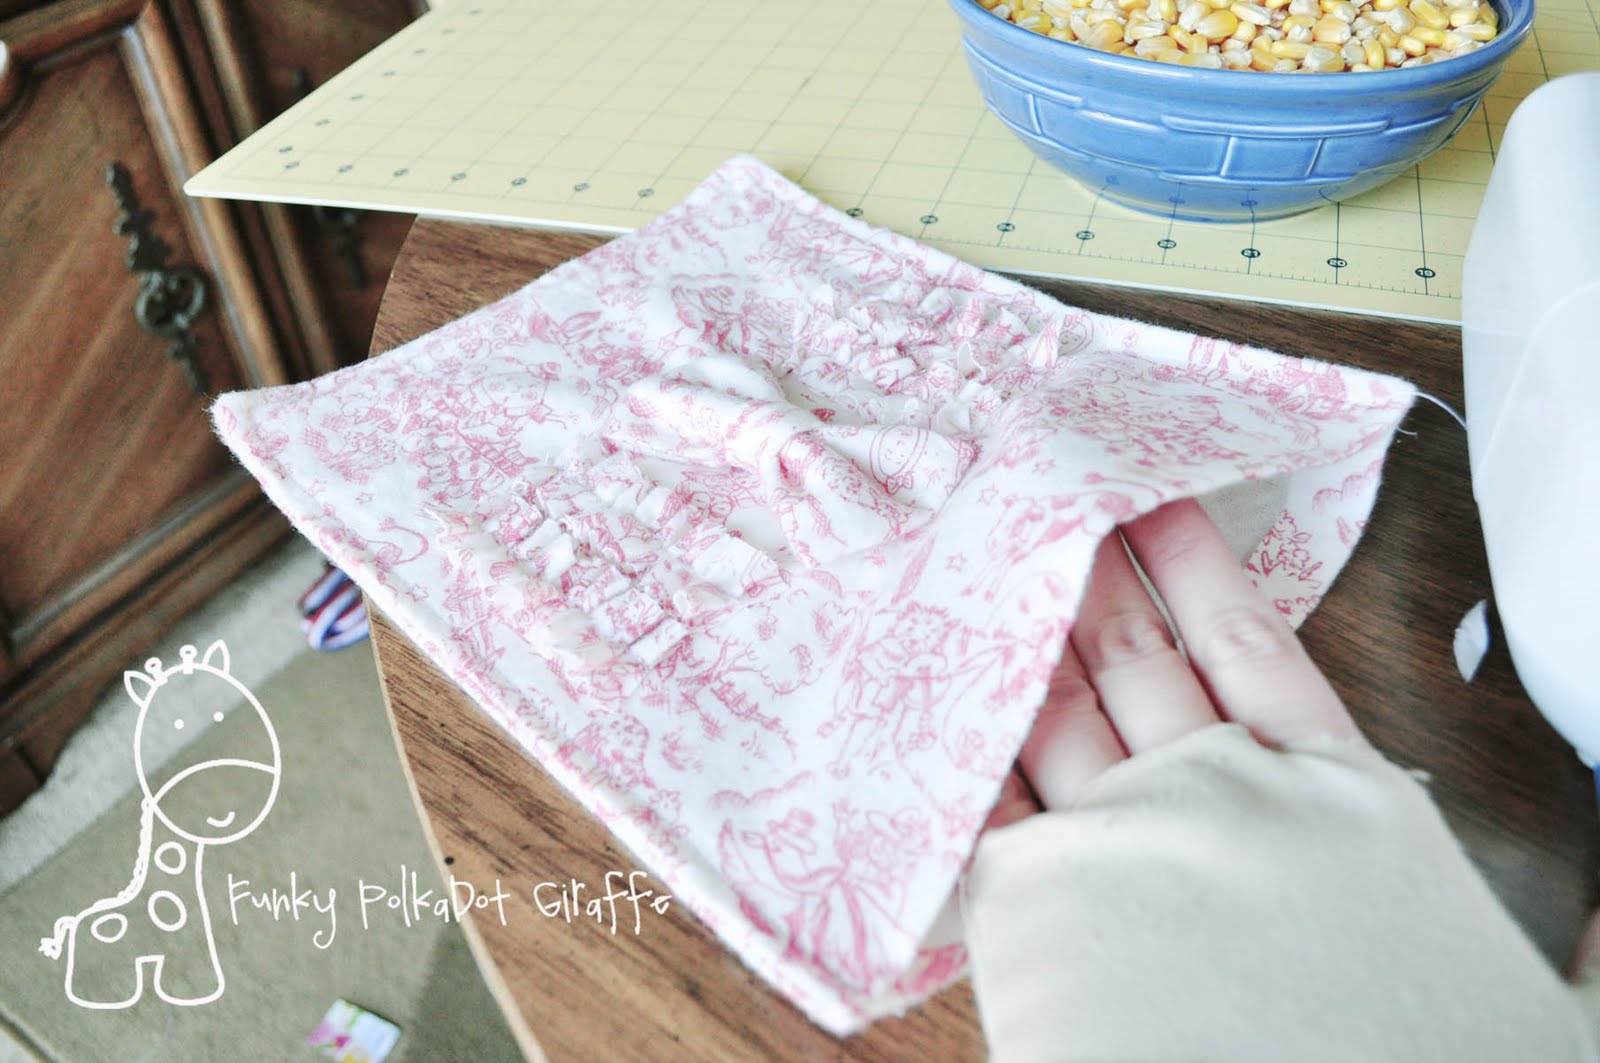
- Onto the ruffles. I’m a ruffle cheater. I set my tension high with a long stitch and let my machine do most of the work.


Step Six:
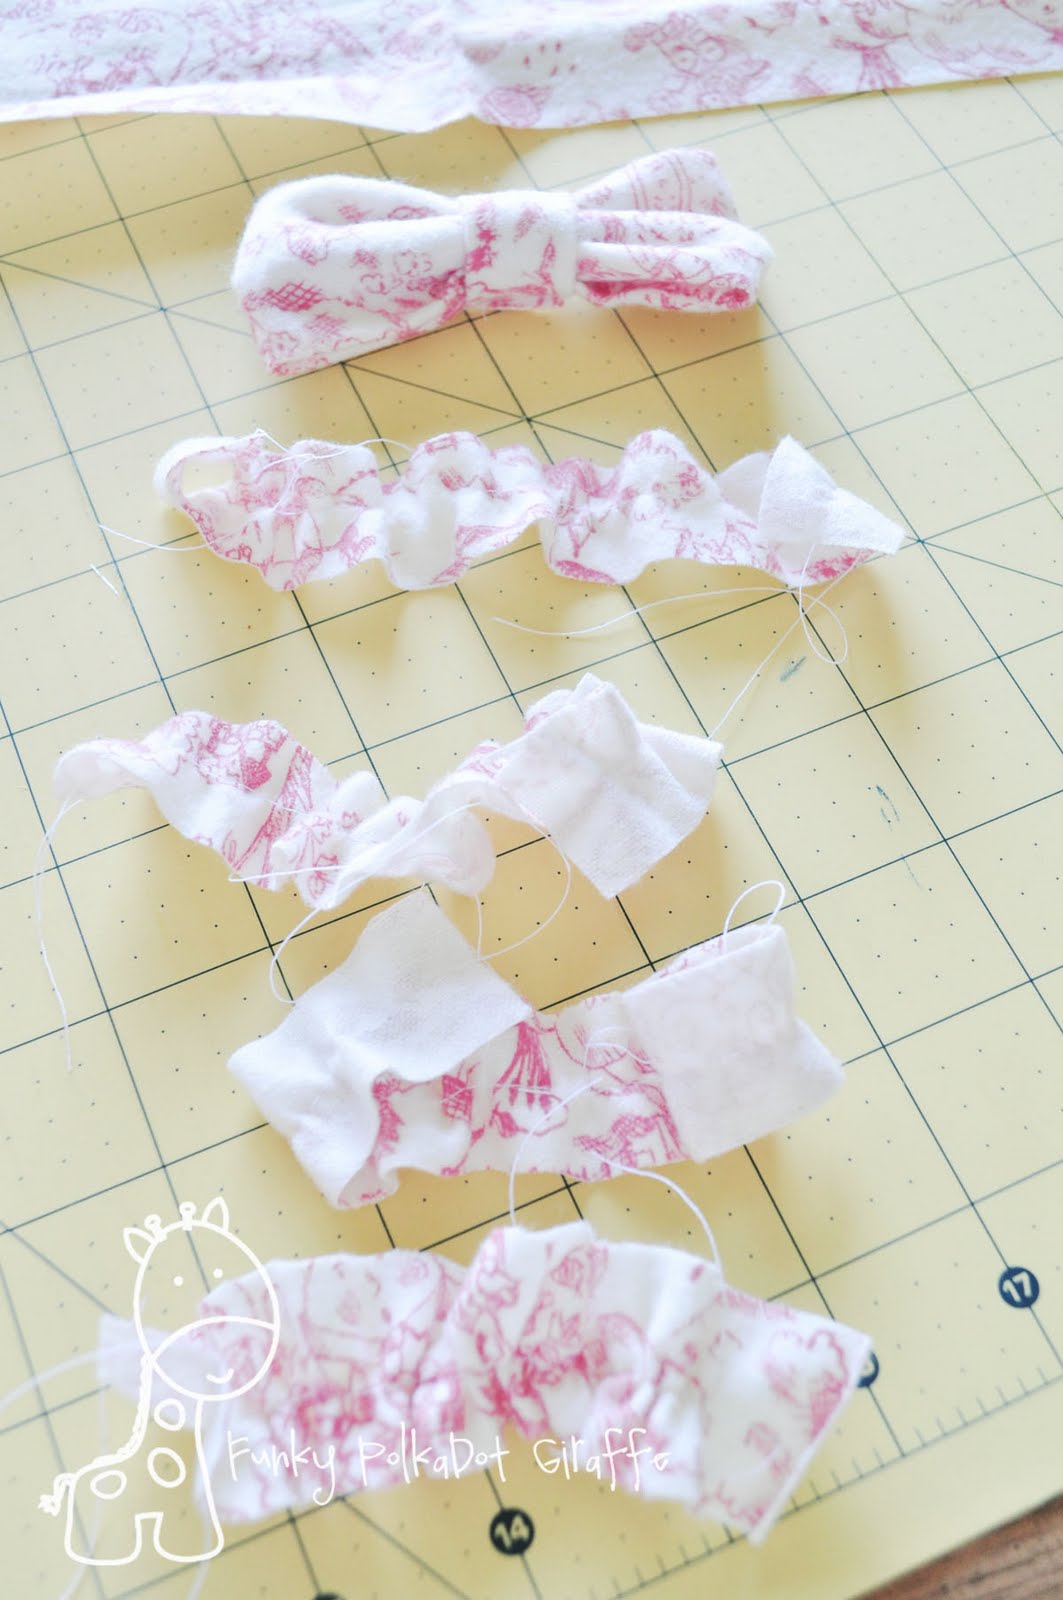
With whatever ruffle method you prefer – be it sewing a long basting stitch and pulling just the top thread to gather, or cheating and letting your machine do the work – ruffle/gather your four pieces of 1×5″ flannel.
So then you’ll have a pretty pile like this!
Step Seven:
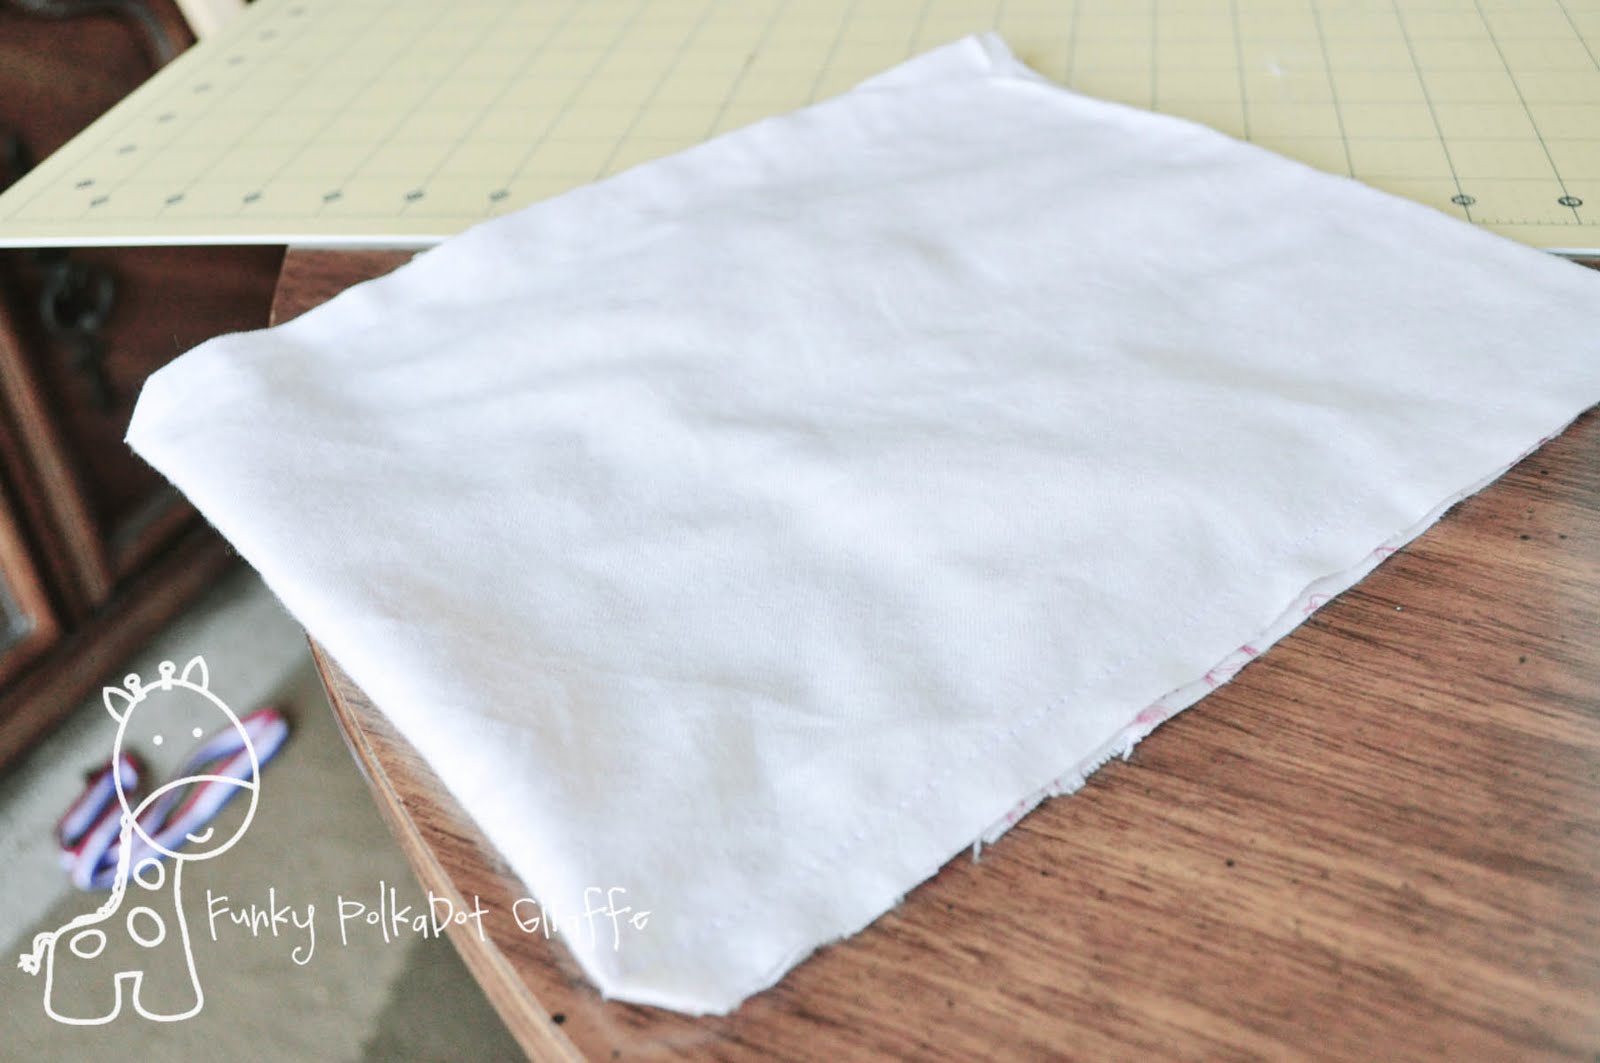
Lay your piece of 9×22 flannel out
and find the middle of HALF of it (9×11) – allowing for seam allowances.
I figured it would be about 4×5″ mark if I used 1/2″ seams.
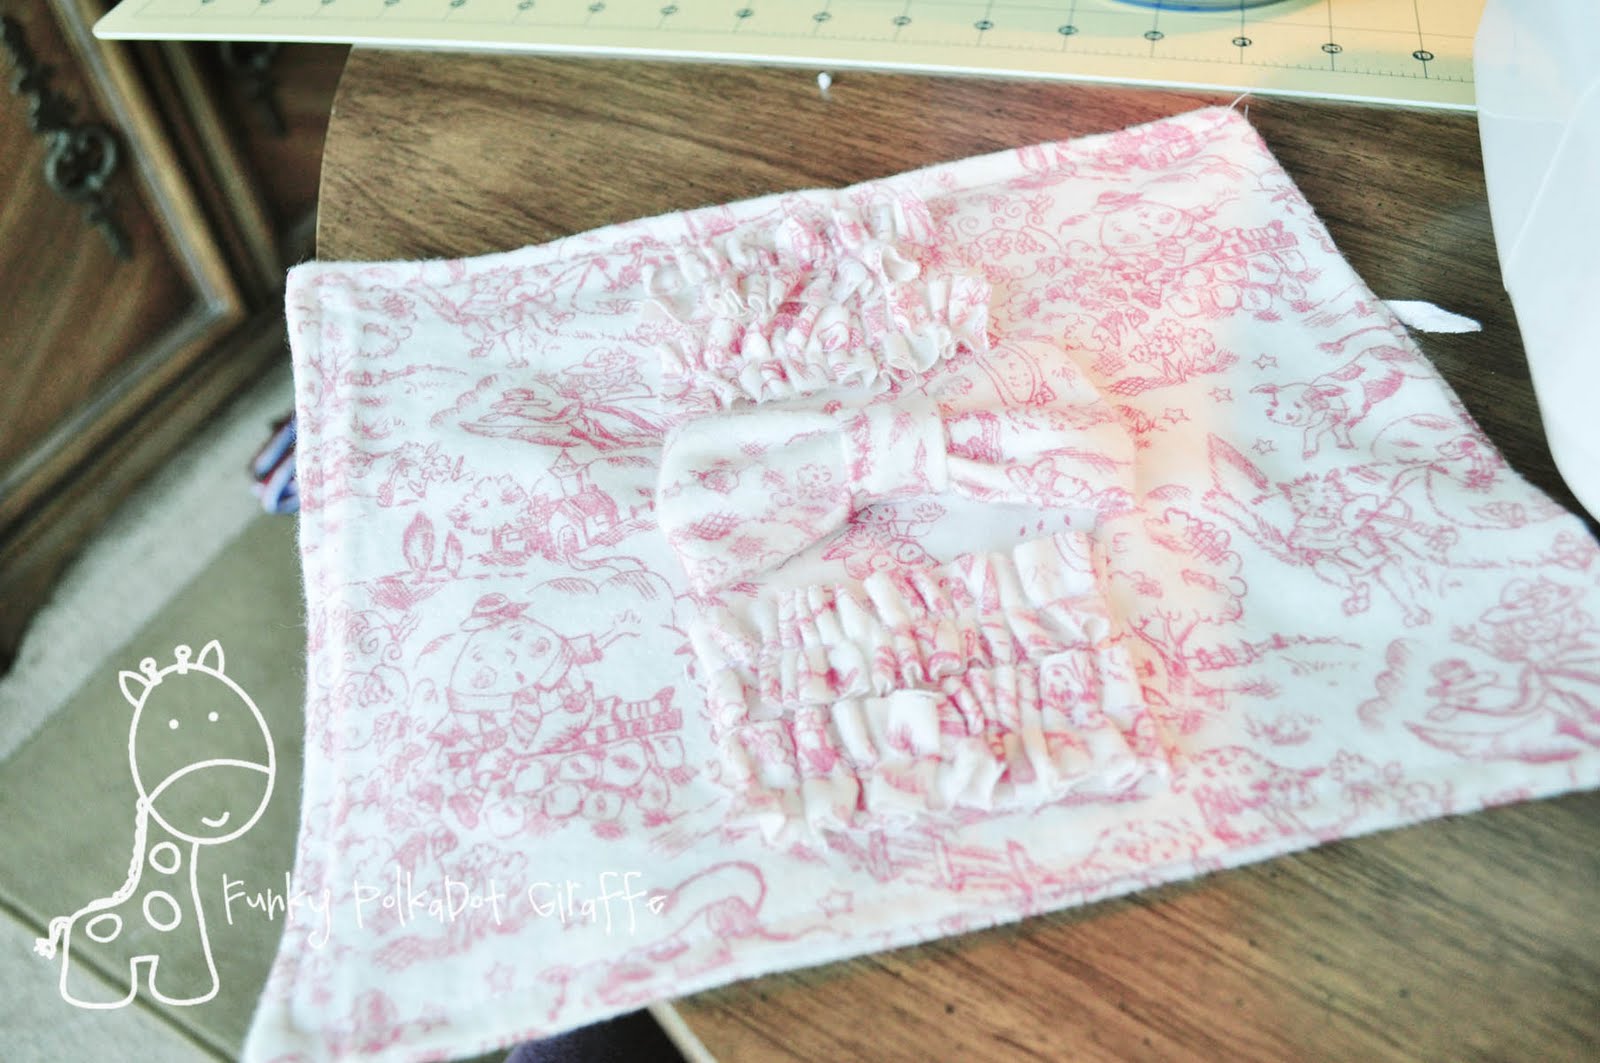
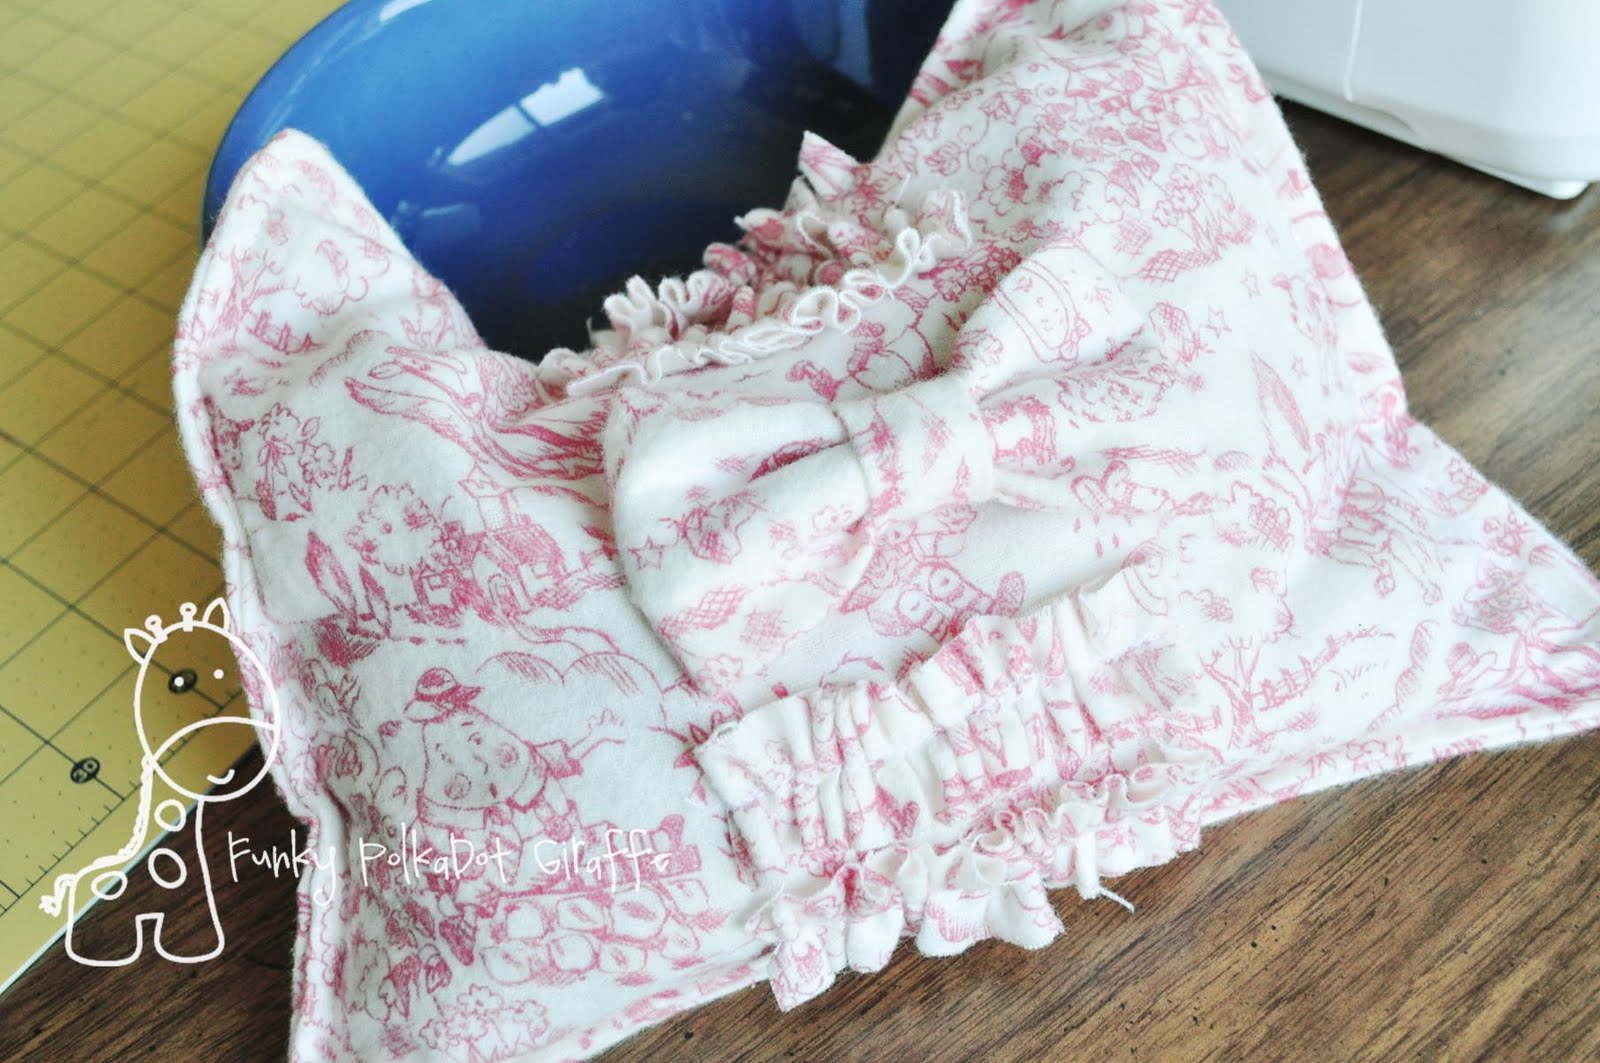
Lay the middle of the bow tie on your middle mark.
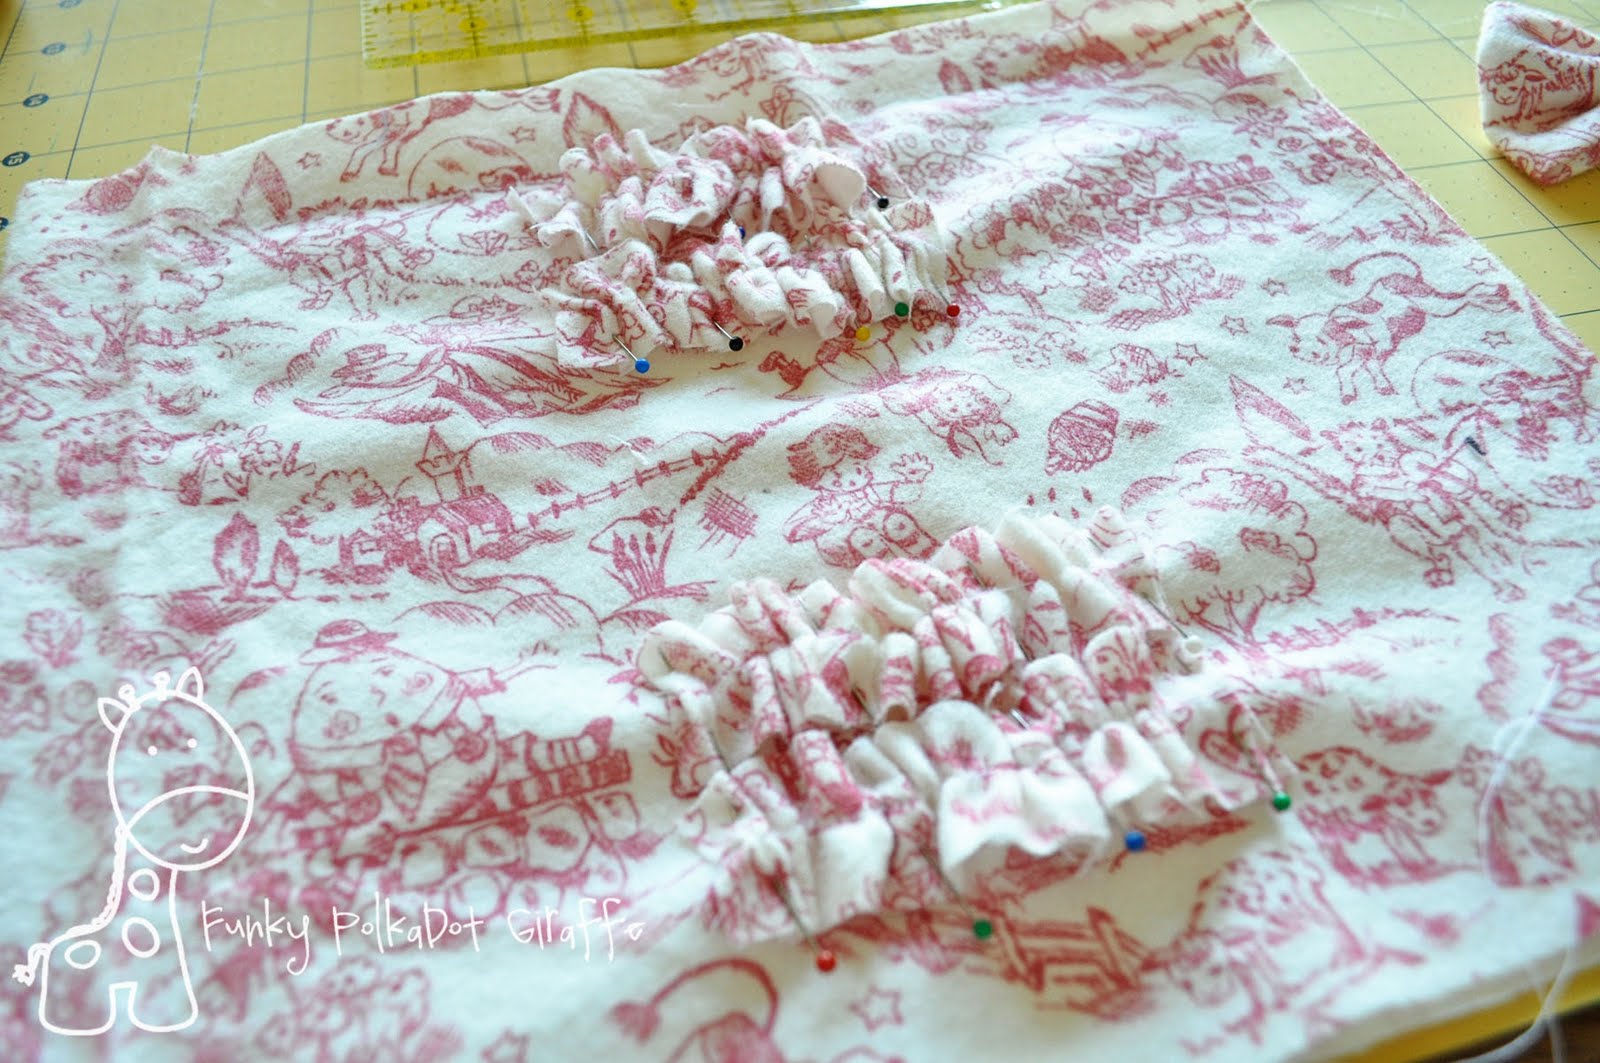
 Step Eight:
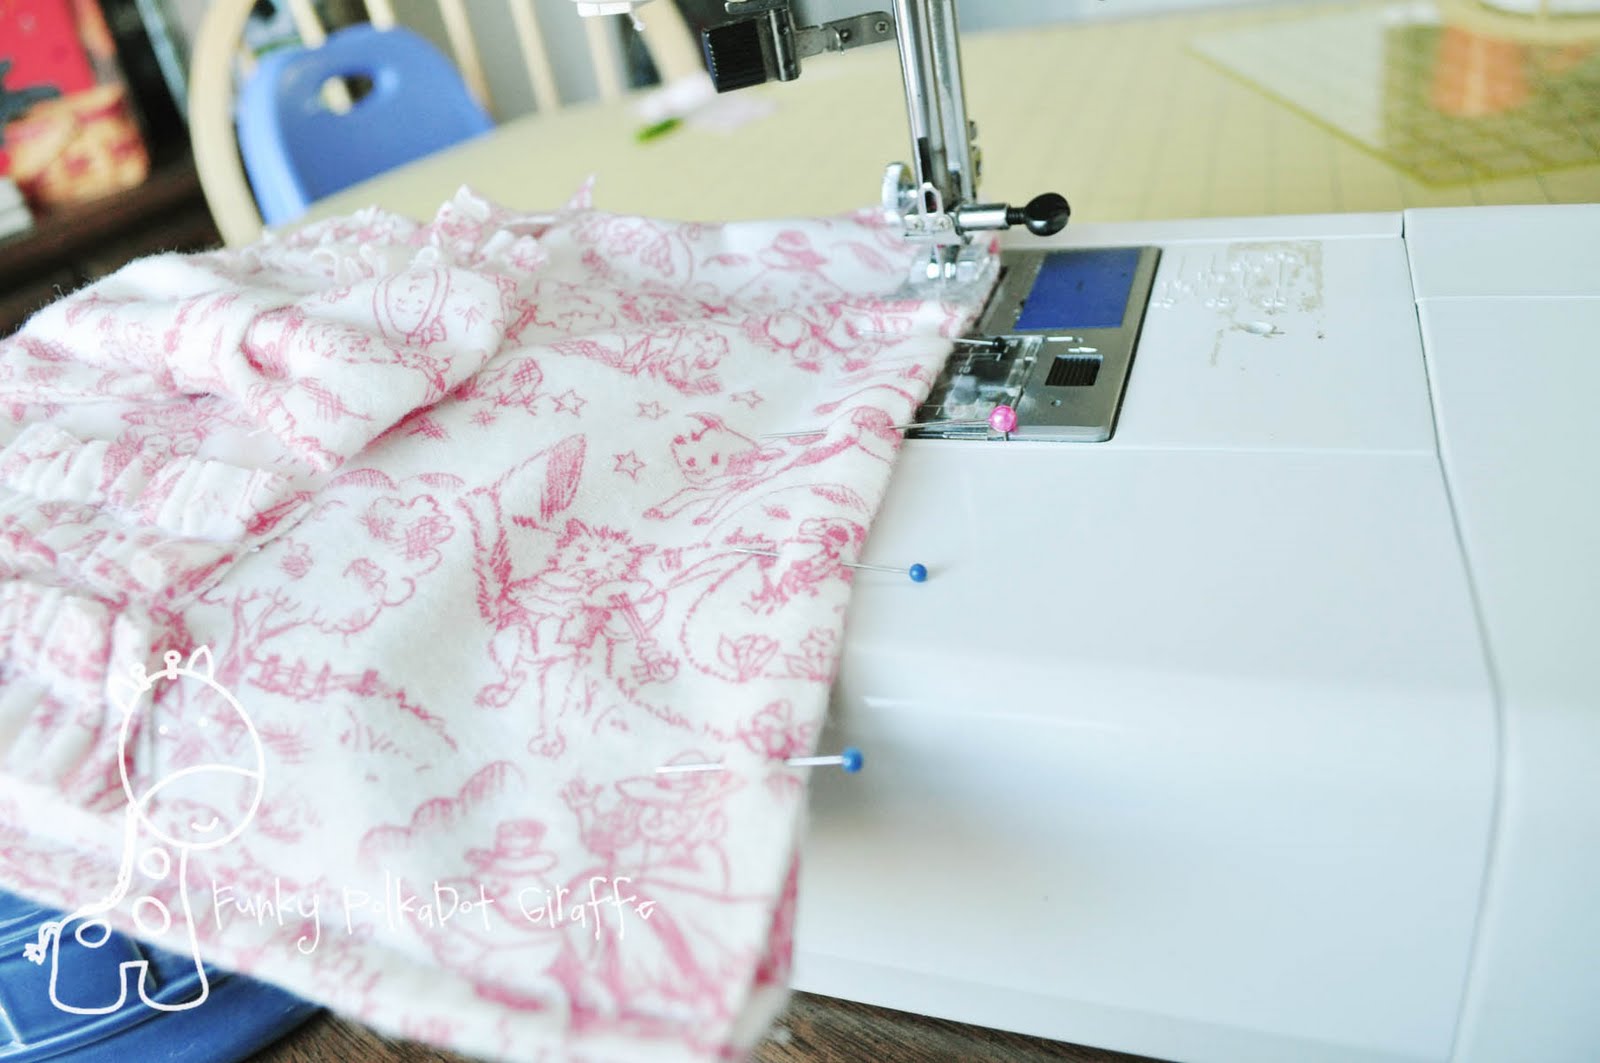
Arrange your ruffles where you want them, and pin them down. I played with a few configurations (a frame, one ruffle on top & three on bottom), but I settled on two ruffles on top of the bow tie and two below.
Step Nine:
Sew down the middle of ruffles with a regular length stitch. I’m reminding you to switch back both your tension and length because I always forget and then I’m silently cursing myself for forgetting.
Step Ten:
Take you 9×22″ piece and sew right sides together with a 1/2″ seam
on 3 sides, leaving one side open.
(in my picture, I only sewed down the 2 long sides, but went back and did the bottom,
because I realized it would throw off my seam allowance figures for the ruffle/bow tie placement)
Step Eleven:
Clip your corners.
Step Twelve:
Turn right sides out.
It should look like this!
Step Thirteen:
Top stitch around the 3 closed sides to give it a finished look.
Step Fourteen:
Fill with 3 ½ to 4 cups (about 2 pounds) with corn. You can find field corn by the pound where bird food is sold – it is whole kernel corn. Use whole corn, not cracked corn.
Or you can go to the local feed store and buy a 50lb bag of recleaned corn like I did 🙂
If you’re making a lot of them, it’s a great idea. It’s usually $13-15 for a 50lb bag.
And no, you can’t just use popping corn. . . LOL
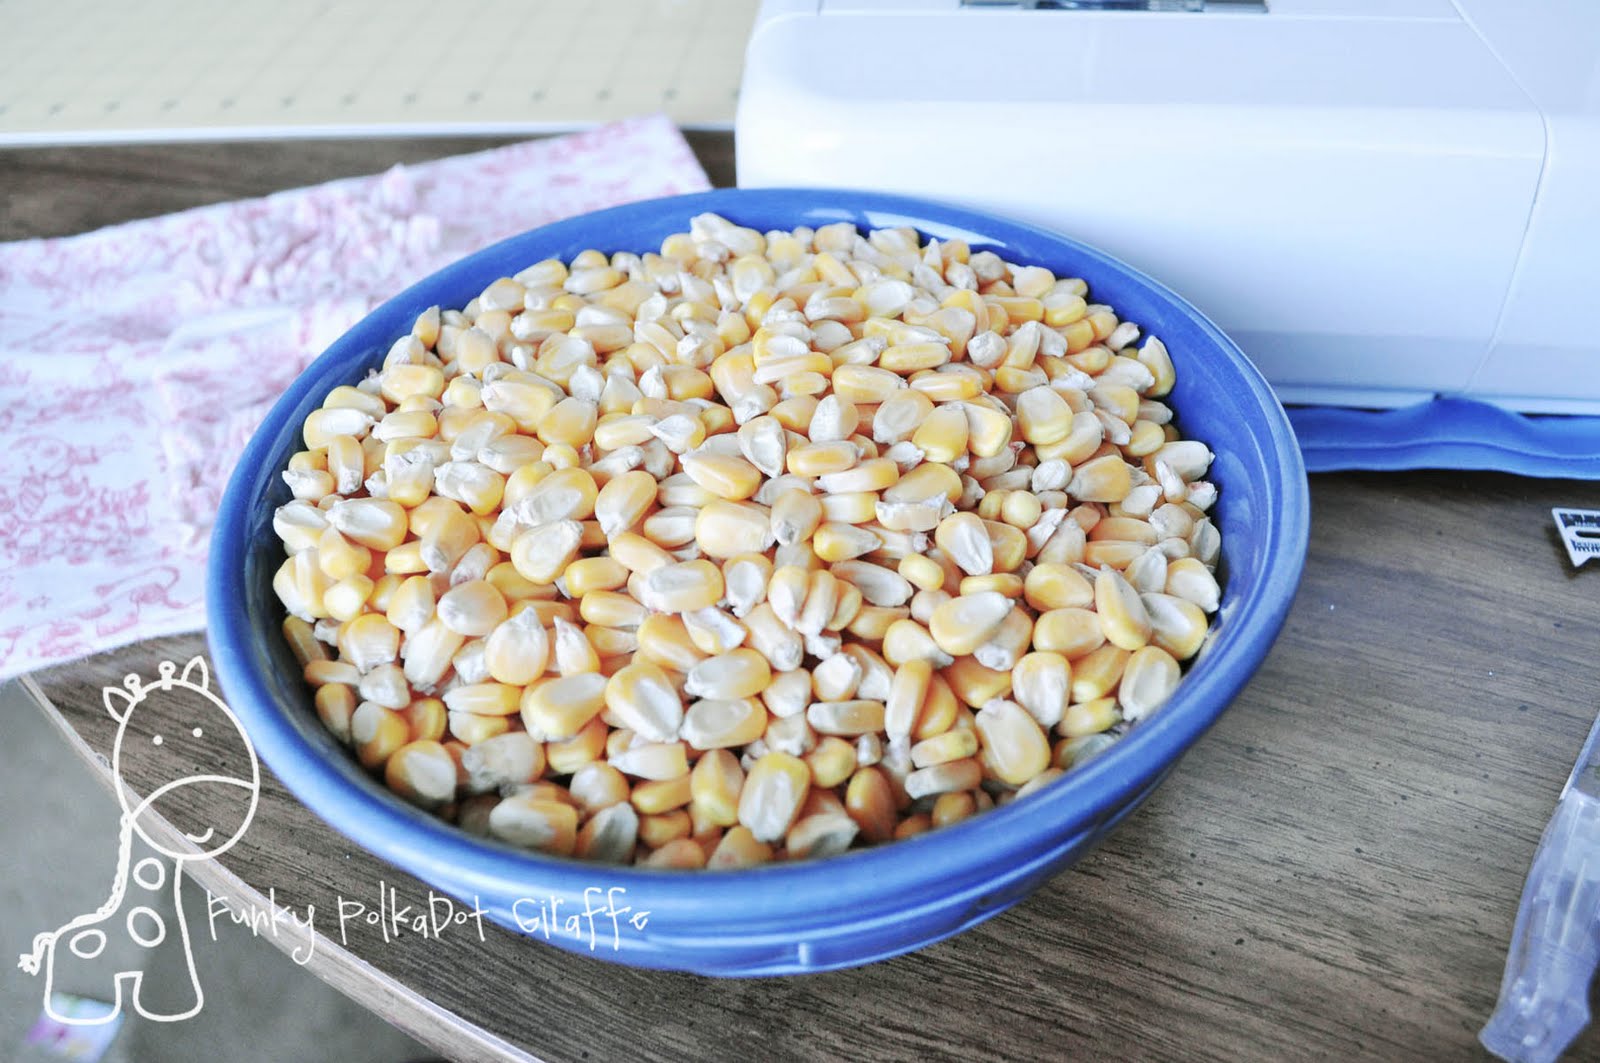
You don’t want to fill it all the way full, you want the corn to be loose in the bag.
Step Fifteen:
Sew your open side closed with a 1/4″ seam.
And VOILA!
You have an AWESOMEFIED Crunchy Little Corn Bag that someone will cherish for 10+ years.
To both sterilize the corn and help it to dry out, place the newly made bag on a paper towel in your microwave and heat it for 2 – 3 minutes. Let it cool for at least two hours, shake it up, and do it again on a dry paper towel. If your paper towel or the inside of your microwave is still showing moisture,
do the heat/cool cycle one more time.
Corn Bag Heating Pad Instructions

Kyla blogs at Funky PolkaDot Giraffe!


I have made several of these and used whole corn. I recently bought another bag of corn – exactly the same as before, but this time, some of the kernels are popping in the microwave. They actually pop open a little bit. Have you seen this? Are these kernels still usable?
That is a fabulous idea Mary!
Hi Cindy!
Thank you for the great tutorial. I make these “warmies” too but I add a special ingredient. I buy whole cinnamon sticks and break them up. I put a few pieces in with the corn and when they’re heated they smell so nice! Just be careful there aren’t any sharp pieces. I also make mine in two pieces so I can wash the outer portion. I sew a muslin square and add the corn and cinnamon. Then I make flannel pockets for the bags to fit in. We have them all over the place. We have “warmies” in the drawer and “coldies” in the freezer. I LOVE these!
Have a great day!
Mary
Hello..
Thank you for your great idea! I already had have that kind of bag and I’ve use it for 7-years. I love it and I tried to buy the corn and baught it but…the smell is very diffrent 🙁
So, could you tell me where I can get the corn?
Thank you!
Hey everyone,
I reading up corn bags too; for last minute Christmas gifts. Anyways, there another website about that answer question about why has be whole corn. I hope this helps.. http://web.archive.org/web/20080531122731/http://www.diamondthreadworks.com/microwave_heating_bags.htm
I have made these for years also. The way I learned was to bake the corn on a cookie sheet at like 200-250 for an hour or so to dry out any moisture in the corn before filling the bags.
PART 2! The first bunch of these I made, I used cracked corn, no problem, it was basically half and full kernels, but they were not sealed shut like popcorn. WELL! I bought cracked corn today, and it was more like pulverized corn, so I think I will see if the feed store has “Deer Corn” instead. So cracked corn can come in different forms.