Hello Skip To My Lou Readers!! I am so excited to be a part of the Holiday Bake, Craft & Sew Along!
")
My name is Bev and I blog at Flamingo Toes. I love to sew, make things for my home, and I definitely have a weakness for jewelry. 🙂
I also love sewing cute things for kitchen!

For the Sew Along, I wanted to come up with a gift that was fun and easy to make – but that people don’t always remember to buy for themselves.
I thought that some cute Pot Holders would be just the thing! It’s more fun to cook and bake with cute pot holders don’t you think?
I have two versions for you today – here’s the first:
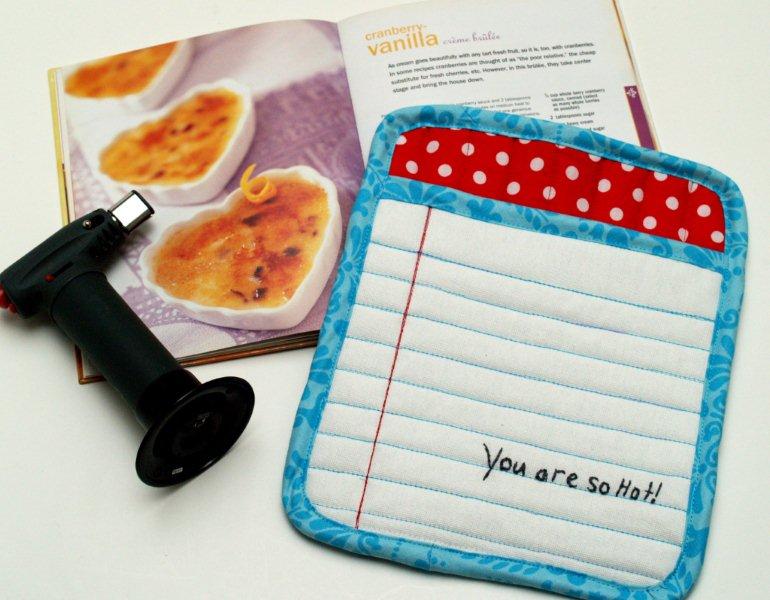
I have been loving all the “lined paper” projects around and I thought that the idea was perfect for a fun, ok . . . silly, pot holder.
Here’s what you’ll need to make your own:
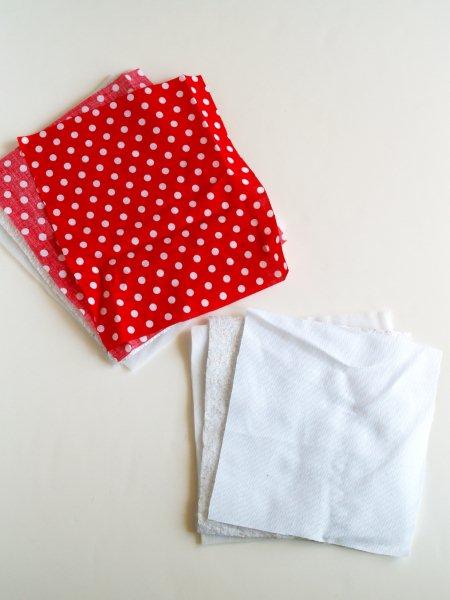
For Front Piece of Potholder –
White Fabric – 2 pieces 8″ x 8 1/2″
Pellon Insul-fleece – 1 piece 8″ x 8 1/2″
Pellon lightweight batting – 1 piece 8″ x 8 1/2″
For Back Piece of Potholder –
Back Fabric – 2 pieces 10″ x 8 1/2″
Pellon Insul-fleece – 1 piece 10″ x 8 1/2″
Pellon Lightweight Batting – 1 Piece 8″ x 8 1/2″
For Binding –
1 piece cut on bias – 3″ x 42″
1 piece cut on bias – 3″ x 9″
How To Make A Pot Holder
Cut out your fabrics. Lay your pieces so that the small front pieces are together and the back pieces are together.
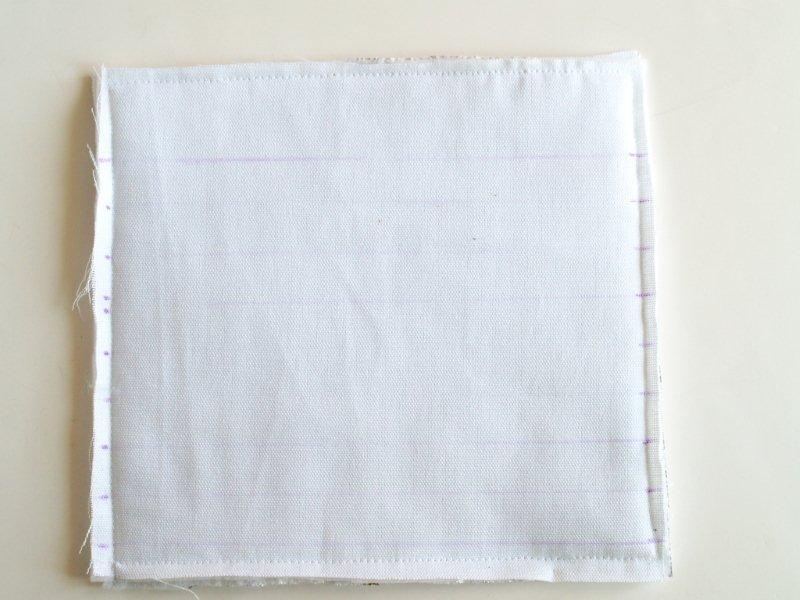
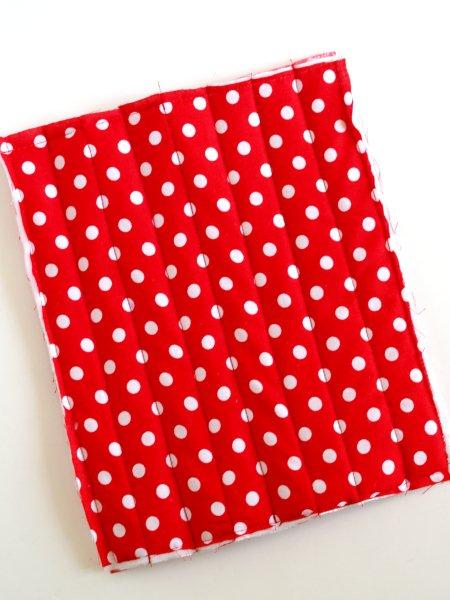
For the Front of the Pot Holder, make a sandwich with the two white pieces of fabric on the outsides, right sides out, and the Insul-fleece and batting inside.
Sew 1/4″ around all the sides to hold everything together.
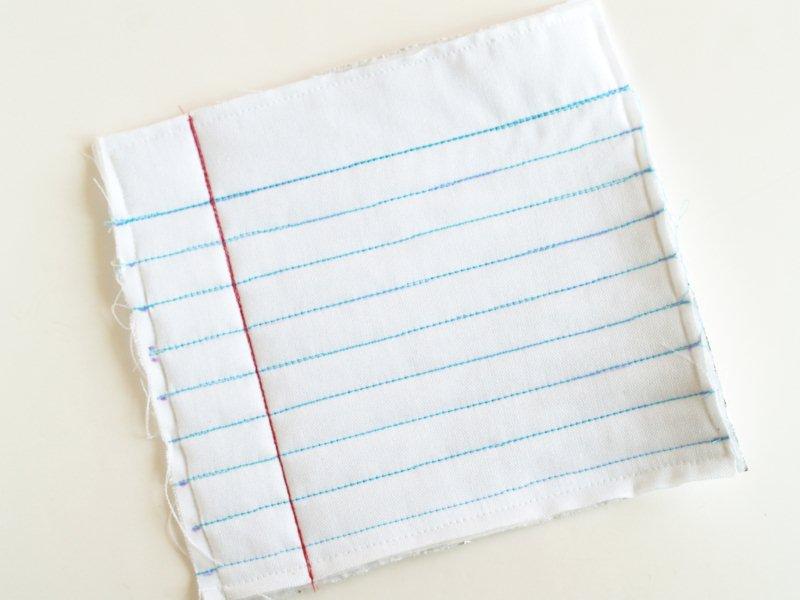
Measure down from the top 1 1/2″ and draw a line across the rectangle with a disappearing marking pen. Mark the next line 3/4″ below that.
Continue marking lines down the rectangle until you reach the bottom.
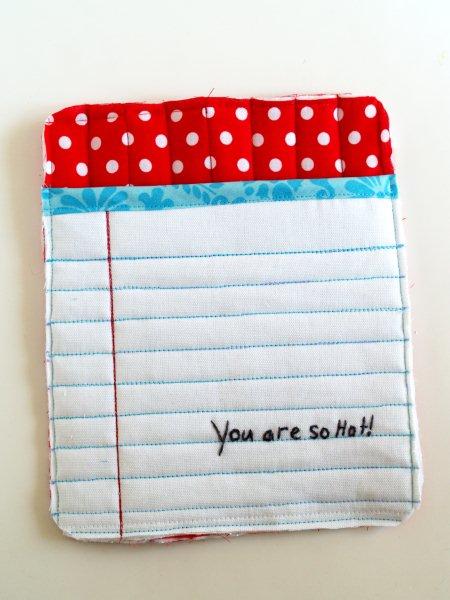
With blue thread, sew across the marked lines. Go over the top line 4 times and the other lines 2 times.
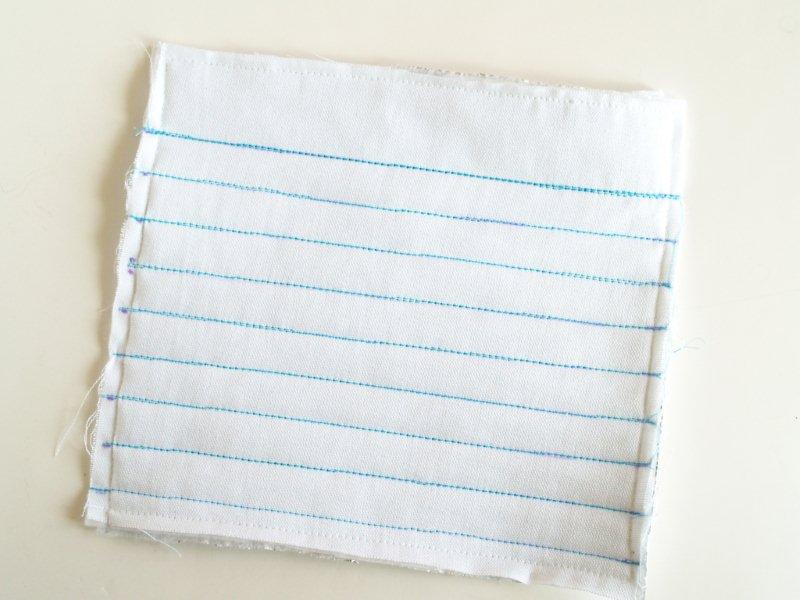
Measure 1 1/2″ from the left side and mark a vertical line down the rectangle. Sew over this line with red thread 4 times.
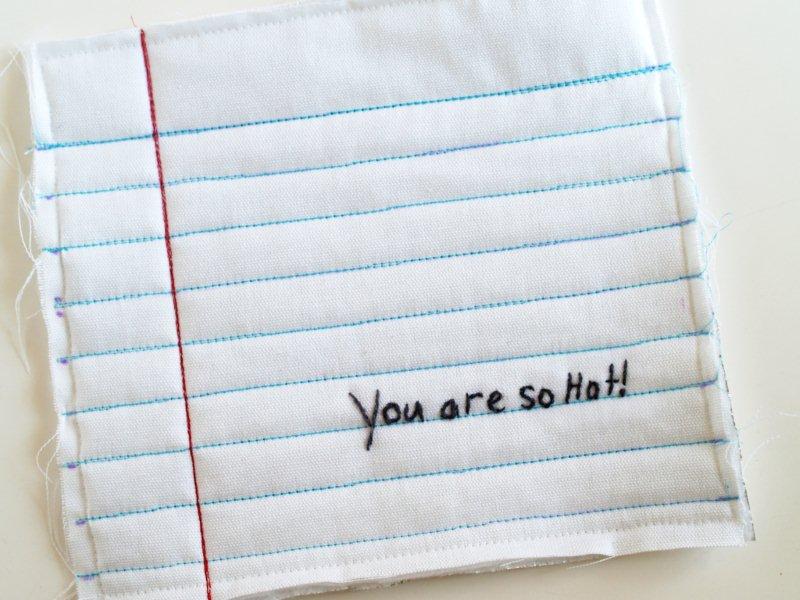
With your marking pen, write out your clever phrase on the fabric. Embroider the letters with a simple stem stitch.
Fold the 9″ piece of binding in half, wrong sides together and press.
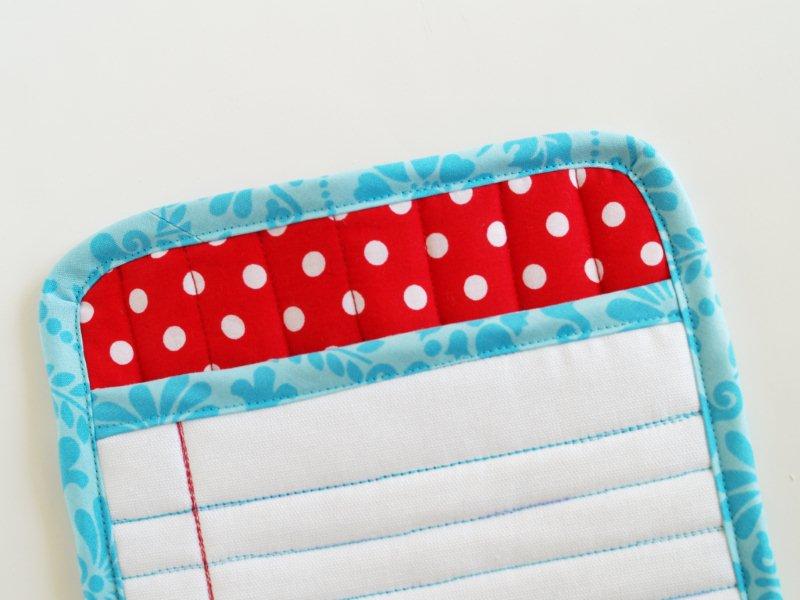
On the back side of the front piece, lay the raw edges along the top edge of the rectangle. Sew down with a 3/8″ seam allowance.
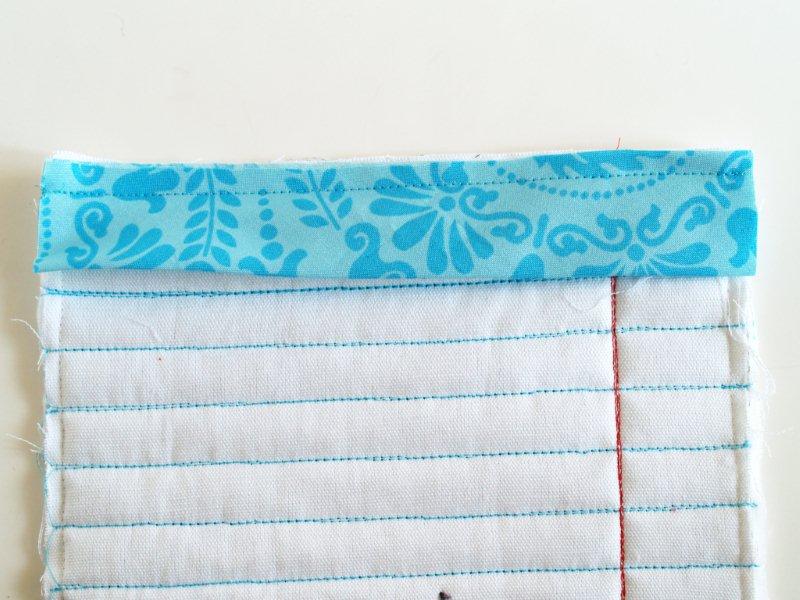
Fold the binding over to the front of the rectangle and sew it down just inside the folded edge.
For the back of the Pot Holder, make a sandwich with the fabric and fleeces just like you did with the front.
Sew 1/4″ around all the sides, then sew vertical lines down the rectangle 1″ apart.
Lay the front of the pot holder over the back with the bottom sides matching up. Trim off any excess and sew the sides and bottom together with a 1/4″ seam allowance.
Trim the corners so they are just a little bit rounded.
Bind the potholder around all four sides, just like you did for the top of the front piece.
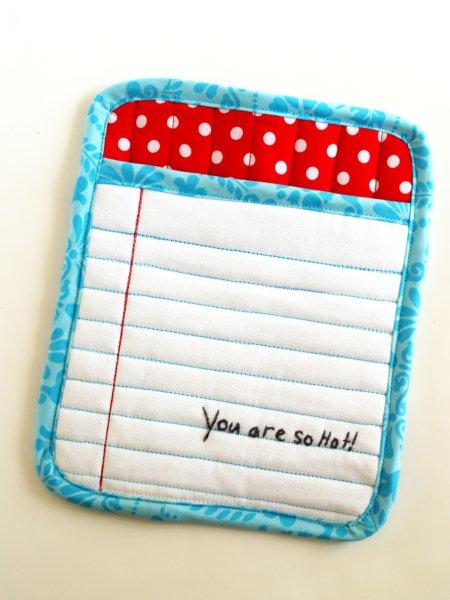
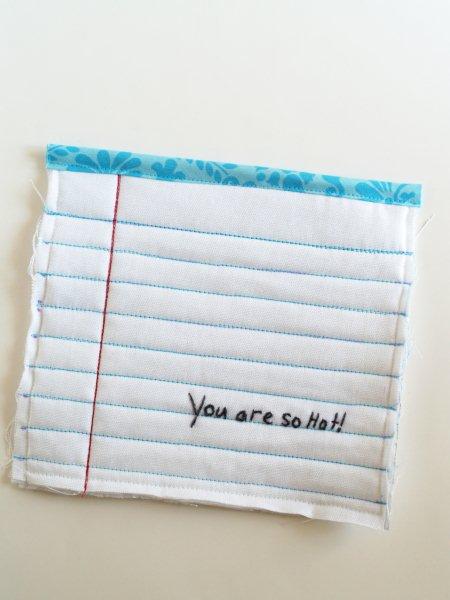
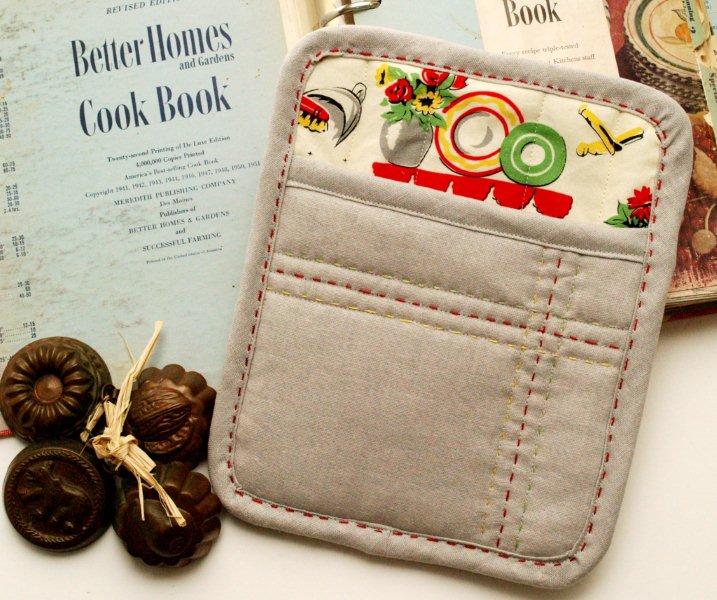
Cute huh? And so quick! I love having the little pocket to slide my hand in.
I’m a bit of a klutz so the more protected my hands are when I stick them in the oven, the better!
The back is super cute too!
If you prefer something that is a little more “traditional” you can use the same steps as above. You can adjust the size easily too!
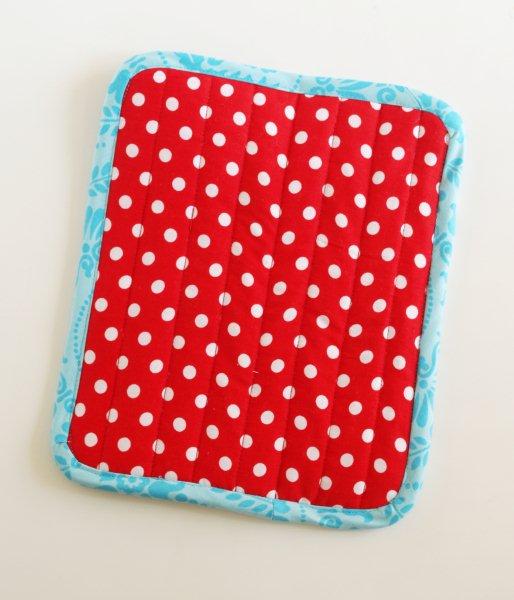
This version is a little smaller – 7 1/2″ x 9″ finished – and has rows of little embroidered running stitches on the front in the same colors as the cute retro fabric in the back.
I did the little running stitches around the edge of the binding in front too.
I pretty much love them both. 😉
I hope you like them too!
If you need more gift ideas, I’d love for you to come on over and visit! I have lots of simple jewelry and accessory tutorials – like these Sweet Skinny Headbands!

Thanks for including me in this great series!


Love this Bev!! the color combos are great!!
The lined paper look is so clever – it’s the first time I’ve seen it!
This made me laugh, super cute! I love it!!
these potholders made me squeeeeeeeee!
These are adorable!!!!
I love it! I can’t wait to make some. 🙂
LOVE this!!! Thanks for the tutorial! 🙂
Thank you so much! I’ve seen tons of potholder tuts, but this is adorable and really fits the bill.
Could you please tell me the name/designer of the vintage-looking fabric on your second potholder, please? It is so perfect for this project and matches my kitchen perfectly!
Thanks…..
These potholders are absolutely adorable! I love them!!
I now know what I’ making for teacher presents! Too cute!!
I now know what I’m making for teacher Christmas presents!!
Too cute!
I love this! And your second version reminded me that I still have scraps leftover from my mixer and food processor covers…
Oh wow… this is definitely the best pot holder I’ve ever seen… I love the design and colors! Thanks for the great tutorial!
Oh my word, TOO adorable, Bev! I absolutely love both versions! And I love how your sewing and stitches really did all the work in the formation of the overall look of the pot holders. *sigh* I really DO need to learn to sew!!! 🙂
It is just SO clever to use the blue thread to make the notebook paper. I have a vision of what to do with this…