I would love to keep you fully stocked with creative ideas, yummy recipes, fun crafts, and loads of free printables. Subscribe to Skip to my Lou to get new ideas delivered to your inbox. Follow me on Facebook, Pinterest, Twitter, and Instagram for all my latest updates.
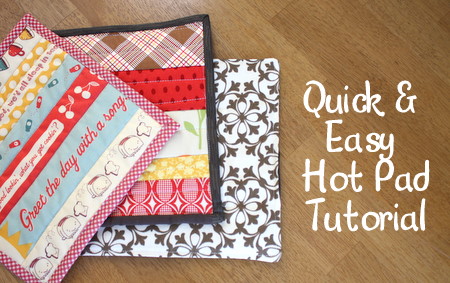
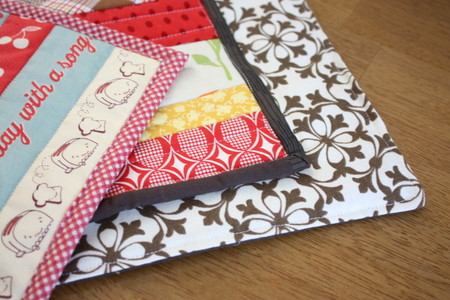
Learn how to make homemade hot pads and you will never have to use a boring store bought hot pad again. With beautiful fabrics and designs, these easy quilted hot pads will make a beautiful gift for any occasion. And, they work great!
Finish off the gift using one of these beautiful free apron patterns, and don’t forget the matching oven mit!
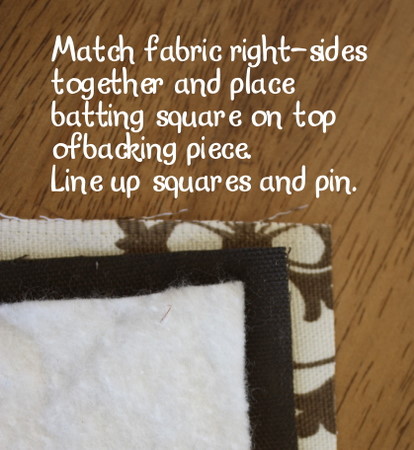
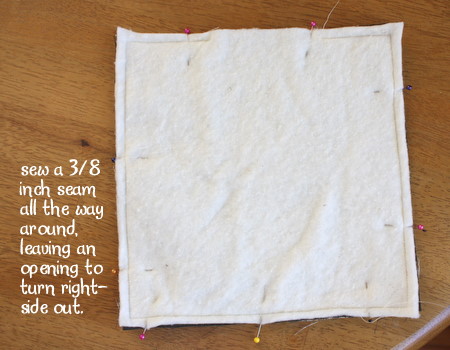
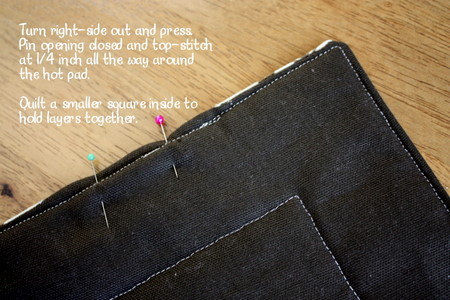
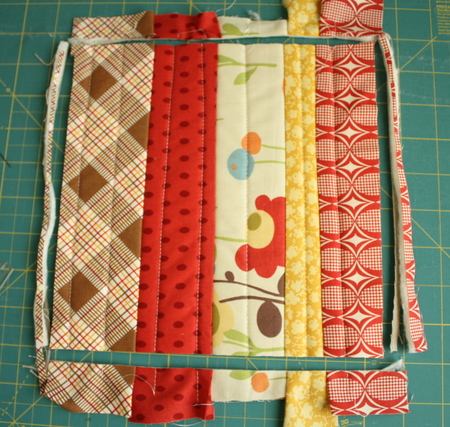
Sew a 3/8″ seam all the way around the square, leaving an opening about 4″ wide for turning right-side out. After sewing clip the corners off (but don’t clip the stitching.)
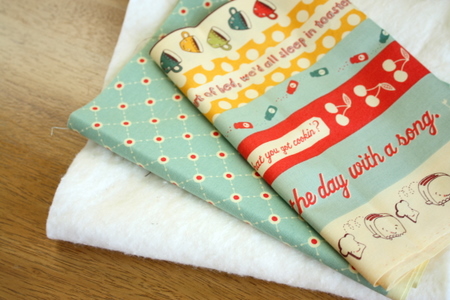
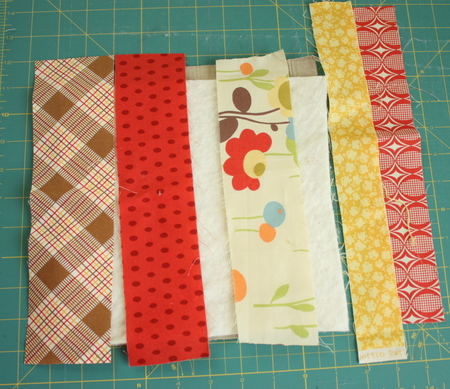
Another quick method creates 5 hot pads at once (or more, depending on the size of the pieces of fabric you use.) In this case I used 2 coordinating 1/4 yard pieces and a piece of batting that was 43″ x 9″.
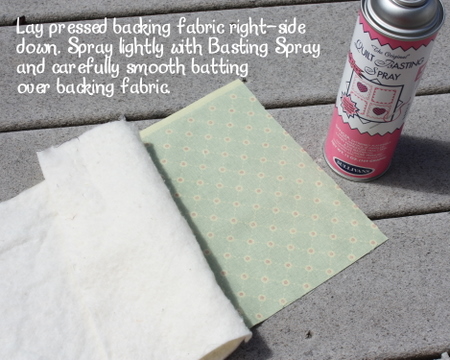
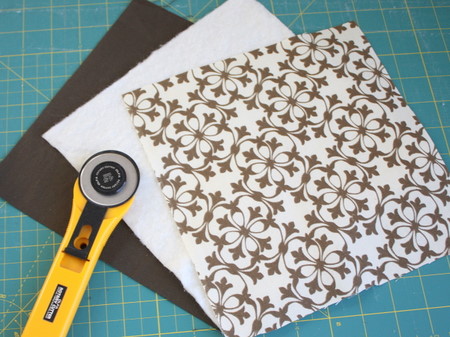
Press both pieces of fabric and the batting before you start. Take the backing piece and lay it face down on a clean surface. Spray lightly with Basting Spray (available at most sewing supply stores). You may want to do this outside to prevent sticky spots in your house.
Trim the batting so that it is slightly smaller than the backing fabric and lay it carefully on top of the backing, smoothing out wrinkles.
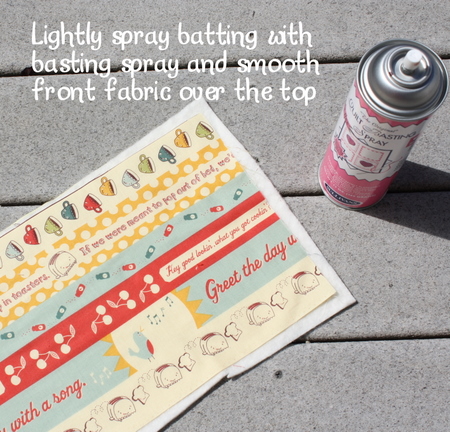
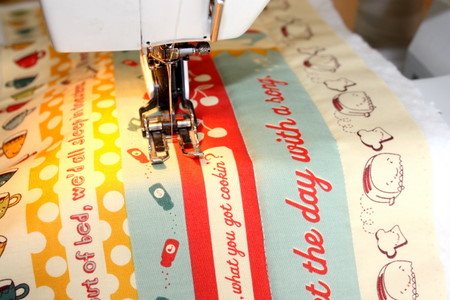
Then I carefully quilted some parallel lines to hold all the layers together nicely. The stripes on this fabric worked great as a guide, but you could mark lines with a disappearing marking pen or just eyeball the quilting lines. Basically it’s nice if you have a few lines at least 2″ apart – but you could do more if you like. Or this is a great chance to practice your free-motion quilting skills.
(I bought this Cosmo Cricket “Early Bird” fabric last year.)
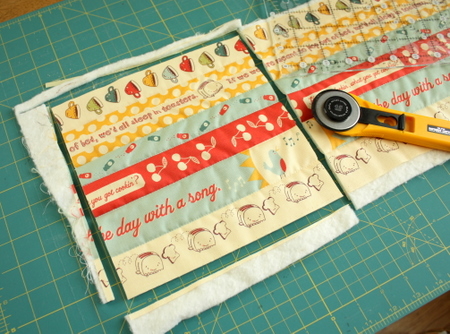
When fabrics and batting are nicely quilted use a rotary cutter and ruler to cut out the hot pads. I cut five 8 1/2″ square hot pads out of a 1/4 of a yard of fabric.

Thanks to Amy at Diary of a Quilter for this great tutorial! Make sure to check out these great sewing projects:
I would love to keep you fully stocked with creative ideas, yummy recipes, fun crafts, and loads of free printables. Subscribe to Skip to my Lou to get new ideas delivered to your inbox. Follow me on Facebook, Pinterest, Twitter, and Instagram for all my latest updates.


Your form for chrstmas emails won’t go away and stays on top of post. Can’t read it and I don’t want to sign up for emails. In fact I can’t even see what I’m typing!! Make it go away!
I am interested in sewing the hot pads.
Thank You
This post presents clear idea in favor of the new people of blogging,
that actually how to do blogging.
if you use two squares of cotton towel scraps between the fabric, your hand won’t get burned ever. i’ve made a lot of these for gifts and everyone is always commenting on how they never get burned with my pads vs. others
love you fabric choices. great tutorial.
I agree with Natalie. I would definitely use something like “Insolbright” Batting inside the potholder. Unless, of course, you are only using the for decorations. I like to use a layer of the thermal batting and a layer of Warm and Natural.
Thanks for the tutorial! Loved it!
the ONLY thing i would *definitely* change would be to use a thermal batting and a heat resistant fabric (like ironing board cover) to use on the back. it might not be the prettiest, but it makes SUCH a difference when you’re taking those really hot dishes out of the oven.
other than that, i LOVE how the hot pads came out!
SO cute! But looks like alot of work for a potholder (that’s just me) 🙂
I love all of the versions, Amy!! It’s so nice to be able to have options depending on how much time is available to complete the project.(I tend to put things off until the last minute!) Another reason to love this sew~along…thanks so much for getting me going! Smiles~Beth
Those are really great gift ideas.
Making personalized hot pads for holiday or house warming gifts would be awesome. Thank you for the lesson.
Thanks for the tutorial. I desperately need to make some hot pads!
Great tutorial – thanks Amy!!
Great job Amy! These are my favorite teacher gift during the holidays. It’s nice to have a few quick-finish projects like these in between quilts, too! I keep meaning to make oven mitts too…my hands are burned to bits!
I really like the quilted one. Very pretty. I bought some thermal batting to make hot pads last year and just didn’t get to it. You’ve given me motivation to try again this year!
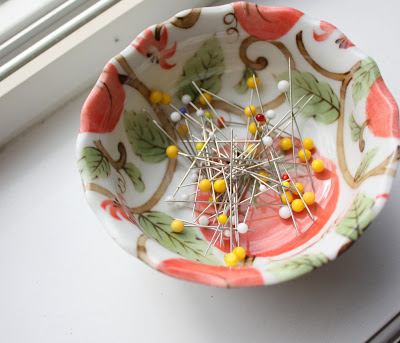
And I can’t wait to check out that magnetized pin dish! Very cool.
This is something I have been wanting to learn to make! Thanks for the tutorial!
You can link this up at Show & Share, if you’d like–
http://southernlovely.blogspot.com/2011/08/show-share-3.html
And I have a fun new giveaway going on now as well–
http://southernlovely.blogspot.com/2011/09/literally-inspired-giveaway.html