Leaf prints are a beautiful way to preserve a bit of fall. They can be used on so many projects including wall art, home decor, and a variety of crafts for kids. and adults too. We were inspired today by the beautiful colors of fall and we found in amazing leaves right in our own yard.
You’ll also want to check out this DIY fall wreath, these adorable fall mason jar crafts, and some fall coloring pages. All are inspired by the beautiful changes in the trees and colors of fresh leaves this time of year.
We used acrylic paint in bottles as it is our favorite craft paint, lots of wax paper and a brayer (our fingers worked just as well, but my 3 year old had fun with the “special roller”) You could also use a cup or bottle with smooth sides as your “roller.” And of course, we spent some time outside finding the perfect leaves for our leaf printing ideas.
My daugher painted the back of the leaf. My job was to check and make sure she painted to the edges and smooth out any globs of paint. You don’t want too much paint, just a nice even coat. The amount of paint varies also by what your are printing on—the fabric took a bit more paint than the paper.
Place leaf paint side down on what you want to print. We printed a canvas bag we had and a kitchen towel (not pictured). Cover leaf with a piece of wax paper. I held the wax paper down over the leaf (to keep the leaf from flying around -remember my craft partner is 3) while she used the brayer to smooth out the leaf. I told her to press hard. We had good luck using our fingers to press the leaf onto the surface also.
Remove your leaf and you have a beautiful print. After a few tries you will get the hang of how much paint to use.
We just loved this diy leaf print on canvas! If you are printing on fabric iron after the paint dries (with a press cloth) to set the paint. If my child could write I thought it would be cute for her to write “I am thankful for you” and I would embroider over her letters. It would make a cute gift for a teacher or someone special. Maybe it will have to be in my handwriting this year.
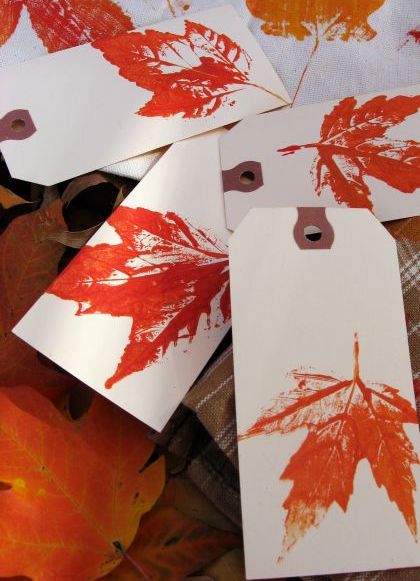
We also used our leaf print art to make some gift tags for some November baking we plan to do.
I would love to keep you fully stocked with creative ideas, yummy recipes, fun crafts, and loads of free printables. Subscribe to Skip to my Lou to get new ideas delivered to your inbox. Follow me on Facebook, Pinterest, Twitter, and Instagram for all my latest updates.


Very nice
Thanks, Betty for these tips!
I did this years ago on t-shirts for the family. I put silver leaves on blue shirts that were the biggest hit. red leaves on green shirts for Christmas. Autumn colored leaves on yellow shirts for autumn. Everyone loved their shirts. Be sure to wash the shirts, no fabric softener, BEFORE, doing this to keep the paint on longer. Then you can wash your shirts with any laundry after they are done.
Hi Cindy,
I am a follower of your blog.
I have blog too and wanted to ask a question.
Where did you get your “Follow Me” links bar from?
Is this a widget?
Thanks
TJ
soo cool… i am uising this for my art GCSE thanx xx
LOVE your leaf prints – awesome! Got to get me one of those rollers! I am featuring your creations today on my blog along with some other leaf-inspired creativity: http://sceneofthegrime.blogspot.com/2011/11/falling-for-leaves-collection-of.html
Thanks for sharing!
Beautiful! Really… this is just a beautiful way to play with leaves! It is going to the top of my list of must do fall projects. I have bunches of these canvas bags I use to carry knitting and hand weaving and other small projects around with me. What a cool way to make them pretty!
Thank you for the idea and especially for the excellent tutorial
Those are gorgeous! We are off to look for leaves!
How pretty! Thanks for the inspiration.
What an inexpensive but so cool idea! The possibilities are endless 🙂
I love the leaf prints, especially the really cute gift tags. But, I absolutely love that idea you threw out about having the child write something, and then embroidering over it. I’m going to embroider a drawing of my son’s for a gift for Grandma, and having him write something on there will be the perfect added touch. Thx!
This would be great on plain napkins! If you were going somewhere else for the holiday it could be a hostess gift.
These a beautiful!
What a neat use for leaves! Very pretty work! Looks like great fun for the kiddos.