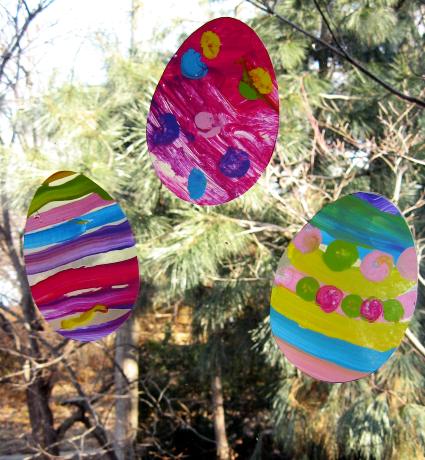
We had so much fun making these window clings —–the possibilities for seasonal and everyday decorations are endless.
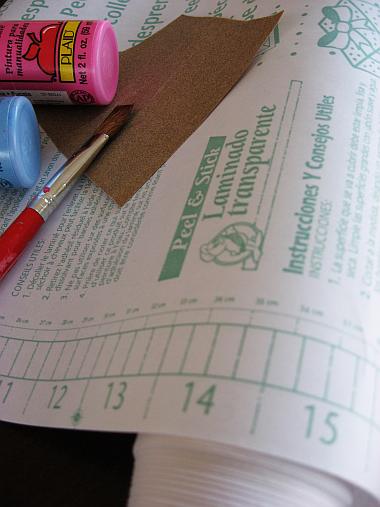
You will need a roll of clear contact paper, paint brushes, paint (we used acrylic), fine sandpaper and masking tape.
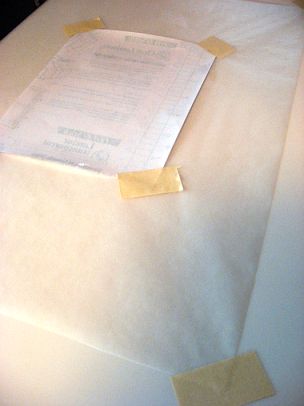
First cut a piece of contact paper from the roll. I cut squares about 5″ x 5″ because that was about the size of shapes I knew I would be cutting.
Take a fine piece of sandpaper and lightly sand the shiny surface of the contact paper where you will be painting. Wipe off any dust. This step helps the paint adhere to the slick contact paper.
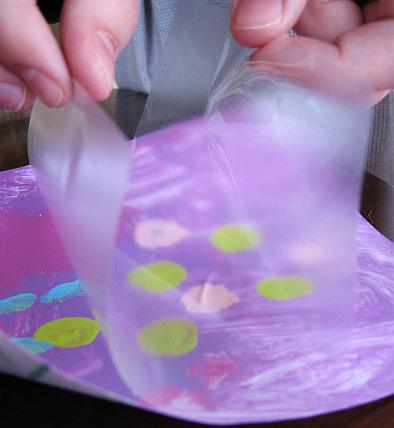
Since we are often VERY messy when we paint I taped a piece of wax paper to the table. Tape the piece of contact paper shiny(sanded) side up onto the wax paper.
Paint onto the contact paper square. Since my daughter is three I encouraged her to paint using lots of colors. I knew I would be cutting out Easter eggs so it really didn’t matter what or how she painted.
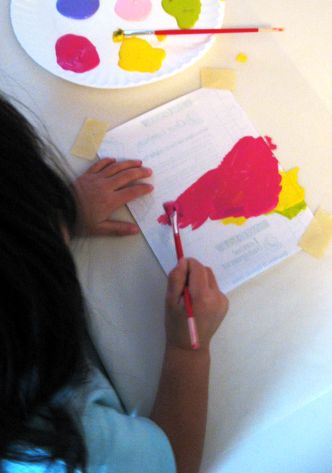
Allow the painting to dry completely. I think she painted about 10 of these squares.
Once the paint is completely dry take another square of contact paper the same size as your painting and peel off the paper backing. Cover your painting with the clear contact paper. Smooth out any bubbles.
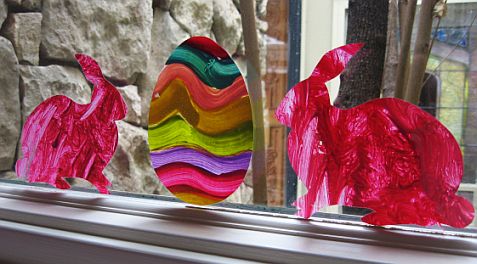
Trace around any shape of your choosing. I used an egg and bunny for my template.

Cut out the shape

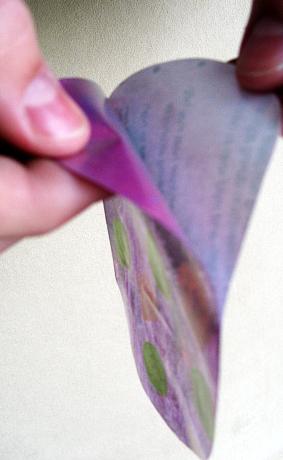
Carefully remove the paper backing. This takes some time —–make sure you are only removing the paper (the back of your painting should be sticky). If you use acrylic paint it is plastic enough that it has a tendency to peel away from the contact paper, so peel carefully! If it does peel away and it won’t stick back down just put a little glue stick between the layers.
Once you are finished stick your silhouettes to your window

from the outside looking in
from the inside looking out
I would encourage older kids to paint their own designs and then cut out. I can imagine huge flowers and birds! Nothing is sweeter than kid’s art!
Have fun!!


Could tempera paint or another washable paint be used? Such and cute idea–can’t wait to do it with my girls!
I can make some of those to prevent birds from hitting my windows!Much less expensive than the purchased ones.
Thanks for the great tutorial. We tried it and kids love it. Plese check it out. We improvised:
http://byebyesoccermom.blogspot.com/2012/04/kids-activities-easter-window-clings.html
I just did this with the kids at my church. I got as far as the paint drying and one cut out, and I’m finishing them this weekend. I do have a question…do they come off the windows easily?
this is a funtastic idea great for keeping them busy during spring break. Or for vacation bible school projects
Great idea. My kids will love doing this.
We had so much fun making these this weekend. My 2 year old was so excited when we hung up “her” shamrocks we painted. I have gotten so many compliments on them. Thank you!
Great idea and a project even the youngest can do! Love that it uses inexpensive contact paper and how easy it would be to make different ones for the whole year.
You can also use window decals from any office supply store
I love this idea but took it one step further. Instead of putting the designs directly on the window, I took two of the painted sheets (sticky side to sticky side) and then cut out the template. Then we took a hole punch, threaded yard and ribbon through the top and hung them.
This is a fantastic idea – our windows have looked so bare since we took down the christmas snowflakes 🙂
I love this!!! I will definitely have to try this one!
Love, love, love this idea! I’m so glad I found your post on Google! I will try this crafty idea for this Easter 🙂
Great idea – a friend sent me here and I can’t wait to try these with my kids!