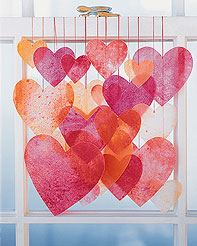
Crayon shavings melted between wax paper and then cut into hearts make a stunning display in windows. I can’t think of anything more cheerful or happy hanging from a window.

Crayon Shaving Art
Crayon shaving art is an oldie but goodie craft that we love. Use crayon shavings melted between wax paper to make beautiful suncatchers. Here are ours made with lots of kid help! It is the perfect way to use up old broken crayons.
How to Make Wax Paper Crayon Hearts
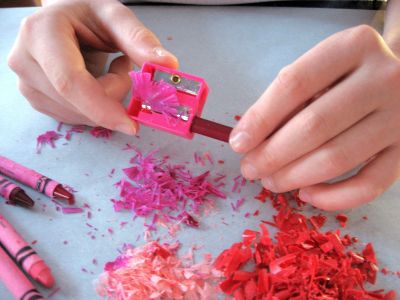
Using a handheld pencil sharpener, shave down unwrapped crayons to create crayon shavings in the colors of your choice. We made a lot of shavings since the boys found it so satisfying.
Place shavings on a piece of wax paper.
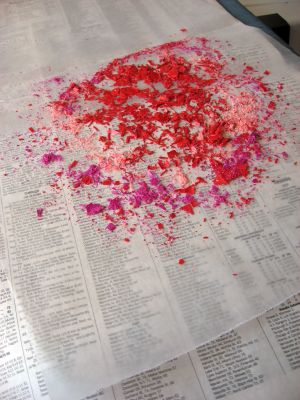
Either place another piece of wax paper on top or fold over the edge to cover all of the shavings.
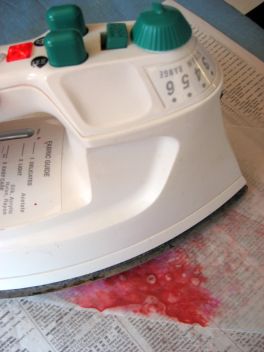
Iron on the lowest setting for about 1 second. You can go always go longer after checking to see if the shavings have melted. Be careful to not burn the wax paper. Protect your ironing board by using parchment paper or newspaper to iron on. Some crayon wax could leak out of the sides and it does leave a residue underneath the wax paper. If you are worried about your iron, just place your wax paper between two sheets of newspaper or scrap paper.

Stained Glass Heart Patterns
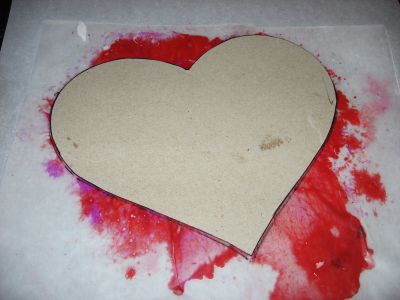
I think it is easiest for kids to trace around cardboard so I took cereal boxes and cut out heart shapes to be used for patterns. This is where you get a variety so let the kids draw the hearts. If you don’t want to draw your own hearts here are some paper heart templates.
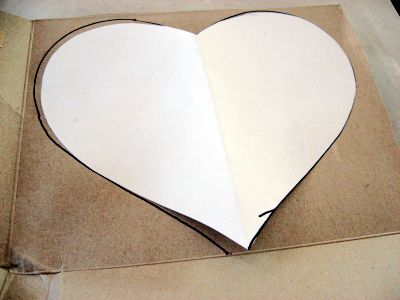
Draw around the pattern and cut out the heart with scissors.
Place a hole punch at the top and tie on ribbon, thread or fishing line. Hang! The melted crayon makes such a pretty “stained glass” heart.

Martha has directions and a gorgeous display at her place.
A festive and fun craft idea for Valentines Day.


I love these so much, I decorate weddings and they were the PERFECT idea!
I did this a few years ago. They’re sooo beautiful and simple!
We did these when I was a kid, but we kept them rectangle and used them as place-mats for the dinner table.
These look really pretty.
HI there, Thanks for the instructions! My son Parker and I had a blast making these!
Oh, these are gorgeous! I’ll have to have Steven stop at the store on the way home and get some wax paper! Thanks for sharing!
we did those not long ago! my mother used to do them with me when i was but a young lass (eons ago). the boys and i also melted crayons in small heart shaped tins to make big multi-colored crayons. so fun!
So simple to make and beautiful. We’ll be making these today! Thanks.
Wowee! I just love them! Once again, you amaze me! Beautiful! Lucky kids to have such a fun mom!
YOU ROCK! These are SO beautiful. Some time this year after my house sells, I’m moving into a room in my friend’s basement. We will share a craft room. I can’t wait till it’s all set up and we can tackle many of the projects you chronicle here.
Thank you, thank you! Your’e like Martha only warm and friendly and fun. 🙂 K
Oooooh, aha! I tried these with my oldest the other day, but it didn’t work out at all… now I realize I’d been ironing on the highest setting (I usually only use my iron to press quilt blocks), never thought to turn it lower. I’ll try again, thanks!
I had forgotten these! We have a pile of crayons perfect for these…thanks for the great idea!
Oh what a great idea! I’m going to use it in my classroom next week.
Those are BEAUTIFUL! I’m totally going to make them! Thanks!
These hearts sure add alot of color on a bleak winter day. They sway in the air from the furnace vent too! Very Beautiful, this would be fun to do with the kids, especially on a cold winter afternoon or weekend. Good Job!